• Action Portraits •
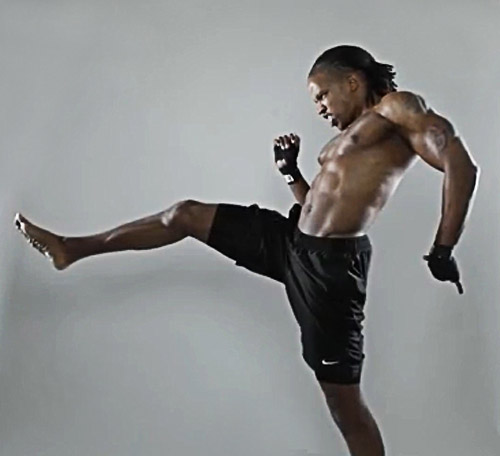
Getting the shot in action situations is not difficult although the lighting can prove a key aspect of success. (Shot taken from the video)
Getting it right…
Most photographers have a go at action shots. Vehicles are common targets – they are easy to find and fun to do. Action portraits can be great fun too and you can do them at home.
Lets talk flash…

Easy action shots at home for anyone.
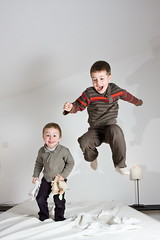
“Some more bed-jump!!” by Mr Din, on Flickr ![]()
Use off-camera flash for best results
The basic technique is to capture the action with a flash. You can use the on-board flash on your camera. However, it will tend to leave tight shadows on the wall behind the action because the flash is directly in line with the optical axis of the camera. Such shadows look artificial and are difficult to remove in post processing. They look as if there is a slight double image. In the picture of the jumping children the flash is from the left hand side. If you look carefully the shadows are projected away from the kids giving a more realistic feel.
Off-camera flash can be placed to the side of the shot and used to illuminate the scene, give it a little depth and off-set those harsh shadows. For this you can use an off-camera flash. I use this one…
This is an excellent buy… it is inexpensive and can be used for any off-camera flash situations. It is reliable, robust, flexible and effective.
I have several of these flash units. At about one fifth of the price of a branded product they are excellent value. If you want to get something a little more sophisticated you can get the YONGNUO YN-560 II Flash unit ![]()
– also a great product. With inexpensive remote flash triggers
![]()
you can set them off when not connected to the camera.
What are you going to capture?
Plan out your scene in advance. You will need someone to be the action taker. You could use more than one person. Then, work out what they are going to do. Jumping on the spot is a favourite. You also try jumping or stepping off something like a chair or low table. You can do skipping, walking, Kung Fu, Juggling, tumbling, hula-hoop, playing ball… well all sorts of things.
How do you do it?
I am assuming that you will be working in a domestic room with a white wall behind the actions.
It is best to use a robust tripod to mount your camera. This is essential. Action shots often cause floor movement and you want a good tripod (Manfrotto 055XPROB) ![]()
and tripod head (Manfrotto 322RC2 Grip Ball Head)
![]()
to give you a chance.
You will need to pre-focus your shot and have it ready to take because you cannot easily compose for action in progress. So set up the camera in advance. Here are some typical settings to get you started…
- Turn off image stabilisation on your lens.
- Focus your lens on your subject then turn off the auto-focus.
- Set white balance to the appropriate ambient light setting.
- Set ISO to 200 (or 400 experiment).
- Aperture priority (select F5.6 as a start) [Shutter speed will be set by the camera].
- Flash synchronisation – 200ths or 250ths of a second (if you need to set it check your manual).
- Flash setting, try the lowest setting or 1/16th or 1/8th power – again, experiment.
This will give you appropriate starting points. Check you shot and then make any changes to the settings. If you click up or down a setting – say aperture or ISO – then the camera will compensate with a different shutter setting for you. Experimentation is good!
OK, now you are ready for action… this part takes a little practice. The idea is to sit next to your camera ready to push the shutter button as soon as the action is where you want it. As you have already lined up your focus the person can now perform and you can press the button as you see fit to capture your shots. Fire away, enjoy yourself.
Two tricks you have learned here
1. The pre-set-up of your shot is important. There are lots of situations where you can do that. So think about it – that is one of the benefits of having a tripod.
2. Flash! The way to capture a good shot like this is to have a very fast shutter speed. That freezes the action. However, I have suggested you hand the shutter speed to the camera by using the “aperture priority” mode. Well, you can in fact control shutter speed another way. By varying the flash duration. “What?”… I hear your cry. “You did not tell us about that control! But I did. Flash intensity is always the same for any given micro-second. It becomes more intense for the sensor if you leave it on longer. When you set the power of the flash to low power you are actually shortening the length of the flash. Hence you are more able to freeze the action. However, to do this you will need to have your ambient light lower. So using natural light rather than bright room lights works better for this technique.
See how its done in a video
In the video you can see all this action in a full process. The photographer, Joel Grimes, starts off by some discussion about how he came to discover this secret and how he used it in a studio context. Then from about six minutes into the video he shows you how to take the shots.
Remember that the settings are important. He mentions about low power and says that it works to freeze the action IF the flash is more intense than the ambient light. Watch out for that.
One other thing worth looking at is the shot progression. He is constantly assuring his model that he has done a good job. Then he is at the same time developing his shot. He is constantly evolving the positions and situations until he gets the shot he wants. This is critical. Make sure you look out for odd lighting effects, hands over face, bits of body out of the frame etc… He works the shot to reach his ideal as he visualised it – then stops. Even great photographers have to practice and perfect a shot. This is quite a helpful lesson about that. Enjoy!
“Special FX, High Speed Action”
Framed show ![]()
Comments, additions, amendments or ideas on this article? Contact Us
or why not leave a comment at the bottom of the page…
Like this article? Don’t miss the next — sign up for tips by email.
Photokonnexion Photographic Glossary – Definitions and articles.
Action shots – how to page of resources
Definition: Exposure
Definition: Aperture
Definition: f number
Definition: ISO
Natural light; Sunlight (A ‘Glossary’ entry)
Definition: Shutter Speed
Light and Lighting – Resource pages on Photokonnexion


