Tag Archives: White balance

Avoid funny colour casts in your holiday pictures

White balance - grey card

White balance – grey card

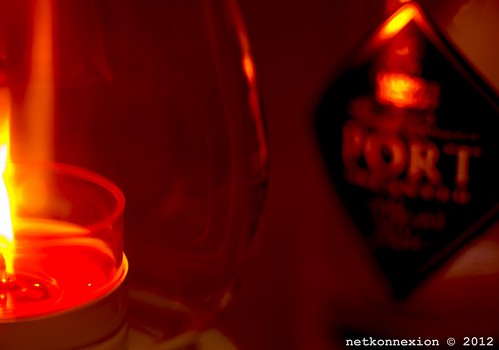
Unnatural indoor colours?

Holiday time – out comes the camera and most daytime shots are great. However, indoor shots often get a funny colour cast. Odd yellowish, greenish or blue tones have appeared. The reason? Auto-white balance problems. The condition is curable.

Auto-white balance problems

Outdoors the auto white-balance function works reasonably well. But not in all cases. Auto-white balance aims to iron out colour casts in your photography. The problem is that the camera frequently gets it wrong. There are two main places that can happen…

  • Out of doors when there is a lot of one particular colour around (eg. lots of sky blue; orange/red sunsets or snow)
  • Indoors when there are artificial lights illuminating the scene (ordinary domestic lights, fluorescents and bulbs).

When a lot of one colour appears in your shot. The camera assumes that too much of one colour is a problem. So, it shifts something called the colour temperature toward a neutral grey colour. This takes out the colour cast.

Intentions ruined

If you intended to capture that colour cast (from a sunset for example), the auto-white balance mechanism will ruin your shot. Typically blue skies and white snow tend toward grey. And, the real classic, lovely orange and red sunsets look pink, cartoon-like and flat instead of saturated. Orange and reds are particularly badly affected. So if your sunsets look cartoon pink/grey instead of saturated fire-orange you need to adjust your auto-white balance.
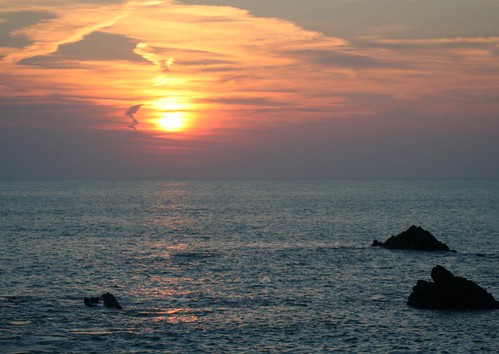
Auto white-balance fail!

• Auto white-balance fail! •

Cartoony pink-grey skies. The auto-white-balance function has colour shifted the orange/red tones toward greys.
Click image to view large
• Auto-white-balance fail! • By Netkonnexion on Flickr External link - opens new tab/page

Artificial light also creates a colour cast. Often the auto-white balance cannot properly adjust for this. The result is odd yellowish, blue or greenish tones in the picture where you did not see them yourself at the time. These also require an adjustment to your white-balance.

Why is there a problem?

Mainly the problem arises because we have made an adjustment in our heads without noticing. Most of the time we compensate for these colour casts and don’t see them. In fact, once we realise there is such a thing as a colour cast we can train ourselves to see it. We certainly see the heavy red colour casts of evening and early morning light. If we look carefully we can also see the yellows and blues from domestic lights – although less strongly.

Remedies

There are two possible ways to tackle the situation…

  • Compensate for colour casts by using a camera pre-set.
  • Correctly set the white-balance so it records the natural colours.

DSLRs have reasonably good pre-sets to tackle well known colour cast issues. On most cameras you will find white balance settings something like these below. The notes explain details…

  • Auto – The cameras best-guess colour match for what it senses. OK most of the time. Poor when there is a predominance of a strong colour.
  • Tungsten – (bulb icon) indoor, tungsten incandescent lighting using bulbs. Cools the colours – often bluish. This setting helps remove blues to warmer tones.
  • Fluorescent – for use under fluorescent lights – will tend to warm up the colours.
  • Daylight/Sunny – (sun icon) indicates the ‘normal’ white balance (may not be present if this is the default setting).
  • Cloudy – (cloud icon) Adds a warmer, yellowish colouration.
  • Shade – This light is cooler (bluer) than sunlight. Shade mode warms the colours a small amount.
  • Flash – (lightening icon) Stark and cool, flash desaturates towards blue. Flash setting compensates with a slightly warmer yellowish tone.
  • Custom – You do a little procedure to get an accurate setting to suit the situation.
Accurate colours

Colour accuracy is important. You really do want a bright blue sky or white snow or saturated red sunsets. The problem is that the pre-sets are averaged out for the “types” of situations encountered. The pre-sets will change the colours from dull flat colours to more representative ones. For example more saturated sunsets will be captured if you use the cloudy setting. However, to get it right you need to adjust the custom white balance.

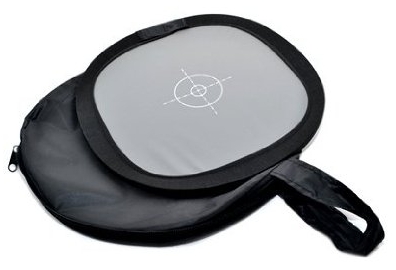
Setting the custom white balance is simple. The camera does most of it. You need a “neutral grey card”. This is simply a card or piece of material set at an average grey colour, normally at 12% grey, which matches the cameras accurate shade for neutral. You can buy these quite cheaply at most camera stores. (See: Range of photographic grey cards).

• The Lastolite Ezybalance •

  • collapsible; durable
  • wipe clean; very light
  • 12% grey; 30cm wide

An easy to use grey-card system. White on one side, grey on the other. The card doesn’t crease, the sprung border stretches the material tight. The card collapses into the supplied case, slipping easily into your camera bag. A great accessory to ensure colour accuracy in your pictures. You should not be without one.Spacer image

To set custom white-balance

It’s easy to set the white balance. However, there are lots of variations for how different cameras do it. Therefore it’s essential to use the right procedure from your manual. To get ready…

  • Place the card about 30cm/12 inches in front of your camera.
  • Zoom in or out to make the grey card fill the frame.
  • Now follow the camera manual “custom white balance” instructions.

To ensure complete accuracy you must do this procedure in the ambient light in which you will be shooting. This is the light the camera will sense and compare to the grey on the card.

More after this…

find out more...Photokonnexion tips by email
Enjoying this article? Please sign up for our
Tips by email service.
                                                Find out more

Shooting with RAW vs. *.jpg

I am sure lots of you are saying, “But I shoot with RAW and this is unnecessary”. OK, that is partly true. You can, with RAW format files change the white balance in the post-processing. Here are two reasons you should NOT do that…

  1. It is time saving to get as much right in the camera as possible. I like to spend my time shooting not computing!
  2. I have rarely met anyone who can remember colours so accurately that they get the post-processing colour and temperature balance right. I like to get them right in-camera as accurately as possible. Then I can safely change them later if necessary.

RAW format is excellent – you have complete control over colour temperature and hues. However, if the picture is wrong from the start, RAW is only as good as your own memory or colour awareness. Artists of many years may be able to remember colours accurately. Very few others can. Beginners especially have very poor colour memory/accuracy. So, use RAW, get it right in-camera – then do your artistic processing from a solid colour-base you know is accurate.

Compensation and accuracy

While both compensation for colour casts, and accurate representation of colour casts both rely on white balance there are differences in how they are treated. Strong colours or a strong colour bias through the picture needs some special treatment. Think about the two different methods above and practice them.

Comments, additions, amendments or ideas on this article? Contact Us
or why not leave a comment at the bottom of the page…

By Damon Guy (author and Photokonnexion editor)

Damon Guy - Netkonnexion

Damon Guy (Netkonnexion)

Damon is a writer-photog and editor of this site. He has run some major websites, a computing department and a digital image library. He started out as a trained teacher and now runs training for digital photographers.
See also: Editors ‘Bio’.

Twelve Simple tips for atmospheric candlelight shots

Candles put out a wonderful light…

Everyone feels the atmospheric impact of candlelight. The colour and the low light seems to draw you in. Capturing that light is easy with a few simple hints. Lets look at what is needed…

Tripod…

There is nearly always low light associated with candle photography. That means working with longer exposures. A tripod is excellent for that. Indoors, beware of a wooden floor, any move you make can be transferred to the tripod. Floor vibrations can ruin a shot or make it soft. For sharpness remember to use the camera timer for the shot or a remote shutter release.

Lighting…

The best way to view candles is by their own light. Because they don’t use a tripod many people are tempted to use flash. Unfortunately flash will over-power the candlelight. It will take out the colour from the light and tend to create hard, sharp shadows. It will ruin the atmosphere of the candlelight. Make sure you switch off your flash. If you need more light the you can use as many candles as you need to raise light levels. They don’t need to be in the shot, but they will keep the light the same throughout the shot.

Composition…

First decide if your candle or candles are the subject or are props. This decision will affect your focus and how you lay out your scene. Candles can create a strong bright spot in the scene. If it is too bright the flame will form a burnt out white spot. Once you have arranged your scene, ensure that the candle will only draw the eye a small amount unless it is the subject. You should consider the placement of the candle in a way that might minimise the impact of the bright flame spot.

Positioning…

If all your candles are close together the light will tend to act as one light source. This will tend to act as a hard light creating more defined shadows. If you want the light to be softer and the shadows with less well defined edges set your candles further apart. If the light is to be cast on a face then soft light will be more flattering.

Movement…

One of the peculiarities of working with candles is that the flames are subject to the slightest air movement. Unfortunately candle flicker is attractive to the eye in real-time; but looks like a loss of sharpness in a still image. It is quite useful in close focus shots with a candle to use an air break of some kind nearby to stop air movement. In a table-top study use a large sheet of card to one side out of shot. That will help prevent air movements. If not, keep an eye on the flames when shooting. Try to capture the flame upright or, if using more than one flame, make sure they are all going the same way. They look more natural that way.

Since candle light is low intensity, make sure you also prevent other sources of movement in the shot. They will inevitably be blurred as the shot will be using a long exposure. This will look like a distraction against still flames.

Can you write? Of course you can!
Write for Photokonnexion...

We would love to have your articles or tips posted on our site.
Find out more…
Write for Photokonnexion.

Light intensity…

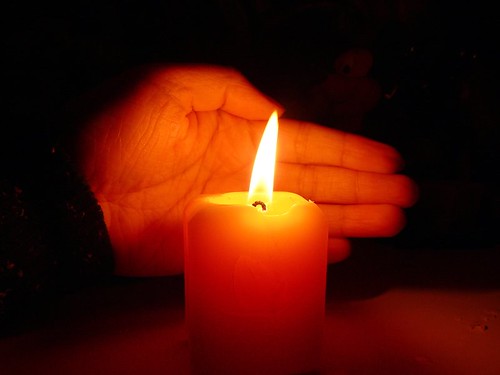
The light from a candle can be made much more intense if you use something to catch the light from the candle. A face, hand or other objects bring alive the picture and complements the candle. The presence of the object acts to reflect the candlelight. Light flesh tones are particularly good in this respect since the flesh colour is tonally close to the candlelight hues and they act as a reflector to bring out the light.

From

From “Candle Series” by Spicedfish
From “Candle Series” by Spicedfish on Flickr External link - opens new tab/page

Using reflectors in a candle scene is a great way to raise the light intensity. You can find other types of surface than the one in this picture in most scenes. Walls, ceilings and even off-shot reflectors are all good. Be careful to use neutral colours. Colour reflectors will affect the colour of the scene. If you are using a big card out-of-shot make it white. This will reflect the same colour light back into the scene, filling in the light.

Shadows…

The other side of light intensity is the shadows. The darker tones and strong contrasts of candle shots create most of the atmosphere. Spend time studying the shadows created in your scene. Strong contrasts are great subjects. If you create shadows that fall badly across your scene it will impact on the overall effect. The best use of shadows is often to the edges of the shot. If the light fades out to edges this holds the scene into the shot – naturally focusing the eye. Work with shadows to ensure the mood is harmonious.

Additional lights…

If you want to use fill light in the scene try to match the quality of light from your candles. Use soft light sources and natural light with hues matching the candles. Natural light will fill the scene well but tend to neutralise the colour of the candle light. The warm glow of candles is a great mix with evening, low-intensity light.

Some people use light with gels to give a warm glow. Warming gels can also be used with a flash. However, beware the power of flash. The candles will lose their soothing effect if all the shadows are taken away around the base of the candle and harsh shadows are introduced from one side. Typically use a diffused flash on the lowest setting – it also helps to be a distance away from the candles as well.

Multiple candles…

When working with one candle as subject the main focus of the shot is clear. However, there is a lot of scope for creativity. Consider two main issues. How to layout your candles and how to use the overall light with the layout. Using candles for making patterns is great fun and can produce excellent shots.

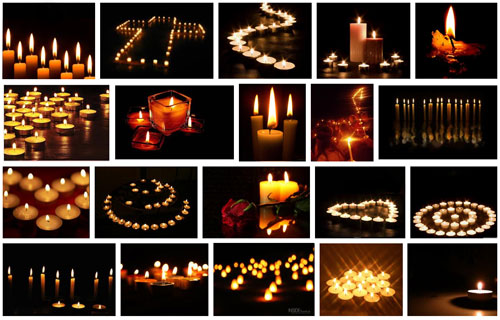
Patterns with candles

Making patterns with candles
Click to view Google Images “Candle Light” search

Try to keep the scene simple. Overlapping candles or indistinct objects in the pattern are confusing. Work with the sharp contrasts and keep your pattern well defined.

Exposure…

How long should you make your exposure? This depends, like any scene, on your light levels. To get more light in the exposure a long shutter speed is suitable for most candle shots. A range of 1/15 second down to 2 seconds is a good starting range with an ISO of 100. Camera settings vary significantly with reflectors, multiple candles or fill lights. Experiment to get it right. Aim to make the shot moody or atmospheric while providing detail for the eye to look at around the candle flame(s).

The main exposure concern with dark or shadowy shots is digital noise. If ISO is too high you will get more noise. It is better to use a low ISO, say 100 and have longer shutter opening. This reduces noise and means more detail is visible.

Lenses…

A fast lens allows a wider aperture. Faster lenses will allow a quicker exposure than a smaller aperture. Nevertheless, when experimenting check the depth of field. With big candle patterns, or larger subjects, a very wide aperture will give a very shallow depth of field. Too shallow and you will lose a lot of detail. On the other hand, lots of candles in the background with a shallow depth of field will produce pleasing bokeh. For choosing your lens, more than other aspects of your set-up, you need to have a clear vision of what you want your final shot to look like. Then do some “Chimping” to check results.

Prime lenses, especially the 50mm, will give an approximation to the human eyes. To capture the mood of a scene a 50mm will help. A wide angle lens close-up can provide great exaggerations of candle tallness or broadness – depending on lens orientation. There is great scope for artistic interpretation. Also remember that zoom lenses tend to foreshorten, reducing the apparent depth of the shot. With a zoom lens place your candles to give an impression of depth.

White balance…

The warm glow of candles is attractive. If you change the white balance you will change the characteristics of the warm glow. Candlelight shots are about moodiness and atmosphere. It is worth playing with the white balance to influence the shot and increase moodiness, but be careful you don’t remove it. You only need to adjust white balance when shooting in *.jpg as it will be fixed once the shot is taken. If you are shooting in RAW you have more flexibility with settings in post processing to control colours and the final exposure. If you cannot shoot in RAW then, again, make sure you do some “chimping” to get the colours right.

Being safe…

Although fun, candles are naked flames. It is all too easy in low light to leave something close to the candle. Fires start quickly and spread fast too. Feel free to experiment but make sure you don’t accidentally knock over candles, touch wall paper with one or do something else to set off a fire. Never leave candles alight and unattended. Always blow them out and wait for the smoke stop raising before leaving.

find out more...Photokonnexion tips by email
If you enjoyed this article please sign up for our
daily email service.
                                                 Find out more
#11030#

By Damon Guy (author and Photokonnexion editor)

Damon Guy - Netkonnexion

Damon Guy (Netkonnexion)

Damon is a writer-photog and editor of this site. He has run some major websites, a computing department and a digital image library. He started out as a trained teacher and now runs training for digital photographers.
See also: Editors ‘Bio’.

Thinking about colour

What do we really see? Do you and I see red the same?

What do we really see? Do you and I see red the same?

Can you and I agree on colour?

Do you and I see the same colour when we look at a red object? We may be seeing completely different hues, or tones. There is no way to objectify colour. We see it, have have name for it, but we cannot agree that we see exactly the same thing. What we see is an internal experience and we cannot share it with other people.

White balance

When we see a photograph taken under the influence of a tungsten or fluorescent light we can clearly see the colour casts. Modern DSLRs have standard white balance settings to neutralise these colours as they are so common. What about colour casts that are not so common? Well, in that case we need to set up a custom white balance setting.

The problem is, we do not have an objective measurement of colour that means the same to everyone. However, if we can standardise colour against something, then we would have a way of sharing a colour on a fixed basis. You may see a slightly or very different colour to me. But when you do, if it is standardised, it does not matter. That’s because we can both agree on it against the same standard.

Light which may appear white to the eye is not necessarily an even distribution of colours. The visible colour spectrum contains a combination of colours which together form white. The various colour temperatures in that mix are manifest at the different colour wavelengths. In photography we use a neutral grey (18% grey) as a calibration point that represents the 50% point in the eyes’ contrast range between brilliant white and perfect black. We can use this grey level to allows us to neutralise colour casts generated by sources which are not on the white light spectrum.

How do we neutralise these colour casts using 18% grey? Well, if certain scenes are slightly off colour or we are unable to create a clean white in a white environment there is probably a colour cast or the camera is compensating for too much brightness. For example, it’s common to have grey snow if the camera overcompensates for brightness in the whites. If we calibrate the camera for a custom white balance we can set white settings to be true to the scene in which the grey card is used. To establish the calibration point we photograph the 18% grey card within the light that contains the colour cast. Then we set the 18% grey point to be correctly grey (18%) and this will even out the colour cast. Check your manual for the exact procedure for your camera model.

Of course this assumes that the manufactures got the colour range-calibration correct. However, there is good evidence that we all agree the calibration points produce consistent colour results. So, if we calibrate the camera to the 18% grey card in the ambient light (with colour cast) the same camera colour range will shift from the colour cast to make the camera see the card as 18% grey again. The adjusted colour is a custom white balance – but it adjusts the colours to be consistent with the grey card standard.

Is Your Red The Same as My Red?

In the video we see that it is difficult to agree on the colour match between people. The video shows how different people can see a colour in a unique way but still agree on the existence of the colour even though our experience of it can differ. However, in reality we can only behave as if we agree that colours are the same. We do not have actual knowledge they are same to everyone. Hmmm! Mind bending… but worth thinking about

find out more...Photokonnexion tips by email
If you enjoyed this article please sign up for our
daily email service.
                                                 Find out more
#11030#

How to take a test shot

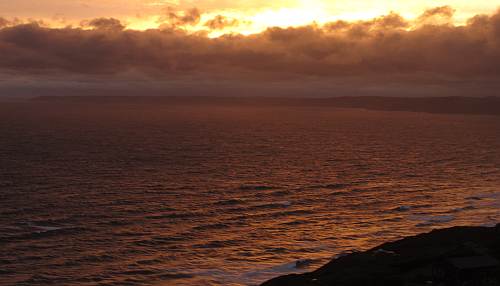
Cornish Dusk - Test shot

• Cornish Dusk – Test shot •
Underexposed, over bright at the top, over dark in the foreground, poor focus… the test shows a need to do some work…

Click image to view large final version with corrections
• Cornish dusk • By Netkonnexion on Flickr External link - opens new tab/page

Ever taken a shot without thinking?

…And regretted it later. We all have. Yet it’s simple to run through a simple check list and do a few test shots. In this article we look at setting up that procedure.

What needs doing?

I will assume you are in the right place and have your camera out of the bag, ready to go. The first thing to do is work the scene and try to see what sort of shots will serve your subject best. Find which angle looks the best through the viewfinder. Your subject is the critical item to focus on, so walk all around to get a full range of ideas of how best to frame it. Then, when you have composed and decided on your shot, you need to start considering your settings.

Approaching the settings

You will be working with the idea of ‘chimping’ now. If you don’t know what that is then read this first.

Here is the list of adjustments you need to make…

  • The first thing to consider is focus. If that is wrong you are in trouble from the start. So make sure that you can get a good focus.
  • White balance – It helps to have your white balance correct even if shooting raw.
  • ISO – Set your ISO for the light levels you are experiencing as your ambient light. If you don’t know about setting the ISO correctly then read ISO: get control of your sensitive camera!
  • Next select the mode you want to work in. You should select for…
    • Shutter speed if you want to adjust exposure length.
    • Aperture if the critical issue is depth of field (DoF).
    • Full manual if you want to work with both, or have more control overall.

Next you need to decide if you are going to work with the DoF or the shutter speed as your main consideration…

  • If working with DoF set the aperture you want to work with now. DoF is one of the primary considerations when composing a shot. Where you want your image to be sharp and where you want it to be unsharp. So play around with aperture for a while. Take a shot, chimp it, adjust the aperture, take another and so on. Once your DoF is correct.
  • If you are working with shutter speed as your main control then you need to adjust this instead of your DoF first. Again, shutter speed is a primary consideration in your shot. A long exposure will get more blur if there is any movement in the field of view. The shorter the shutter speed the more the shot will appear frozen, movement blur will tend to be eliminated.

As you set up each setting you can take a test shot of your subject. Then, by doing a bit of chimping, you can work out if you have your setting correct. You may need to take one, two, or maybe three shots to get your setting correct.

Once you get experienced working with these settings you will do them in seconds. Two things helps to achieve that. First, you will become familiar with which settings are appropriate for the conditions you are working with. Secondly you will be more sensitive to what you need to think about as you set up your shot. In particular the type of light is the main consideration. That in turn leads you to get a feel for what settings you need.

Some issues to note…

If you are working with landscapes you will need to do a bit of ranging to get your focus right. When working with longer distances the DoF and the focus vary. As your focus point gets further away from you the distant edge of acceptable sharpness rapidly goes into the distance. It is not always easy to determine DoF control precisely at long distances. There are methods but I will discuss them in another article. Just remember that from f11 you will effectively get sharpness right through the shot.

If you are working with an on-board (pop-up flash) then the camera will sync automatically to your camera settings. When working with off-camera flash, adjust that at the same time as the shutter speed. Normally your camera will have a ‘sync-speed’ to work with your flash – it maybe 200ths sec or 250ths sec depending on the camera. So you will need to consider that too.

Working with a tripod? Make sure you turn off all electronic motors in your camera to prevent tripod vibrations (Vibration compensation, auto-focus). This means you will have to manually focus the lens.

By Damon Guy (author and Photokonnexion editor)

Damon Guy - Netkonnexion

Damon Guy (Netkonnexion)

Damon is a writer-photog and editor of this site. He has run some major websites, a computing department and a digital image library. He started out as a trained teacher and now runs training for digital photographers.
See also: Editors ‘Bio’.

White Balance Settings Explained

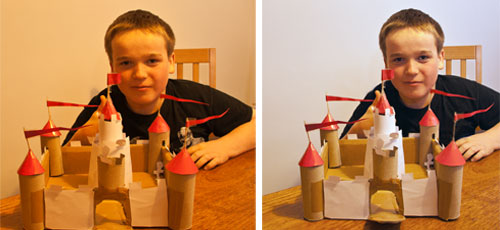
Two photos of the same subject showing colour cast and adjustment

Two photos of the same subject showing colour cast and adjustment. The left hand photograph has a strong colour cast from an overhead incandecent light bulb. The second photograph compensates for the cast adjusting to daylight tones.

Colour Casts

Colour casts are caused by the main light source creating a coloured light resulting in an odd colour mix. Common colour casts are a blueish hue created by Tungsten bulbs; greenish/yellow created by fluorescent lights and reddish tinge caused by very hot bulbs or light sources. A whole series of variations of these exist.

We notice these colour casts in the image or on the screen at the back of the camera. They appear odd to us because we don’t see them when we look directly at the same scene. Our eye-brain system compensates for the colour cast in a sophisticated way that cameras cannot.

If you have a colour cast in a picture you can adjust for it in editors like photoshop and others. However, it is better to compensate for these casts in-camera. Then you can get a shot that is ‘daylight adjusted’, reflects the prevailing light conditions or is how you want the shot to come out. In other words you control the colour cast.

White Balance Settings

In modern digital cameras there is a setting group called ‘White Balance’. This normally provides the following settings…

  • Auto WB;
  • Daylight;
  • Shade;
  • Cloudy Day;
  • Tungsten;
  • Fluorescent;

These settings adjust your picture to compensate for a colour cast. White balance controls compensate for colour casts. You choose what you want to control by picking the appropriate setting. However, most digital photographers never use this setting often content to use Auto WB (white balance). The latter setting allows the camera to apply a setting according to its presets. Most digital cameras are pretty good at adjusting for the most common colour casts particularly for standard shots.

Experienced photographers tend to use RAW files – the image-file format that retains all data captured by the camera. RAW files can be adjusted in post-shoot processing to compensate for any colour issues. In this case the auto white balance setting is adequate because it can be adjusted later.

If you use another file format – most commonly .jpg – you should consider taking more control over your white balance. The .jpg format discards much of the data in the image. The reduced data makes later adjustment difficult and limited. To get the best from .jpg you should maintain full colour-control in the camera. This means carefully managing white balance.

The Settings – and some advice

Picking a white balance setting (other than auto) tells the camera what light source you will be working under. The camera has presets for these conditions. Here is an interpretation of these settings and how to use them…

  • Auto WB. The camera senses light colour and the type of source. It compensates for you. It is usually effective. Test shots are advisable.
  • Daylight – To be used in normal daylight, but intensifies the blueish tones so skies and similar blues are not washed-out.
  • Shade – Compensates for the slightly blue cast seen under shady conditions. The setting increases the red tones to warm the shade slightly. This is a good setting to use on cloudy days or under shady conditions. This is a stronger warmth than the ‘cloudy’ setting.
  • Cloudy – Warms up the cooler tones under a cloudy sky, but not as much as the Shade setting. It promotes an ‘afternoon’ warmth feeling. It is worth considering using this setting even on a sunny day. The tones tend to flatter most outdoor scenes and flesh colours. Sometimes worth using indoors too – especially in natural light coming indoors.
  • Tungsten – Compensates for the reddish tones from indoor tungsten lighting. The setting adds bluish tones which will iron out the reds creating neutral tones.
  • Fluorescent – Compensates for the greenish/sickly-yellowish tones created by fluorescent lights. As various fluorescent bulbs produce different types of light be wary of this setting. Sometimes you might get some really unexpected results. Always check your camera screen. It is not reliable with modern fluorescent variations.
  • Custom – Allows you to precisely adjust your camera for the prevailing light conditions. You adjust white balance against a neutral grey colour-card. (T0 be the subject of another tutorial).
Practice

Get to know these settings. Understanding colour casts helps you learn to recognise what sort of light you are working with. This helps you appreciate the effects you see in your final picture. It will help you to research lighting methods as you will be familiar with the terms and the actual colours you see.

Practice makes perfect! So take some standard practice shots in different types of light. Keep the shot the same while you try different settings. This will help you see the effects of the different light on the picture.

By Damon Guy (author and Photokonnexion editor)

Damon Guy - Netkonnexion

Damon Guy (Netkonnexion)

Damon is a writer-photog and editor of this site. He has run some major websites, a computing department and a digital image library. He started out as a trained teacher and now runs training for digital photographers.
See also: Editors ‘Bio’.

Can you write? Of course you can!
Write for Photokonnexion...

We would love to have your articles or tips posted on our site.
Find out more…
Write for Photokonnexion.