Tag Archives: Project

Six tips for reigniting your photographic passion

Reignite passion in your photography - try charity Work

• Charity Work •
Doing a bit of charity work can really uplift your photographic spirits while helping others. It is a great way to make contact with new people, get interested in new things and Reignite passion in your photography.

Discover your passion again…

Sometimes it can all go wrong! You just cannot get it right and you’re not bursting to take the next shot. When things look down don’t give up. This is the time to take new steps to invigorate your approach. Photography with a passion is one of the most exciting and interesting pursuits. When the passion fades it is not because photography is not engaging. There’s enough in photography to keep you captivated for a lifetime. More likely your vision has become distracted, stale or you’ve lost the creative spark. These are not long term problems. Lets get you fired up again! Here are six tips to reignite passion in your photography.

Reignite passion :: Take a photogs break

We are not talking holidays here. Although that would be nice, actually it would not solve the problem. Holidays make you want to take the camera out. When you are down in the dumps about your photography, more photography can be off-putting.

Take a real break from photography. Have a month off. Tell yourself to put all your equipment away and don’t be tempted to touch it. A rested mind is a freshened mind. Just forget your photography, your composition, your equipment. Rest.

Reignite passion :: Do something different

One of the most creativity stimulating activities is to learn something new. It helps you to cross fertilise your ideas and introduce new perspectives to your thinking. Adding a new dimension to your outlook can only be a good thing for your photography. So read something you would not normally read. See something you would normally not be interested in. Do something your partner wants to do without taking along a camera. If you had an interest in the past that you have neglected, spend a little time getting up to date on it. The wealth of our experience is the greatest gift we can give our creativity. Try this little trick. Pick out ten techniques from another interest. Think about ways to incorporate those skills into your photography. This new synergy will be sure to reignite passion in your photographic work later on.

Enjoy a few weeks of photographic respite, and immersion in an alternative area of insight. Bath in its luxury. Now you are ready to reignite your passion…

Personal contact will help you reignite passion

I have always found that meeting new people and having new discussions helps me get really fired up about photography. Every year I do two or three charity events. It is a really fun and cleansing experience. I come away from each of these events feeling refreshed and tingly – as if I had stood under a hillside waterfall. The sharpness of the water making my skin sting and turn ruddy.

One of my charity activities is to take the photographs at a local event held for senior citizens. Sobering too. As they sit eating their lunch I chat at each table for about ten minutes then take photos of each of the guests. During the course of about two hours I talk briefly with over 100 people and take a quick and candid portrait of them all. Wow. What stories I have heard – of war and love, action and sadness. It has not only helped my photography to be more passionate and expressive, but it has helped me grow as a person too. I have some great pictures as well.

Find something to get you involved in something new. Charity is great, but schools, drama groups, local clubs and even sports organisations all love photographers. Get involved. You might learn something new and you will certainly find a new way to express your photography and reignite passion in your hobby. The most important thing is getting involved with the people. That will spark off new contacts, opportunities and enthusiasms.

Reignite passion through commitment to a project.

Give yourself something to develop. It could be learning how to photograph your new interest in the club or group you have got involved with. Or, equally, it could be some aspect of photography that is new to you. I spent a lot of time two years ago developing my table-top work. It re-invested my interest in photographic art, as well as complementing the product photography I started to do for my work. Funny how things come together in your life when you start exploring new angles.

If you are working up a project for yourself enjoy it, but have some goals. A project with no plan or goals soon gets forgotten. Then the point will be lost and so will your passionate commitment. Sit down at the start of the project and have a good think about what you want to achieve. Then, set a deadline for completion. The key to a good project is to make it time-bound and challenging; cover new material and have specific targets. You will reignite your passion by just having those positive goals and thoughts in mind.

Reignite passion :: Learn a new technique

We would all like to learn more about photography. The simple away is in bite sized chunks. Pushing the boundaries to learn it all at once will simply lead to failure. That will make things worse for an already down time. So, find out about a particular technique. Practice in lots of different situations and with a variety of equipment. Put it to use in your project, your charity work or in your every day shots. Before long you will be a proficient and enthusiastic user of that technique. Sometimes you can help this process along by buying a new piece of equipment. It does not need to be expensive. Make it something you have never tried before – try to extend your experience and your approach with it.

Change your work flow

I have often noticed with developing photographers that when they learn to be more effective editors their success as photographers improves. Obviously a more effective editorial process relies on good knowledge of post production, and composition too. The more important point is that being more ruthless about what is an acceptable photograph also helps you when you are looking through the viewfinder too. Your eye develops, your acceptance of what should be in the frame is more discerning and your satisfaction with your shots goes up.

If you are in the photographic doldrums studying editing will sort out your problem. But, it can be a great way to sharpen your awareness of your good points and what needs improvement. Once you have a framework to improve your whole attitude will lift and be more positive. So think about this as a way to positively sharpen your photographic wit and reignite passion and feeling in your work.

The path to success

If you want to become a good or great photographer, or if you just want to make a better job of photographing your grand children… its possible to get stuck along the way. There are a variety of ways you can get out of the down times. Being positive, resting and then trying new things will set you off in ways you never suspected you would enjoy. Give it a try. Extend yourself, push the boundaries, try something new – have fun!

Comments, additions, amendments or ideas on this article? Contact Us
or why not leave a comment at the bottom of the page…

Like this article? Don’t miss the next — sign up for tips by email.

By Damon Guy (author and Photokonnexion editor)

Damon Guy - Netkonnexion

Damon Guy (Netkonnexion)

Damon is a writer-photog and editor of this site. He has run some major websites, a computing department and a digital image library. He started out as a trained teacher and now runs training for digital photographers.
See also: Editors ‘Bio’.

Seven deadly photography sins

Seven Deadly Sins

Seven deadly sins of photography – it will catch up with you!

Some things you should be careful about…

Photography is full of pitfalls! You will come across them. Keep your eyes wide open. In the meantime here are some of the obvious sins that create problems for all the unwary…

Lust

Drooling over the latest release of some mega-technological update of the latest camera, lens, equipment… Then actually buying it because you think it will make you a photographer! Every photographer has suffered from equipment lust. Not one photographer, ever, has become a great photographer because they have suddenly purchased the latest and most expensive equipment. All that will happen if you succumb is that you will be the same photographer with less money in your pocket. Concentrate on getting better with what you already own. When your excellence surpasses the ability of the camera to show it, then consider moving to something new.

Pride

Carrying your equipment as a badge… If you buy equipment because it looks good, or shows off your purchasing prowess you are misguided. Successful photographers carry equipment because they need it for the shoot. Your pictures will be much better if you buy equipment only because it is necessary. Then use it until it falls apart. Your photography will improve, your pocket will thank you.

Sloth

Not using the equipment you have… If you have the equipment you are not a photographer unless you use it. If you stay in bed and don’t take photographs your photography will stagnate. Get up early, stay up late, travel to distant locations, take thousands of pictures and make lots of friends who also shoot pictures. The only way to enjoy photography is to get out there and do it. Then your photography will improve.

Envy

Being jealous of someone else’s equipment, photographs, ability, lights, job, whatever.. This is a shameful waste of your own time and ability. There is no better camera in the world than the one you own. Your own ability and skill will increase if you spend the time focussing on your photography. Share with others what you enjoy, and enjoy what you have. That way your photography will benefit directly from attention to your own improvement.

Gluttony

Buying more and more equipment, because its on sale, because its new, because it’s, well, photography equipment… Just because it is photography equipment does not make it good. Just because it is cheap does not make it worthwhile. Just because it is on sale does not mean you have to buy it. Good equipment should be well made, well designed and last a long time. Research your needs very well. Question your motives for every purchase. See if you can borrow something to try it first. Buy only what you need every day for your photography. Anything else you can probably do without.

Wrath

Hating on others because… The “Other” camera manufacturers products are not to your taste. If someone has something that is not your thing, or they shout about how good it is, then there is only one response. Celebrate the fact they are photographers. Express joy for their ownership. Rejoice with them over their successes. Getting angry about things you have no control over will do nothing for your photography. It will certainly do nothing to help you make friends. Concentrate on working with your own equipment, your own ability and take joy in your successes too. Then your focus will be on improving your photography. Stay with that.

Greed

Wanting it all now… No amount of wanting will give you what you want now. Money may buy the equipment, if you have the money. If you don’t then save up for it. There is very little money in photography. So make sure you fund the purchases you make with readily available cash. Debt will do nothing for your photography. It will reduce your ability to get to locations and take photographs. Instead, work consistently for well formulated goals. Set up a savings fund to ensure you get what you really need. Concentrate on what you need to do to improve and focus on working with what you have got. If you work and plan for your improvement what you want will come in time and with step by step positive action.

Being a better photographer…

Is really about being a better person. Great photographers have great insights. Those only come with introspection, self-improvement and concentrated, goal directed work. Oh, and you should enjoy yourself too!

By Damon Guy (author and Photokonnexion editor)

Damon Guy - Netkonnexion

Damon Guy (Netkonnexion)

Damon is a writer-photog and editor of this site. He has run some major websites, a computing department and a digital image library. He started out as a trained teacher and now runs training for digital photographers.
See also: Editors ‘Bio’.

A simple project with fruit – a tutorial for fun!

• Orange •

• Orange •
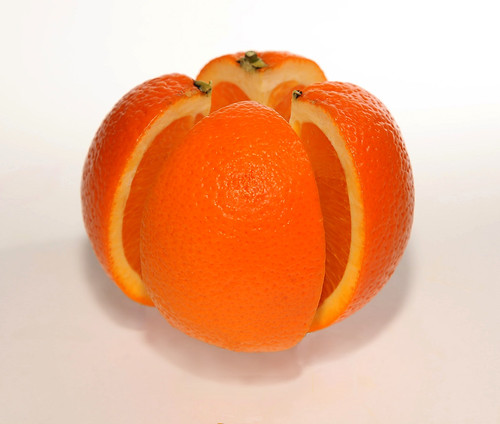
Have a go at producing a floating orange in “exploded view”
Click image to view large
Orange By Netkonnexion on Flickr External link - opens new tab/page

Fruit is fun!

This tutorial will show you how to photograph fruit in all its glory – in a unique way. There are ways you can make the project your own with plenty of room for creative ideas. It is an easy project giving you some useful tips for still life lighting and working with a high key background. Have fun!

The picture of the orange

The picture above shows an orange, a wonderful fruit, in all its glory. We can see both inside parts and out. In this tutorial I will show you how to create this yourself and show some other similar examples to give you some ideas of your own. This tutorial will cover the following simple steps:

  1. Pick a good firm, clean orange.
  2. Cut it into quarters.
  3. Assemble the orange in an “exploded view” using toothpicks.
  4. Create lighting to show off your orange without highlights.
  5. Finally you will clone out the toothpicks on the computer.
Choose your fruit

Be careful, make sure that your orange is nicely shaped, no odd depressions or bruises, and as firm as possible, not over-ripe. Check the skin for consistent colour too. You want your orange to look delicious. No one will be interested in your shot if it is damaged, dripping and discoloured. Also, wash and gently wipe the skin before starting the tutorial. The skin should look bright and clean. Dirt, hairs and marks will really draw the eye of the viewer. Don’t let them be distracted.

Constructing the orange

Cut it in four pieces top to bottom (two cuts). It helps not to have too many cuts. Cut carefully and accurately. If you hack the orange you will be adding distractions to draw the eye. Be careful and slow to ensure accuracy.

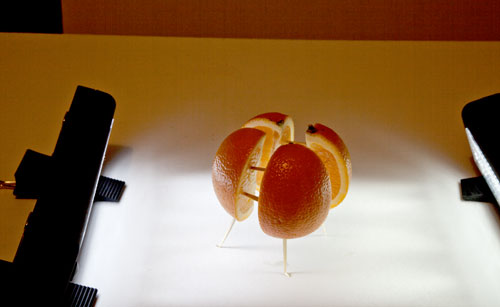
Once cut we are going to assemble the orange in an “exploded view”. That is the term used to describe an “almost” assembled item that is floating in space so you can see how it would assemble. To hold the pieces apart I arranged the quarters using tooth picks. In the picture below you can see how the orange is braced with the toothpicks. The picture also shows how the back lighting is set up.

• The toothpick set-up and initial back-lighting •

• The toothpick set-up and initial back lighting •
• The toothpick set-up and initial backlighting • By Netkonnexion on Flickr  External link - opens new tab/page

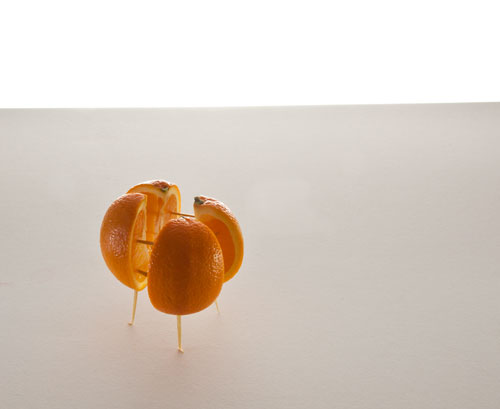
You can see from the picture the orange is held firmly together by the toothpicks. It is also supported by four toothpicks as legs. We want the orange to be slightly off the ground so it has the feel of an independent object in space.

The white card under the orange extends to the edge of a table. On a chair a little way back from the table is another upright card. You can see the white back-card is very bright. I used a strong light under the table to illuminate that card giving it a high-key brightness. There are some links at the end to explain more about high-key effects.

We want to take the final shot with a little shadow under the orange. This give the impression the orange is floating in space. I will light the orange from the front with a flash. You can use the flash on your camera. However, that will create a very sharp shadow since flash is a very hard light. This means very harsh, sharp-edged shadows that will be quite dark.

In the next picture you can see how I created some under-lighting below the orange to soften the shadows created by the flash. I have two cheap Rolson 61770 72 LED Camping Lights. These are really flexible for table-top still-life and can be easily set up for fill light. They are great lights and affordable.

The underlighting setup to soften the shadows and create fill light.

• The underlighting setup to soften the shadows and create fill light •
• The underlighting setup to soften the shadows and create fill light • By Netkonnexion on Flickr External link - opens new tab/page

The lights under the orange and the back-lit card provide light on all sides except the front. If you have an off-camera flash you can use that, off-set to one side, for the front lighting. It is important to off-set so that you prevent ugly highlights on the front of the orange. Better still you could bounce the light off the ceiling if it is white. That way the orange will be evenly lit from above. To find out more about off-camera flash and some great opportunities for affordable models see:

If you only have a pop-up or on-camera flash then you should find a way of diffusing the light from it. Alternatively you could create a diffused reflection. You should be trying to find ways to prevent the flash pointing directly on the orange. Bright highlights would be created that are distracting and ugly.

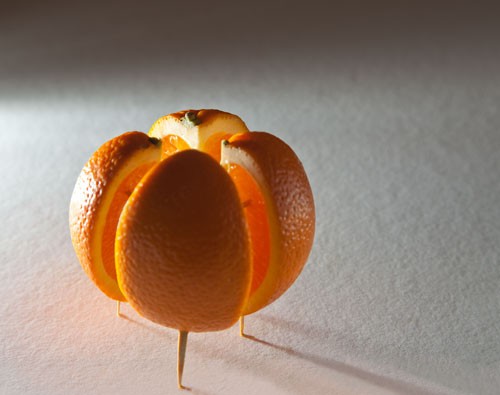
Once the lighting is set up to your satisfaction you need to position the orange for the final shot. It is important to spend a little while positioning the orange so it obscures as many of the toothpicks as possible ready for your final shot.

The final position ready to photograph the orange obscures as many of the toothpicks as possible.

The final position ready to photograph the orange obscures as many of the toothpicks as possible. Then there is less cloning work to do on the computer.
The positioned orange By Netkonnexion on Flickr External link - opens new tab/page

You can see from the picture that the orange is positioned so most of the internal toothpicks are not visible and the legs are minimised. Once the shot is taken we are going to clone out the remaining sticks. So if you have less showing you have less cloning-out to do.

Now you are ready to take the shot – shoot it! Make a few attempts. Do plenty of chimping to ensure you have the lighting right. Pay special care to minimising highlights on the orange. When you are ready you can download your shots to your computer.

The remaining work is to clone out the toothpicks. You will need to very carefully clone the white surface around the legs over the legs themselves until you can not see them any more. Pay attention to any shadows so that they remain realistic and consistent after your cloning is finished. When cloning over the toothpicks in the orange interior use the same coloured flesh of the orange to clone out the remaining toothpicks you can see.

If you are not familiar with cloning techniques you can see a tutorial here: Getting Started With Cloning.

find out more...Photokonnexion tips by email
Enjoying this article? Please sign up for our
daily email service.
                                                Find out more…
#11030#

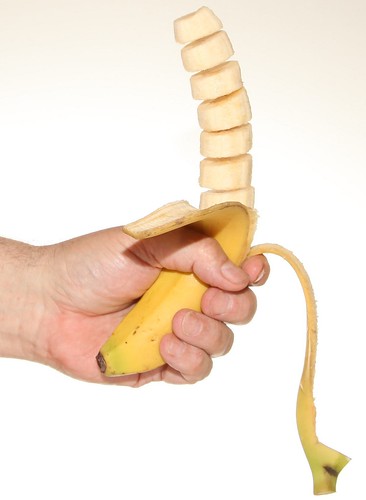
If you want to try other ideas here are a selection of other fruit-cut pictures below. All done using toothpicks or cocktail sticks. There is an infinite variety of things you can do using this technique so have lots of fun!

• Sliced Banana •

• Sliced Banana •
Click image to view large
The banana slices were held together with cocktail sticks while the shot was taken. Then they were cloned out afterwards.
• Sliced Banana • By Netkonnexion on Flickr External link - opens new tab/page


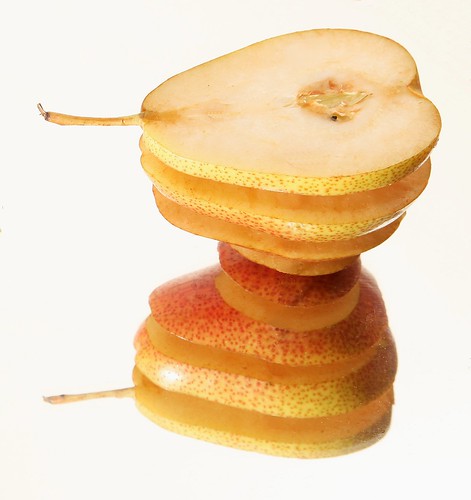
• Sliced pear on mirror •

• Sliced pear on mirror •
Click image to view large
A half pear was sliced and held in the exploded view with toothpicks. However, the pear was on a mirror – giving the effect of an inverted pear.
• Sliced pear on mirror • By Netkonnexion on Flickr External link - opens new tab/page


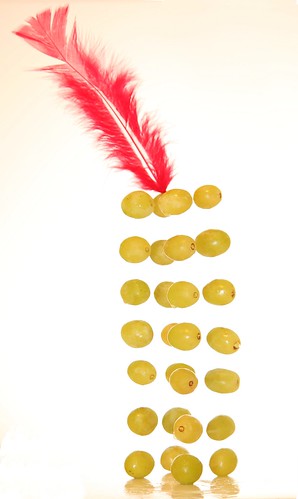
•  Alexander The Grape •

• Alexander The Grape •
Click image to view large
Each grape was painstakingly held apart using cocktail sticks.
• Alexander The Grape • By Netkonnexion on Flickr External link - opens new tab/page


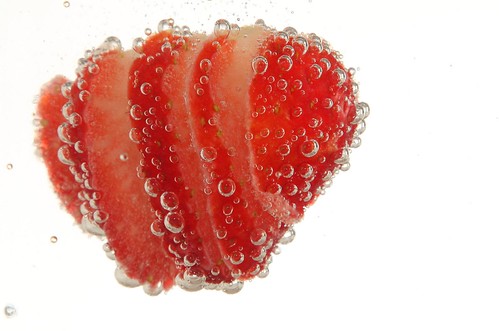
• Strawberry Layer Drink •

• Strawberry Layer Drink •
Click image to view large
The strawberry has been sliced and held together with toothpicks. Then it has been placed in sparkling water to create the bubbles.
• Strawberry Layer Drink • By Netkonnexion on Flickr External link - opens new tab/page

By Damon Guy (author and Photokonnexion editor)

Damon Guy - Netkonnexion

Damon Guy (Netkonnexion)

Damon is a writer-photog and editor of this site. He has run some major websites, a computing department and a digital image library. He started out as a trained teacher and now runs training for digital photographers.
See also: Editors ‘Bio’.

Random words to give you a creative boost…

Any subject has scope if you use imagination.

Your inventiveness provides an extended insight to a specific subject. Given any word you should be able to do something different with a photograph, something exciting. Think about stretching your mind, and of course your photography.

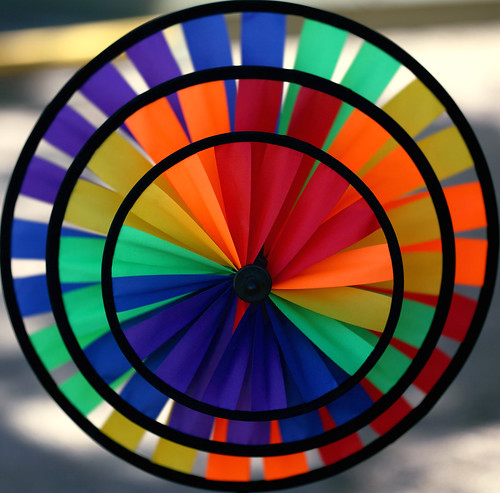
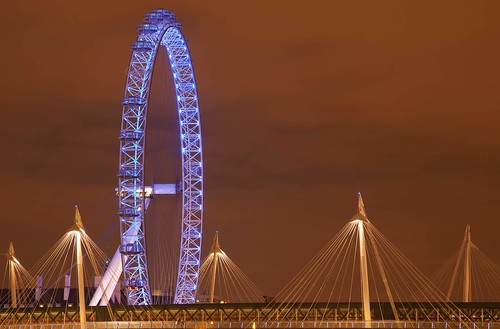
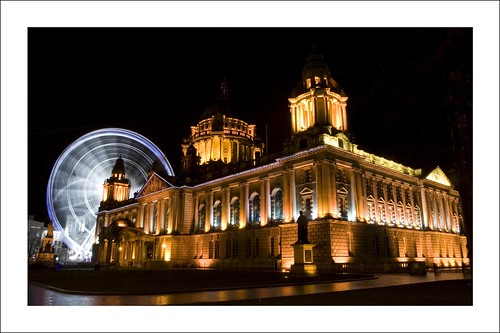
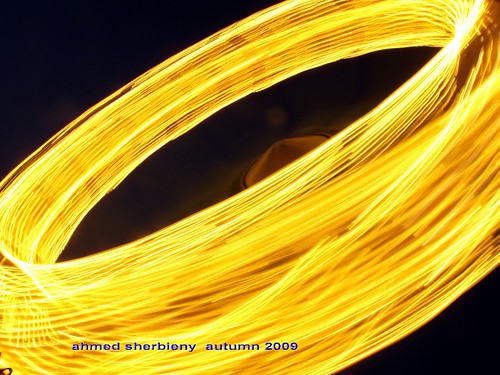
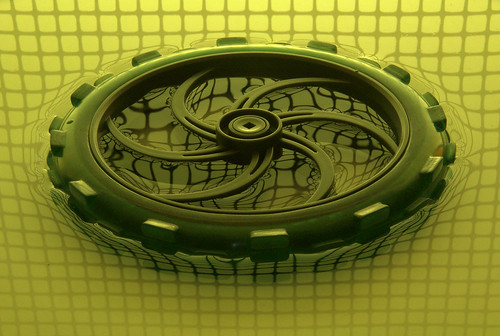
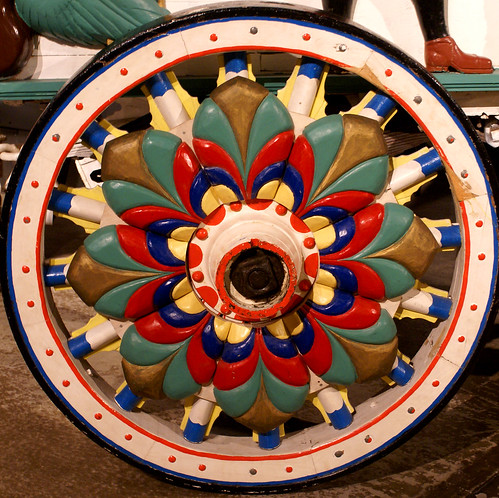
In this post I have included pictures which are all indexed with the term “wheels”. A simple subject, but not maybe what immediately comes to mind. And, that of course is the point. The idea is to fix some subject in your mind and then go out with your camera and try to do something creative with it.

Have a go. Create five pictures with the term “wheels”. If you come up with a term you would be prefer that is fine too. Try a random work from a dictionary or a book. The point is that you can get out and try something different…

See what you think about these ideas to get you going. Have fun!

3 Wheels • by cobalt123 on Flickr

• 3 Wheels • by cobalt123 on Flickr
Click image to view large
• 3 Wheels • By cobalt123 on Flickr External link - opens new tab/page

• London Eye • by Netkonnexion on Flickr

• London Eye • by Netkonnexion on Flickr
Click image to view large
• London Eye • by Netkonnexion on FlickrExternal link - opens new tab/page

Belfast City Hall and Wheel

• Belfast City Hall and Wheel •
Click image to view large

• Belfast City Hall and Wheel • By Felipe Pitta on Flickr External link - opens new tab/page

Wheel rides

• Wheel rides •
Click image to view large
• Wheel rides • by Ahmed Sherbieny (Flickr)External link - opens new tab/page

• Wheel warp •

• Wheel warp •
Click image to view large
• Wheel warp • By Scottdd222 on Flickr External link - opens new tab/page

External link - opens new tab/page
• Circus Wheel 2 •

• Circus Wheel 2 •
Click image to view large
• Circus Wheel 2 • By Atelier Teee on Flickr External link - opens new tab/page

If you want to see a variety of other image ideas you can use this search on Google images…
More wheels on Google Images

Stunning waves – some great insights

Zak Noyle calls himself a water photographer. Actually he is almost a merman. From his pictures and his lifestyle he seems to spend most of his life in the water. Wow! What inspiring images he produces. Stunning shots, amazing insights.

What makes Zak so special is his complete dedication. In the videos below you can see how his whole life is slanted towards getting in the water and producing inspiring images. He is obviously in love with photography. But that love is surpassed by his love of the water. He trains for it and lives it. Dedication itself is inspiring, but when you are dedicated you are also in a position to be inspired; and that comes out in Zaks work.

If there is one lesson in this, it is about dedication. Photographers gain a lot from getting to know a subject. Not only do you see the deeper meaning in something when you explore it from all angles, you also get to understand the dynamics of your subject. You learn how it works and what is important. Like working the scene, dedicating yourself to a subject allows you time to get to know it in different light, different times of the day, different weather. It is about growing into your subject, learning to be at one with it.

I am not suggesting you need to become Zak Noyles in your own right. Instead I am saying that Zak shows us what it is like to get inside a subject. As photographers we can gain a lot of our own insights by having a project that we work on over days, weeks or years. Project photography is not only fun, it allows us to show a little of something that other people don’t know. Then they will look at your images to find that ‘something special’.

The original videos featured in this blog have been taken down. However, Zak has a number of videos available as a continuing testimony to his work and enthusiasm for water. Check out this YouTube link… Zak Noyal surfing Zak Noyal Surfing | External link - opens new tab/page

Damon Guy - Netkonnexion

Damon Guy (Netkonnexion)

Damon is a writer-photographer and editor of this site. He has run some major websites, a computing department and a digital image library. He started out as a trained teacher and now runs training courses ing digital photography.
See also: Editors ‘Bio’.
By Damon Guy see his profile on Google+.

Project Based Learning is Best

Colins Complete Photography Course.
A great book available on Amazon

The best way to improve is to do…

When you read a book, you learn things. However, practical application is different to book knowledge. I am reminded of a great line in a film, “…there’s a difference between knowing the path, and walking the path” (Morphus – ‘The Matrix’). In Collins Complete Photography Course you get to “walk the path”.

Actually doing photography is what teaches us to move forward. This book is about taking our inspiration, our passion, and developing our skills through project-based photographic work. Its about getting involved; getting inspired. Learning through projects.

This is a project based way to take the important steps that lead you to get control of your camera, get control of your ideas, get control of your confidence. Step by step the book takes you through the things you need to master photography. By inspiring you to undertake projects it helps you to get an insight into one interesting aspect of photography at a time – learning from inside the experience. It is a great book to grab your enthusiasm and to express your art… while learning.

Here are some things that others have said about: “Collins Complete Photography Course

“This is a really instructive book…” By Mrs. C. Leigh.

“…if your photography has gone a bit ‘flat’ or you’re struggling to find a subject, it would be worth buying this book for the inspiration alone.” By J. Mousley

“An excellent book for anyone starting on their photographic journey…”. By ‘Fellingmal’

 
If you want to move your photography forward this book can take you on a great journey. It is an opportunity not to be missed. Buy it now…
Collins Complete Photography Course


Doing a Creative Shoot

Photography is a way you express yourself - a facet of your creativity.

'Creation 'De Pens' on your perspective!' By Damon.
 
Photography is a way you express yourself - a facet of your creativity.

Setting Up From Scratch

Perhaps the most challenging form of photographic expression is the ‘scene-from-scratch’. It requires no more skill than any other photograph of any other scene. It demands the same level of achievement. It requires the use of photographic techniques like any other photo. It may require a certain amount of experimentation like any other shot. However, the ‘scene-from-scratch’ also requires you to construct the scene itself to which you will apply your photographic skills. It is a skill that is different to the photographic process.

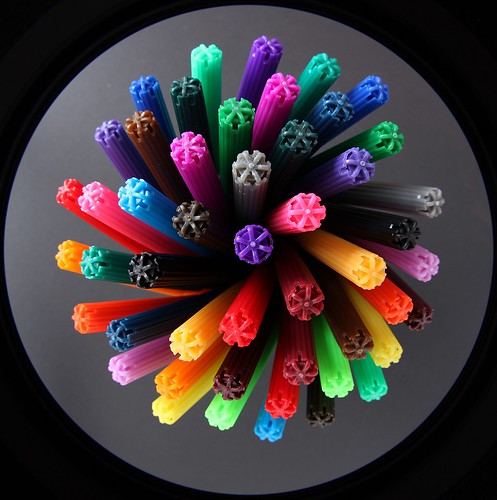
The picture above, ‘De Pens’, is one such ‘scene-from-scratch’. I spent days attempting to visualise how I wanted the scene to look. I raised questions for myself and wrestled with my imagination over the shot. Familiar? Well, here are some ideas to help you through the creative process and to get you to the shoot.

Crystalise your idea:

The creative process always starts with an idea. It is usually unclear and unformed. So you need a vision. Creating a picture in your head does not come easily to everyone. However, with practice you will be able to ‘see’ a scene in your minds-eye that is the vision you seek. You can develop that facility by practising the placement of each element of the scene. Start with one item. Observe it, become completely aware of all its facets – know it intimately. What is its size, weight? Is it coloured? Is it shaped how you want it? Is it the one you want or do you need another similar one? Once you know that item, then you can look at others. Is the first item alone? What is its position relative to other things in the scene? How many other things? Once you are seeing these things in your head you can move them around your scene in your head as well. Now you have begun to crystalise the scene and to create the vision. You are aiming at having a picture in your head that is the final scene you want to achieve – in glorious perfection. Once you see the scene how you want it in the final photograph you are ready to start putting things together…

Practice creating the scene:

This helps to crystalise the vision and to put the technical issues into perspective. Creating a shot, like mine above, you need to consider many things. Will the shiny plastic create nasty highlights? Will bright light cause the loss of colour? How will the pens be held in place during the shot? And, many other questions come to mind. Laying out the scene Will help your thought experiments. It will also help you to understand what techniques you will need to use for the shot. Perhaps most important – you will be able to anticipate problems.

Create the lighting:

You need to consider lighting in every photograph. After all, a photo is created only by the light. Start by trying out the lighting in your crystallisation process. So, think of these…

  • Soft light – How are you going to diffuse it? How far away? What source? Shadow/blacks control?
  • Hard light – How are you going to focus it? Distance? What source? Highlight control?
  • Coloured light – What colour, hue depth? What creates the light? Natural, artificial, filtered?
  • Other equipment… reflectors, diffusers, gels, boards, speedlites, cables, radio connectors…

Resources

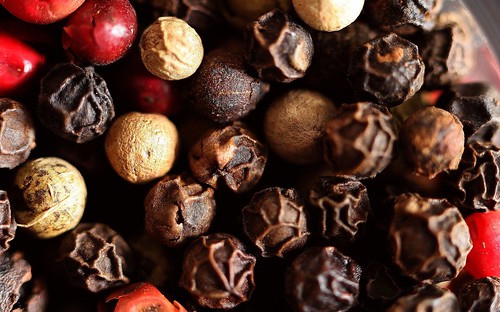
Even simple shoots sometimes require purchasing in advance. I had in mind a shoot involving peppercorns. Fascinating little seeds, especially when seen close up. There are a number of species that produce peppercorns and I wanted as many types as possible. Surprisingly, it took me three weeks to find a supplier of mixed peppercorns. So consider a shopping list as early as possible or your shoot may not go well on the day!

Mixed Peppercorns

'Mixed Peppercorns'
 
To get the right resources you must prepare in advance.

Photographic equipment

Think about what you will need for the shoot – especially if you are on location. Some things – camera – are obvious. Some not so… I forgot a memory card only once! I was thinking more of which lenses are appropriate. Make sure you have an appropriate tripod. Is your lighting sufficient and mobile. I have a pair of 1000watt studio lights. They have batteries for location work, but not so good to take up a mountainside. Advanced thinking about what you need will help you to organise for the day. By the way, experience has taught me that on location you should always have two colours of ‘gaffer tape’ and about 8 studio clamps. Works for me anyway. Do you require any special photographic equipment? Don’t forget cables. Nearly everyone does at one time or another – and lens cloths.

Techniques

Being creative is about learning techniques perhaps even developing them. However, if you are planning a shoot of some kind where you need a specific technique it makes sense to learn and practice it before you start your shoot. I was once invited to photograph a rare orchid in the wild. It was at a site of special scientific interest. I was quite excited – this was a secret location and I was privileged to be there. My friend had arranged the morning and we turned up with our macro lenses and everything we needed. What I did not know was my friend had no idea how to use his new macro lens. I spent most of my precious morning teaching him and not photographing orchids! What a waste of a shoot. He lost out too. Make sure you practice to get the standard of results you need for your shot before you start your shoot. Otherwise you may get nothing reliable or worthwhile from it.

Clothes and Props

It may sound obvious – it’s not. Weather can turn suddenly. So you need to be sure that you have what you need to stay warm, dry and safe when on location – especially if you are outside. Models or subjects need to do the same. You also need to have the clothes or props required to be able to create your scene. Often, when on location there is quite a lot of standing around. If you are the photographer you are responsible for direction AND safety. Make sure you keep everyone safe and warm. That includes making sure the props are safe (and not likely to blow over or fall down and injure someone). If out in winter you may need to lay on accommodation or shelter for anyone on the shoot with you. And, even back in the studio, you need to make sure that scantily clad models are warm and alert. A scantily clad young lady with hypothermia does not look sexy – no matter what she is wearing!

Planning for the Shoot

If it is just you and your camera, you can just have a go. If it does not work, well, you can try again. Factor in a few resources and even one other person and you have a different ball game. Suddenly you need to be organised and well set up in advance. I have always tried to impress on people that they should know what they want to do on site before they set off. So have a plan. Even if it is a sketchy one. Everyone makes some things up on the spot. Some people have nearly everything planned down to the last crisp for lunch. Do what you can – and note where you made mistakes. Keep notes and lists for next time. The actual shoot scene should always be drawn out or laid out with a model in advance so you can partially realise the visualisation in your minds-eye. Then you are ready for the site when you arrive. In the studio, on the dining room table or even on the bedroom floor, a planned scene can help you decide how to start and what you might do if it does not work out. A good starting point helps you get ahead from the off. It also helps you be more confident in changing things if you can play around with preconceived ideas on a model or drawing rather than start moving things around a lot just to experiment. So have some ideas ready for change if your first idea is not good. Make sure that your contingency plans include an alternative shoot in case the original plan is blow away by something unforeseen.

Review and Feedback

Has it gone OK? Was it a disaster? What did you forget? What did you need but did not realise you needed? Who did what wrong? What went right. What do you need to know for next time? I could go on and on… there is a lesson here. Write down all the things you need to remember. Create a list of all the things you need. Make a note of the good, the bad and the ugly. I keep a little notebook of lists for such occasions. Make sure you get feedback from any participants too. If they tell you they were fed up, take note! You may want them again. They sure won’t come back a third time if you mess up on the second attempt. So fix your ways!

What Next?

The renown French scientist Louis Pasteur famously said: “…chance favours only the prepared mind.” Photographers take note. If you have properly organised yourself and prepared in advance you will be more likely to get a good result from your shoot. Unhappy accidents happen to those who rely on chance and have not prepared for an unlucky event. Clear ideas, the best equipment you can muster, planned activities and contingencies and appropriate safety precautions make things go faster, safer and more efficiently. And, you get a better result.

Related links:
My Still-life Photography Adventure!