Tag Archives: Portraits

Action portraits… easy to do

Action Portraits

• Action Portraits •
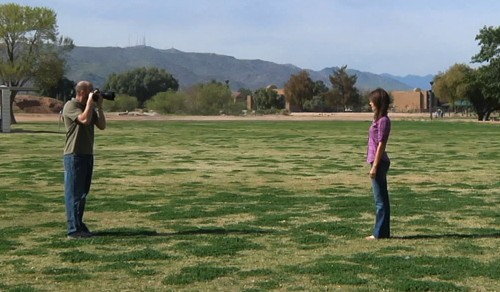
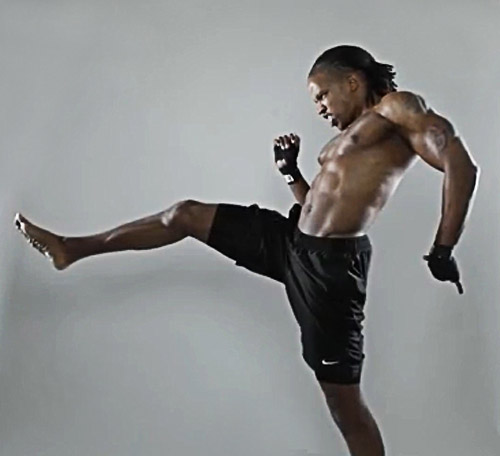
Getting the shot in action situations is not difficult although the lighting can prove a key aspect of success. (Shot taken from the video)

Getting it right…

Most photographers have a go at action shots. Vehicles are common targets – they are easy to find and fun to do. Action portraits can be great fun too and you can do them at home.

Lets talk flash…

 Set up pictures at home to show some action.

Easy action shots at home for anyone.
“Some more bed-jump!!” by Mr Din, on Flickr  External link - opens new tab/page

In its most basic form, it’s a portrait of someone in motion (action?). The wonderfully muscled fighter in the shot above is one way to go. On the other hand pictures of your grand children jumping into the air can be just as effective – and probably more relevant for many of us!

Use off-camera flash for best results

The basic technique is to capture the action with a flash. You can use the on-board flash on your camera. However, it will tend to leave tight shadows on the wall behind the action because the flash is directly in line with the optical axis of the camera. Such shadows look artificial and are difficult to remove in post processing. They look as if there is a slight double image. In the picture of the jumping children the flash is from the left hand side. If you look carefully the shadows are projected away from the kids giving a more realistic feel.

Off-camera flash can be placed to the side of the shot and used to illuminate the scene, give it a little depth and off-set those harsh shadows. For this you can use an off-camera flash. I use this one…

YONGNUO YN460 Flash Speedlite for Canon Nikon Pentax Olympus…  External link - opens new tab/page
This is an excellent buy… it is inexpensive and can be used for any off-camera flash situations. It is reliable, robust, flexible and effective.

I have several of these flash units. At about one fifth of the price of a branded product they are excellent value. If you want to get something a little more sophisticated you can get the YONGNUO YN-560 II Flash unit  External link - opens new tab/page – also a great product. With inexpensive remote flash triggers  External link - opens new tab/page you can set them off when not connected to the camera.

What are you going to capture?

Plan out your scene in advance. You will need someone to be the action taker. You could use more than one person. Then, work out what they are going to do. Jumping on the spot is a favourite. You also try jumping or stepping off something like a chair or low table. You can do skipping, walking, Kung Fu, Juggling, tumbling, hula-hoop, playing ball… well all sorts of things.

How do you do it?

I am assuming that you will be working in a domestic room with a white wall behind the actions.

It is best to use a robust tripod to mount your camera. This is essential. Action shots often cause floor movement and you want a good tripod (Manfrotto 055XPROB)  External link - opens new tab/page and tripod head (Manfrotto 322RC2 Grip Ball Head)  External link - opens new tab/page to give you a chance.

You will need to pre-focus your shot and have it ready to take because you cannot easily compose for action in progress. So set up the camera in advance. Here are some typical settings to get you started…

  • Turn off image stabilisation on your lens.
  • Focus your lens on your subject then turn off the auto-focus.
  • Set white balance to the appropriate ambient light setting.
  • Set ISO to 200 (or 400 experiment).
  • Aperture priority (select F5.6 as a start) [Shutter speed will be set by the camera].
  • Flash synchronisation – 200ths or 250ths of a second (if you need to set it check your manual).
  • Flash setting, try the lowest setting or 1/16th or 1/8th power – again, experiment.

This will give you appropriate starting points. Check you shot and then make any changes to the settings. If you click up or down a setting – say aperture or ISO – then the camera will compensate with a different shutter setting for you. Experimentation is good!

OK, now you are ready for action… this part takes a little practice. The idea is to sit next to your camera ready to push the shutter button as soon as the action is where you want it. As you have already lined up your focus the person can now perform and you can press the button as you see fit to capture your shots. Fire away, enjoy yourself.

Two tricks you have learned here

1. The pre-set-up of your shot is important. There are lots of situations where you can do that. So think about it – that is one of the benefits of having a tripod.
2. Flash! The way to capture a good shot like this is to have a very fast shutter speed. That freezes the action. However, I have suggested you hand the shutter speed to the camera by using the “aperture priority” mode. Well, you can in fact control shutter speed another way. By varying the flash duration. “What?”… I hear your cry. “You did not tell us about that control! But I did. Flash intensity is always the same for any given micro-second. It becomes more intense for the sensor if you leave it on longer. When you set the power of the flash to low power you are actually shortening the length of the flash. Hence you are more able to freeze the action. However, to do this you will need to have your ambient light lower. So using natural light rather than bright room lights works better for this technique.

See how its done in a video

In the video you can see all this action in a full process. The photographer, Joel Grimes, starts off by some discussion about how he came to discover this secret and how he used it in a studio context. Then from about six minutes into the video he shows you how to take the shots.

Remember that the settings are important. He mentions about low power and says that it works to freeze the action IF the flash is more intense than the ambient light. Watch out for that.

One other thing worth looking at is the shot progression. He is constantly assuring his model that he has done a good job. Then he is at the same time developing his shot. He is constantly evolving the positions and situations until he gets the shot he wants. This is critical. Make sure you look out for odd lighting effects, hands over face, bits of body out of the frame etc… He works the shot to reach his ideal as he visualised it – then stops. Even great photographers have to practice and perfect a shot. This is quite a helpful lesson about that. Enjoy!
“Special FX, High Speed Action”

Framed show  External link - opens new tab/page

Comments, additions, amendments or ideas on this article? Contact Us
or why not leave a comment at the bottom of the page…

Like this article? Don’t miss the next — sign up for tips by email.

By Damon Guy (author and Photokonnexion editor)

Damon Guy - Netkonnexion

Damon Guy (Netkonnexion)

Damon is a writer-photog and editor of this site. He has run some major websites, a computing department and a digital image library. He started out as a trained teacher and now runs training for digital photographers.
See also: Editors ‘Bio’.

Learn to shoot while controlling the depth of field…

Depth of Field

• Depth of Field •
Work with Depth of Field in mind. It will help you to control the blur that provides soft and un-distracting backgrounds.
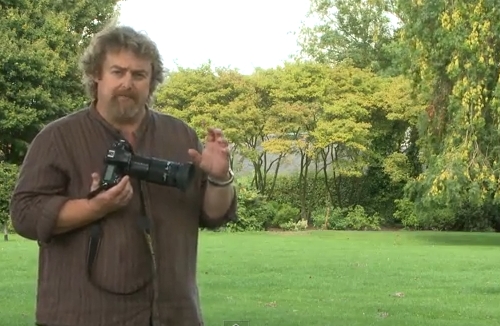
(Image taken from the video.)

Shooting with Depth of Field

The controlled use of Depth of Field (DoF), when done skilfully, is a central pillar of artistic success in photography. To learn how to properly control its use will help you to master many challenging situations.

Getting the measure of Depth of Field

Following the great response from “Understanding depth of field” yesterday, here is another video. In this one Mark Wallace shows how the three basic controls of DoF actually affect the clarity and blur in fields where depth of field is visible. It is important to watch the settings as he takes the pictures. Follow how the blur changes as the settings change.

SnapFactory  External link - opens new tab/page

Comments, additions, amendments or ideas on this article? Contact Us
or why not leave a comment at the bottom of the page…

Like this article? Don’t miss the next — sign up for tips by email.

By Damon Guy (author and Photokonnexion editor)

Damon Guy - Netkonnexion

Damon Guy (Netkonnexion)

Damon is a writer-photog and editor of this site. He has run some major websites, a computing department and a digital image library. He started out as a trained teacher and now runs training for digital photographers.
See also: Editors ‘Bio’.

Handshake blur – do your shots suffer?

Handshake Blur Problems?

• Handshake Blur Problems? •
It is so easy to lose sharpness in your shot because your hands make tiny movements. There are simple ways to fix it. Here’s how…

Handshake blur – a cause of blurred shots.

It is not the only cause of blur, but it is more common than most learners think. Handshake blur is a devil in the camera. Or is it?

In auto modes, most of the time, the camera will cope and help keep your shots sharp. When you get more advanced and start to use manual modes then the problems arise. Most people are perplexed – their shots appear to be getting more blurred as they get more advanced. What is causing this handshake blur?

Auto modes limit your photography

Auto modes are set up to average out the conditions you encounter to give you a “reasonable” result every time. The auto mode is set up to compensate for your handshake blur. It will tend toward higher-than-necessary shutter speed for example. That will help you to freeze the shot, cutting the handshake blur. When you encounter more challenging shots the camera cannot produce the results that manual modes produce.

As you advance you want to start doing things that give you more creative control. This is when manual modes help you. However, working the camera appears to become more technical. In fact it is just responding to more sensitive settings – the ones you choose. What you may not realise is that your camera holding, stance and breathing have an impact. You need to be more sensitive to those when you hold the camera. Take everything into account – personal body movement and breathing.

Toward a handshake blur cure…

Handshake blur is quite a technical problem. The camera manufacturers have been working to improve the response to handshake blur for years. Image stabilising mechanisms are built to help reduce handshake blur problems. Good ones can reduce it a right down. And, you need to work on it too. So how do you stop the problem?

There are three basic responses to handshake blur…

  • Increase shutter speed freeze the picture in time. If the shutter is open for a shorter time your hand has less opportunity to move. Then, blur is reduced.
  • Improve the way you hold your camera. The basic hand position is one hand under the lens and one hand holding the body ready to push the shutter button.
  • Improve your stance and breathing. Your body is acting as a tripod. If you are wobbly, so will your shot be! A practiced stance, will help your stability.

You can read my guide to a good stance and breathing techniques in “Simple tips for a good stance”.

There is another response that’s hardly ever mentioned… but it’s extraordinarily important. Most advanced photographers never mention this. They don’t think it is a problem. Working mostly with beginners I know it can be a huge issue. The problem is…
Muscle tone/strength
…even fit people suffer from weakness with a camera at first. I find that disabled people and older people are more sensitive too. Handshake blur can have a big impact on anyone. It is not something to worry about though.

Cameras are quite heavy – especially DSLRs. They are also unbalanced – long lenses make them more-so. People who are not regular camera holders do not develop the fine muscular control and strength needed to hold a camera and use it.

Sure, one or two shots are OK. If you are on a longish shoot, even tough men find they are unaccustomed to the position and control of a DSLR. Your shots slowly lose sharpness as you get tired. Through a whole day handshake blur can be a real issue.

If you are fit, and if you hold a camera a lot you will find your muscle tone and control improves. So will your control over handshake blur. You don’t have to do weights or go to the gym, although that will help. All you have to do is to carry your camera around and use it regularly. Not too much of a problem! The practice will put strength in your arms, shoulders, fingers and hands. Before long you will be steadier with a camera, reduce that handshake blur and improve the sharpness – a lot.

If you are disabled, have problems holding the camera, or suffer from weakness a chest harness can help. Check out DIY Camera Chest Harness for Weak Hands & Arms

Handshake blur… a video

In this video Mike Browne shows us the things I have mentioned above (except the muscle tone part) and how to put them into practical use.

Uploaded by Mike Browne  External link - opens new tab/page

Comments, additions, amendments or ideas on this article? Contact Us
or why not leave a comment at the bottom of the page…

find out more...Photokonnexion tips by email
If you enjoyed this article please sign up for our
Tips by email service.
                                                 Find out more

Damon Guy - Netkonnexion

Damon Guy (Netkonnexion)

Damon is a writer-photographer and editor of this site. He has run some major websites, a computing department and a digital image library. He started out as a trained teacher and now runs training for digital photogs.
See also: Editors ‘Bio’.
By Damon Guy see his profile on Google+.

Everybody Street… a new documentary about street photography

Video

Video

Documentary released for Film Festival.

Released at the “Hot Docs International Film Festival”, Everybody Street is about the street photography art of New York. Focusing on a range of street photogs it opens up the everyday reality of street photography.

The trailer for the documentary has been released and provides an insight to what may be in the documentary. It shows some stunning shots and some powerful insights. However, it also takes a rather voyeuristic and antagonistic view of street photography. While I personally don’t aspire to that approach there are others that do.

I believe that to act as an antagonist on the street is both dangerous and unnecessary. Personally I believe in respect, contact and participation in the street scene. But I do acknowledge that there are some people that take a different view.

I think it is worth seeing this documentary and I hope that one day it will be widely available. For now I leave you with the trailer. See what you think. The video is just over two minutes.

EVERYBODY STREET – New York City

Everybody Street Trailer from ALLDAYEVERYDAY on Vimeo.

Visit the website for the documentary at: http://everybodystreet.com/  External link - opens new tab/page

Comments, additions, amendments or ideas on this article? Contact Us
or why not leave a comment at the bottom of the page…

find out more...Photokonnexion tips by email
If you enjoyed this article please sign up for our
Tips by email service.
                                                 Find out more

By Damon Guy (author and Photokonnexion editor)

Damon Guy - Netkonnexion

Damon Guy (Netkonnexion)

Damon is a writer-photog and editor of this site. He has run some major websites, a computing department and a digital image library. He started out as a trained teacher and now runs training for digital photographers.
See also: Editors ‘Bio’.

A simple way to bring out your subject in environmental portraits

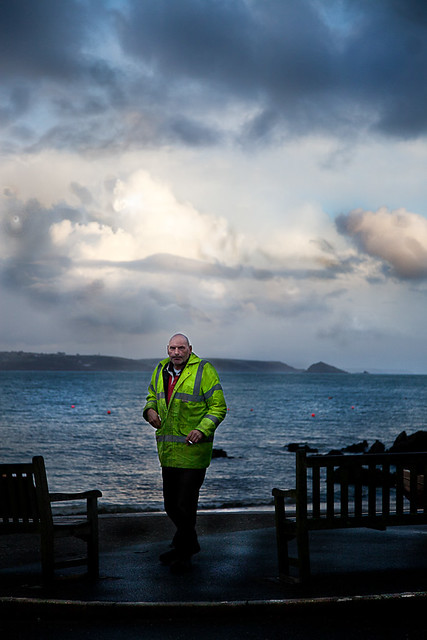
• Early morning worker • Bring out your subject in environmental portraits.

• Early morning worker •
Click image to view large
• Early morning worker • By Netkonnexion on Flickr External link - opens new tab/page :: Environmental portraits
A great way to show off your subject is to find a way to make them brighter than the background. This projects them right out into the viewers eye. Environmental portraits are particularly good subjects for this technique.

Subjects should come first.

Every photograph should have a subject, but sometimes they get lost in the overall picture. If that happens you lose the viewers eye. Make the subject stand right out. In environmental portraits, one of the best ways to do that is to bring out your subject. Find a way of making them brighter than the background.

Environmental portraits

Most people shots, whether street photography, simple portraits, or even an event shot benefit from emphasis. There are lots of forms of emphasis. Here are a few examples…

  • High contrast
  • Big colour variations
  • Placement in the frame
  • Perspective…

Probably one of the most effective forms of emphasis in environmental portraits is subject highlighting. Environmental portraits are where a person is captured in the context of their environment. You can see them as they are in that environment. This helps you see into the person and their character.

If you can use highlighting your emphasis has two impacts. First, it provides an immediate draw for the eye. This is because the eye is drawn to the brightest spots in a picture. Secondly, the scene takes on more depth because of the impact. The very fact that the background is more subdued helps the eye to perceive the depth. The highlight creates a wider contrast between the darkest and lightest parts of the picture. In environmental portraits this has a profound effect on the eye.

How?

During the middle of the day the ambient light is very bright. You have to take care when highlighting to prevent blown out areas or over-exposure. There is one way to do it. Pick out your subject as the focus. Then turn down your exposure to slightly underexpose your background. Then use a manually set flash to illuminate the foreground subject. You will see the background as darker from the slight under-exposure. The subject will be properly exposed by the flash. Be careful not to have your flash too powerful. It will over expose the foreground and leave the background too dark. You might need to practice your technique.

In the photograph above I was lucky enough to capture the subject in bright clothes. The incidental light that did most of the work for me. A little brightening in my post-processing helped bring out the details. The emphasis of the light made the foreground object (the man) stand out. Often, what makes environmental portraits powerful is the understated background lighting.

In environmental portraits, bringing out the subject with highlighting is about taking advantage of natural lighting. Nearly every situation has local lighting variations. So if you take the time to look around your location and find light/shadow situations you are sure to find some place where the natural highlighting will give you an advantage. Most of the time it is down to becoming aware of the light and shade relationships.

Two lessons

What we should be doing when the light is right is highlighting the subject. It gives the picture impact and depth. When doing environmental portraits you will always have local light variations. Take advantage of them where you can. If you need to, use a little flash to emphasis the subject and make them stand out.

Comments, additions, amendments or ideas on this article? Contact Us
or why not leave a comment at the bottom of the page…

find out more...Photokonnexion tips by email
If you enjoyed this article please sign up for our
Tips by email service.
                                                 Find out more

Damon Guy - Netkonnexion

Damon Guy (Netkonnexion)

Damon is a writer-photographer and editor of this site. He has run some major websites, a computing department and a digital image library. He started out as a trained teacher and now runs training for digital photogs.
See also: Editors ‘Bio’.
By Damon Guy see his profile on Google+.

A fast and simple introduction to portrait photography

How to make a digital camera

A rapid but full introduction to portraiture


When I introduce a new idea or a concept in these pages I often provide a video to help put the point across. Well, here is a video that stands up on its own. It is a light and simple introduction to portraiture. It bombs along at a great rate and has plenty to say about good principles in portrait photography. So, without further ado here it is. It’s 4mins 15secs long.

How to take great portrait photos


VideoJug  External link - opens new tab/page
Portraiture – Resources on Photokonnexion.com

Comments, additions, amendments or ideas on this article?
Contact Us
or why not leave a comment at the bottom of the page…

Do you know what street photography is? A look behind the scenes

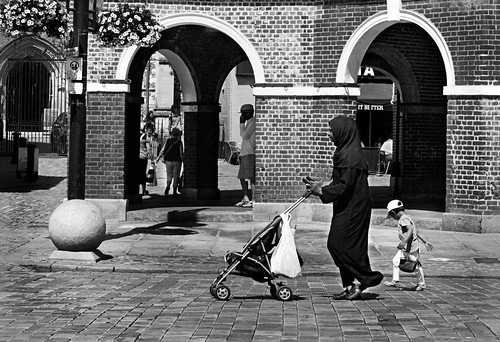
• Lady in black •

Click image to view large
• Lady in black • By Netkonnexion on Flickr External link - opens new tab/page
The street photographer looks to expose life as it is on our streets and much more…

What do we really mean by street photography?

The concept of street photography covers a lot of ground and means many different things to the people who do it. Simple descriptions of street photography might include things like:

  • Candid photographs taken in public places
  • Portraits and depictions of ordinary people out and about
  • Pictures telling the stories of people living their lives
  • The normal behaviour of individuals seen in public
  • Extraordinary scenes in ordinary places
  • The street environment with or without people
  • Things which catch the eye photographed in public places
  • Extraordinary sights amid people going about their daily lives
  • A micro-social documentary through a still photograph
  • The drama of an event in the every day lives of people on the street

Street photography is a broad spectrum subject. Mostly, street photography is about the sights and significant micro-events that attract the eye of the photographer in urban places or other popular places. The idea of “street” means where people can be seen. Or, where they “may” be seen. It is not absolutely necessary to have people in the scene. Although people usually provide the focus of interest.

In fact, beyond these simple descriptions of the craft there are other things. The need to have sympathetic framing, simple backgrounds, good composition and excellent timing go without saying – these are a part of photography in general. Beyond those there are other themes underlying the term “street photography”…

The environment

The ‘street” environment is as important as the people themselves in that it provides a context. The environment and the people together makes the scene interesting. Background provides the cultural context for the shot and so it is important to include it. Nevertheless, many street photographers will work to minimise the impact of the surrounding scene so they can focus the viewers eye on the behaviour of the people of interest. The choice to show the wider scene or to focus right in is both an aesthetic one and a contextual one. You have to consider what would make the picture as visually pleasing as possible and at the same time make sure you are able to show the subject in the best possible environmental context. Difficult choice – but an essential part of working the street scene.

Because the environment is important street photographers often prefer to work with lenses that give a wider angle than other DSLR users favour. A wider view captures the scene as well as the subject person. A common lens for street photogs would be a 35mm or 50mm fixed prime. These lenses tend to give you a more immediate correspondence with the scene you are in. They are close to the focal range and angle of view that the eye sees. They reduce distortion and give the impression of the scene through the photographers eyes. Street photography is a unique and real experience for the photographer. The best of them try to convey that experience in a very real way to the viewer too.

Black and white or colour

Most of the well known names in street photography worked with black and white film. Perhaps for this reason today’s street photographers tend to work in black and white too. It emulates an era of the past with a stark reality and a retro-cultural look about it.

Some street photographers dispute the (cynical) view that black and white is the medium of choice because it promotes a ‘retro’ atmosphere and see that as an insult, a cheapening view of their work. Instead they’d argue B&W street pictures have more impact.

It has often been argued that when you take colour out of a photograph it almost purifies the picture. Certainly much of the distraction is taken out. Colour does draw the eye. A Canadian photojournalist was once quoted saying…

“When you photograph people in colour, you photograph their clothes. But when you photograph people in Black and white, you photograph their souls!”
Ted Grant

There is much to be said for removing colour to see the inner person. However, it is not obligatory to work in black and white for street photographers. Your choice is part of the way you present the scene you are photographing. There are merits in colour and in B&W media. Making the right choice for your picture is a part of the success of your final image.

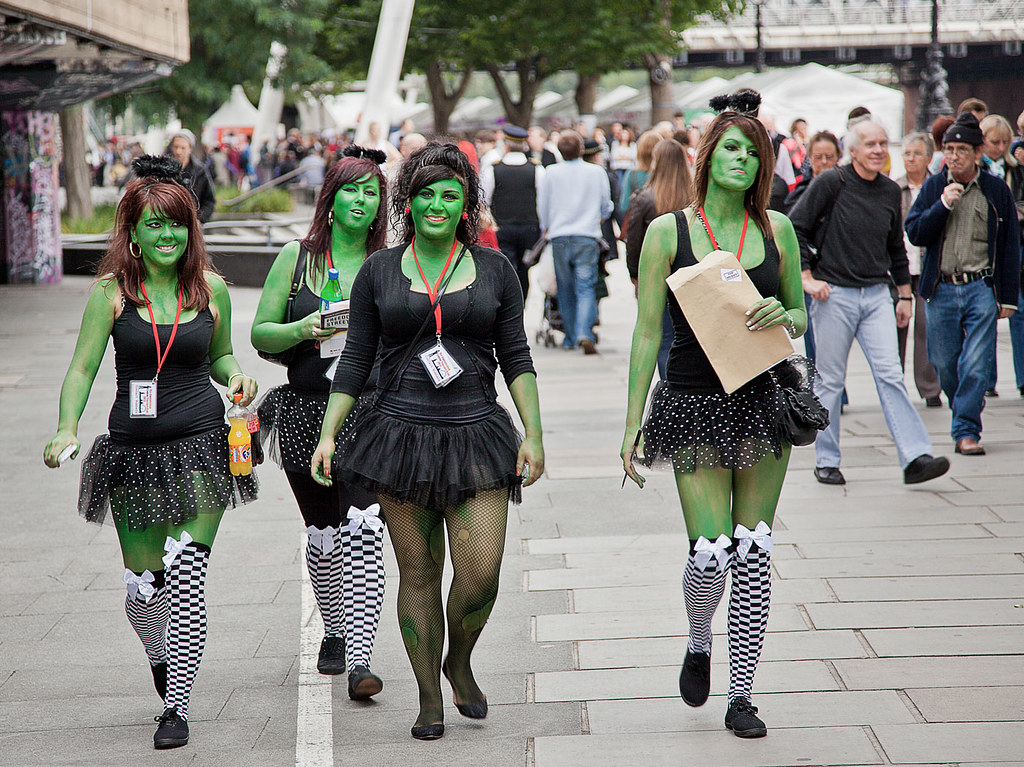
• Green girls •

• Green girls •
Click image to view large
• Green girls • By Netkonnexion on Flickr External link - opens new tab/page
Sometimes pictures simply don’t work in black and white. You have to make the choice. There are no rules that say you must do street photography in monochrome.

Cultural context

Street photography is a worldwide phenomenon. However, there are undoubtedly cultural contexts that tend to make certain places more interesting. That is especially the case when the viewer is seeing something they consider exotic or out of the ordinary. Street photographers take pride in finding the ‘unusual’ in otherwise ‘everyday’ places. So where possible street photographers will search out the poorer environments, the degenerating places and the places that their viewers would not go themselves. On the other hand they may find interest in the very essence of modern culture and how that actually contrasts with local way of life there. In this way they can help their viewers see another culture, observe different behaviours, see another way of life or shock their viewers about how others live.

Seeing other cultures and other places in the world is part of the wider scope of the art. You may choose to travel to far away places. However, street photography is found everywhere. In your local town, urban area or event space you can find interesting and captivating scenes everyday. Watching your fellow citizens is great sport. It’s funny, serious, interesting, frightening and enlightening. Showing your culture in all its facets is interesting. It requires a strong sense of place, character and understanding of your subjects and where they are.

It is often the deep contrasts that make a street photograph successful. The ordinary and unremarkable are the things that are not celebrated because of our familiarity with them. After all they are in our daily view. Strange or culturally contrasting situations draw the eye. It is a part of the street photographers observational skill to isolate and therefore to highlight these inconsistencies in our view of the world. It is not about travel, getting around the world, but seeing into our own locality and monitoring the differences between each of us and the others who share our streets.

Taking this alternative look at our own cultural space is one of the really difficult things about street photography. Henri Cartier-Bresson, sometimes referred to as the father of street photography, once said…

To interest people on far away places… to shock them, to delight them… it’s not too difficult. It’s in your own country – you know too much when it’s on your own block. It’s such a routine… it’s quite difficult… in places I am in all the time, I know too much and not enough. To be lucid about it is most difficult… But your mind must be open. Open-aware. Aware.
Henri Cartier-Bresson

In his strong French accent, he was trying to express the difficulty of overcoming the ‘ordinary’ view and seeing the extraordinary things about our culture that are in plain sight.

Street photographers are the ultimate people watchers and observers. They look for the extraordinary in the ordinary. They are able to articulate culture through the medium of the very people they sit next to on the bus. They are in the scene and a part of the picture they are creating with others around them. At the same time they are documenting it and living it, but bringing out the things that other people miss.

Origins

Much of the body of street photography was generated in the 20th century. During the 19th century the film speeds were low and exposures too long for effective fast capture of people going about their everyday lives.

There is currently a huge resurgence of interest in street photography. It has come about partly as a response to a renewed interest in photography. It is also partly due to recent significant collections of work from street photography artists being published around the world. A whole genre has developed from the interest of key individuals from photographic history. Some of the great street photographers we recognise today worked in the years from around 1900 through to the 1980s. Some of the well known names are…

  • Henri Cartier-Bresson
  • Diane Arbus
  • Vivian Maier
  • Alfred Eisenstaedt

There are many more (See: Category: Street photographers  External link - opens new tab/page). These bodies of work are of key interest today to many people. Academics, street photographers themselves and ordinary people all have an active interest in the past and particularly of places they know. Their photographs offer a unique insight to both the time and place – but also of the photographer themselves.

Today’s street photographers are providing an insight for future generations into the way we live now. It is the ordinary and extraordinary things that happen in ordinary lives that street photographers want to search out. Diane Arbus, working in the middle of last century, is famously quoted as saying…

I really believe there are things nobody would see if I didn’t photograph them.
Diane Arbus

Her interest and focus was on people who were different. She called them freaks. Often they were on the fringes of society as well as hidden from the eyes of the ordinary person. Today we are slightly more tolerant of the type of people she photographed. Nevertheless, we still label people who live differently by describing them in a “politically correct” manner. In effect that is a euphemism that is more damning than a direct label. Street photographers can open up the difficult lives that some people live – help them to become a part of a wider scene, a more tolerant world.

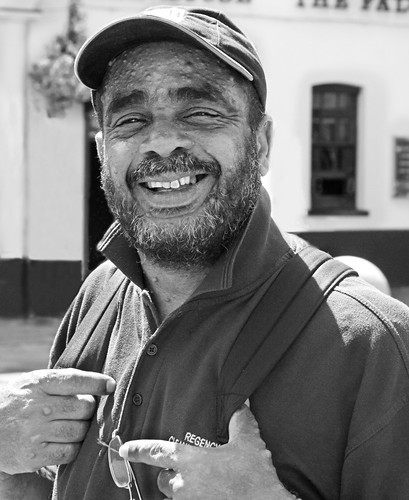
• All Smiles •

• All Smiles •
Click image to view large
• All Smiles • By Netkonnexion on Flickr  External link - opens new tab/page
Truly candid street photography is about bringing out the inner essence of the people you photograph.

Celebrating the rich diversity of people and the things they do is important. It makes human beings so different to the animals. We can and do respond so differently to each other and the situations we find ourselves in. It’s a cultural cliché that almost defines us.

Successfully seeking the essence of the person being photographed is an expression of the photographers vision and an exposure of a culture. It is another tiny revelation about ourselves as humans and as members of society at large.

Respect and communication, doing and being

One of the hallmarks of street photography is to be excited and invigorated. The situation may even make you nervous. This is right and proper. Representing people in a photograph makes you a conduit for who they are. You must respect them. Holding a camera is a responsibility and a communication. You are saying something to the people who see you working the scene. So don’t ‘do’ street photography as if there is a bad smell under your nose. Be a street person who happens to be engaging with people while holding a camera. Then you will be a part of the scene. With respect, and contact with the people you photograph, you become a part of the life you are depicting. Not only an observer, but a participant. Then you will see more clearly, the spirit of the people you want to document.

Comments, additions, amendments or ideas on this article? Contact Us
or why not leave a comment at the bottom of the page…

find out more...Photokonnexion tips by email
If you enjoyed this article please sign up for our
Tips by email service.
                                                 Find out more

By Damon Guy (author and Photokonnexion editor)

Damon Guy - Netkonnexion

Damon Guy (Netkonnexion)

Damon is a writer-photog and editor of this site. He has run some major websites, a computing department and a digital image library. He started out as a trained teacher and now runs training for digital photographers.
See also: Editors ‘Bio’.