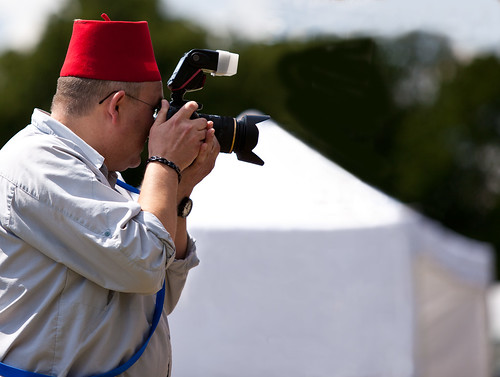
Tag Archives: Planning

Three easy photography time savers

Making time by saving time.

We would all like to spend more time with our camera. If we can save time on our shots we will have time to take more of them. It is about being photographically efficient.

1. Plan your shoot

Most photographers find out the hard way. They go to do what they think is a great location to do a shoot. When they get there they find out that all is not as they thought. Here are some common problems encountered because of lack of planning…

  • No photography allowed – eg. public buildings, churches, malls and private offices.
  • Area is too large to complete everything you wanted to do.
  • You cannot find what you want. Wild life is especially difficult to predict.
  • Did not check the weather at the destination before leaving.
  • Failed to check up on local information with local people/camera clubs.
  • Do a little planning and you could save your whole day or get more shooting done.

    2. Use a tripod and work sharp

    The aim of great photography is to do as much as possible to create sharp images in camera. Sharpness is much sought-after among those who are trying to improve their photography. Oddly enough most improvers are too anxious to move onto the next shot. In their haste they sacrifice sharpness, or fire off a machine-gun-like series of shots in the hope that one of them will make the grade. During a day you will get hundreds of shots of not very many subjects.

    OK… here is the news. After the shoot you will spend hours going over all those shots choosing the sharpest and doing the post processing. Professional photographers know that they want two things: a sharp shot and a good composition. Consequently they take a little more care and time making the shot in the field. They use a tripod and follow a procedure for checking their composition and ensuring sharpness. Check these posts out for some ideas…
    An old sailors trick to improve your photography
    The fifteen second landscape appraisal
    Three Tips for Pin Sharp Shots with a Tripod
    The Zen of sharpness – 12 easy ways to improve
    Here is the trick. If you learn to do sharp shots at the outset you save time two ways. First, you will be able to efficiently arrive on the scene, set up, get the shot, move on. Secondly, you will save hours of time on your computer trying to find the right shot and then spending time cleaning it up. You will have fewer shots of more subjects.

    Know how you are going to shoot your subject

    Every photographer has to learn what works and what does not. You can save a lot of time on that learning curve by researching the best way to take particular shots. Online photographs are perhaps the best way to do that. When researching a new shot Google Images is a great resource. Go to Google and select images, then enter the subject you want to shoot. There will be thousands of images to choose from so you can get some great composition ideas for your subject. Look at the angles of the shots. Check the point of view. Look at backgrounds… all these give you great ideas. It is not cheating. It is doing what every artist has done for centuries – getting a great understanding of their subject and then adding their own creative touch. Not only does this save you time on the shot, it helps you develop your creativity. That’s a win:win situation.

    Saving time is cool and gives you more creative time on the shots you want. Spend time on these points and you will earn the time back later hundreds of times over.

    find out more...Photokonnexion tips by email
    If you enjoyed this article please sign up for our
    daily email service.
                                                     Find out more
    #11030#

    By Damon Guy (author and Photokonnexion editor)

    Damon Guy - Netkonnexion

    Damon Guy (Netkonnexion)

    Damon is a writer-photog and editor of this site. He has run some major websites, a computing department and a digital image library. He started out as a trained teacher and now runs training for digital photographers.
    See also: Editors ‘Bio’.

    Principles for excellent photographers – yes, thats you!

    No matter how quirky, make sure you drive your photography forward...

    No matter how quirky, make sure you drive your photography forward…
    Quirky By Netkonnexion on Flickr External link - opens new tab/page

    People who excel do so because they try.

    My students of photography are exceptional. They are dedicated to learning photography, clever, talented and they enjoy what they do. They don’t know how talented they are, they are not ready to move to the next level or to take charge of their photographic destiny. Most of them hold back.

    Those students are you! Photography is a uniquely self driven pursuit. You don’t need to be “ready” – you need to have a go… Everyone can be exceptional if they try; most don’t.

    Here are the principles to help motivate the next move. They will take your photography to the next level and get your pictures out there.

    Imagine…

    You can do some incredible things with photography. Imagine what you want to do. No matter how amazing it sounds, no matter what you want to achieve, or how out of your reach it seems – imagine yourself doing it. If you have that dream, that goal, that vision in your mind, you are on the road to success.

    Contract…

    This is your dream. No one else’s. Only you want it. Make a deal with yourself to fulfil your own contract. You are going to reach that goal you envision. You will get help and work with other people, but that contract is your guide. Be your own leader, worker, supporter, friend, cheerleader troupe and advocate.

    Plan…

    Your contract is your guide. Plan how to fulfil it. Make your path obvious, map it clearly. Don’t be afraid to risk changes – be flexible. Your development can teach you better ways. Work to move quickly to your goals. Use your dream. The paths you take should reflect the importance of your contract. Take one step at a time and move smoothly forward.

    Risk…

    Do things that invigorate your soul. Get the adrenaline pumping. Do the risky things despite your misgivings. Publish a picture, dare to write to a celebrity for a photo-shoot. Challenge your limits. Take risks to push your photography beyond comfort. Make your heart pound. Don’t protect yourself or create limits. Take some risks, it opens doors. Try new things, it makes you take a new look at your photography. Start immediately, stretch your limits.

    Toughness…

    Doing new and exciting things will get you attention. Sometimes you will be the toast of the town. Sometimes you will feel you are drowning in the pool of criticism. Stand-outs, leaders and risk-takers all have enthusiastic followers. The down side is the critics cluster around too. But when the going gets tough, the tough get going! Being neutral will consign you to obscurity. Get used to being on the crests of waves and in the trough between them. They come together, but the benefits win out. Stay with it.

    Readiness…

    You don’t need to wait for validation, promotion or the big break. You are not going to be ‘discovered’. You are ready now. Moving on is liberating and simple. Take the next step on your own initiative. You know you can do it. So take the next move – dare to work to better your photography, dare to be bold. Don’t question yourself – you are ready.

    Different…

    If your vision is different, innovative – that is good. Dare to think different. Push your style to its limits. The unique, quirky and out of the box style gets attention. Don’t listen to the inner art critic. You can let your style out. You can realise your artistic and photographic talent. Be different. It will be your own personal validation. It is a licence to show people how you see. Seeing is what photography is about. Be quirky – show the world.

    Agendas…

    Ask for help. Ask for advice. Make your own decisions about moving forward. Assess advice yourself. Be confident in your assessment. Work to your agenda. Your development, your talent, your ideas are only going to be successful because of you. Other people have agendas of their own for helping and advising. While some things others say will be useful – some will not. Review your “contract” with yourself. Check that the advice of others fits with your inner direction. Test all advice you are given and follow only the advice that benefits your long haul goals.

    Respite…

    Focus your attention. Do the unthinkable. Push the limits, take your photography to the edge – push your skills. Remember, learning and redefining your boundaries is hard. You will be challenged and you will find it tiring. Stretching yourself becomes a compulsion once you start. Make sure you have some “you” time. Take time for respite. Be rested – be more effective.

    Share…

    Share your knowledge, skills and talent. There is no greater self development than to share and teach. Be generous with your help of others. Give of yourself so that you can feel fulfilled as a person as well as an artist and photographer. If you are helping those who will be the future of photography you will also be the parent of a trend. Don’t hold back your talent. Let others benefit. A wave will carry you for free. Commanding the tide not to rise is futile and saps your strength. Share and you will reach your goals.

    Enjoy!

    find out more...Photokonnexion tips by email
    If you enjoyed this article please sign up for our
    daily email service.
                                                     Find out more
    #11030#

    By Damon Guy (author and Photokonnexion editor)

    Damon Guy - Netkonnexion

    Damon Guy (Netkonnexion)

    Damon is a writer-photog and editor of this site. He has run some major websites, a computing department and a digital image library. He started out as a trained teacher and now runs training for digital photographers.
    See also: Editors ‘Bio’.

    Get talking to your street photography subjects…

    Street photography: It helps to talk to your subjects!

    Street photography: It helps to talk to your subjects!

    The communications element in street photography…

    Really, there are so many different ways to approach street photography that it is no surprise that people don’t know where to start. Today Mark Wallace discusses his communicative approach to the art. While some tend to be observers of people by capturing candids, he really likes to get into conversation and becomes a part of his own scene.

    In the last street photography video, “Famous street photographer talks about his work” we saw Travis Jensen using a compact but fully functional camera. In the video today Mark Wallace uses a full frame, full sized DSLR. There is a debate about the camera you use in street photography. Do you go with a big DSLR and risk being really intrusive? Or, do you go with a little camera and risk not having control.

    These variations on a theme are fine. Street photography is all about doing what you do best. There is no one way to be a street photographer. Everyone takes their own approach. This is exactly what is meant by your personal style. It is your approach, your way of doing street photography.

    Digital Photography One on One: Episode 70: Street Photography

    While street photography is endlessly fascinating the fact that we all take different approaches means there is always a benefit in listening to other peoples experiences. It helps you to think around your own approach. So, see what you make of Marks’ spin on the subject. Enjoy!
    SnapFactory  External link - opens new tab/page

    find out more...Photokonnexion tips by email
    If you enjoyed this article please sign up for our
    daily email service.
                                                     Find out more
    #11030#

    By Damon Guy (author and Photokonnexion editor)

    Damon Guy - Netkonnexion

    Damon Guy (Netkonnexion)

    Damon is a writer-photog and editor of this site. He has run some major websites, a computing department and a digital image library. He started out as a trained teacher and now runs training for digital photographers.
    See also: Editors ‘Bio’.

    Six things to consider for starting portraiture

    A dear friend

    • A dear friend •
    Click image to view large
    • A dear friend • By Netkonnexion on Flickr External link - opens new tab/page

    Portraiture – the photographers passion.

    Starting in portraiture can be daunting. We are going to look at the important things to consider when getting started with photographing portraits. There are also links to some of the portraiture resources available on Photokonnexion.

    This post is aimed at introducing the portraiture resources found here…

    Location

    Choice of location can make or break a portrait. If you choose an outdoor location you have to consider a range of issues like the weather, how to pose your subject and exactly what you will be putting in the background. The problem with outdoor portraits is that there is potentially a huge number of composition decisions to make. Taking the shot can be quick. Deciding on what background is right can take a lot of effort and research.

    If you are just starting out with portraits it might be better to focus on indoor shots. The environment and light is potentially simpler and the lighting more controllable. The essence of good indoor shots is to reduce the composition to a very simple background and lighting and to focus your attention on the subject. This gives you time to practice the posing, including expressions, and the lighting set up.

    Lighting

    Light and Lighting can be as simple or complicated as you make it. My advice is to make it as simple as possible. Most great portraits are done with one simple source light. Working with one light gives you the ability to try out shadow casts and hard light vs. soft light. Practice with simple ideas will help develop your skills more than working with confusing multiple light sources.

    Background

    This is not the same as the location (which is really more about the surroundings). When you are considering the background this could be as simple as a blanket suspended behind your subject. It could also be as complicated as a workbench that your subject works at. What you have to do is decide how to set it up, how to light it and how to place your subject in front of the background. You have to make a decision as to whether you are taking an environmental portrait (a large amount of the background is visible) or a simple portrait where the background is a minimalist setting, where you show very little of the environment and make it as simple as possible.

    It is better to start simple. Placing your subject in front of a coloured, white or black background is a great way to get started. You will be able to focus on posing your subject and spend less time worrying about what to include or exclude in more complex backgrounds.

    Posing

    The best advice for starters is to work with your subject. He or she will be comfortable with certain poses. Get them to start the posing. Then, when you see how they like to pose, you can ask them to vary it to get your light right and get them showing their best side (the left side of the face is best).

    Remember that that definition of the features of the face are defined by light and dark. Your poses should be aimed at using the shadow/light relationship to bring out your subjects facial and body features.

    find out more...Photokonnexion tips by email
    Enjoying this article? Please sign up for our
    daily email service.
                                                    Find out more…
    #11030#

    Props

    It is difficult to provide resources about props. There are as many props as there are things people can hold, wear, sit on, stand next or or play with. Yes, props can be pretty much anything you want. However, one thing is certain. Your portrait subject will suddenly come alive when they have a prop to distract them from the daunting prospect of the camera. Try to get them to work with a prop they are familiar with – get them to tell you about it or show you how they use it while you photograph. These things will make the comfortable and help them to relax. It will also show you the character of the person they are.

    Camera settings and lenses

    Some people will tell you this is the most important point. Others will say the posing, still others will focus on the other things above. How you set up your camera, and how you place your subject are very closely related. But there is a lot to learn here. Start simple so you can feel in control. If you are not yet working with manual controls then be comfortable with auto mode – try to become aware of the types of settings that seem to work.

    Exposure settings are an important study. There are some exposure links in the link box below. However, you should be concentrating on natural colours. The type of light you use is important to your exposure. I have one piece of adice on this. Beginners at portraiture almost always over-light. Keep your lighting soft and your exposure moderate and not over-bright to start. If you are using flash, turn it down. Bright flash always washes out flesh colours and sometimes causes nasty highlights on the face. It is worth reading up about how you can ruin your shots with flash.

    I hope that this article has provided you with some options for getting started in portraiture. Please spend some time going through the links on the portraiture resources page to get more detailed information.

    By Damon Guy (author and Photokonnexion editor)

    Damon Guy - Netkonnexion

    Damon Guy (Netkonnexion)

    Damon is a writer-photog and editor of this site. He has run some major websites, a computing department and a digital image library. He started out as a trained teacher and now runs training for digital photographers.
    See also: Editors ‘Bio’.

    How to decide what to take on a photo-walk

    • Evening Walk By The Lock •

    • Evening Walk By The Lock •
    Click image to view large
    • Evening Walk By The Lock • By Netkonnexion on Flickr External link - opens new tab/page

    A trip out is a key part of your photography.

    The photo-walk is a common photographic activity. Many amateurs take the photo-walk as the main way to enjoy their hobby. So how do you decide what to take with you each time?

    The purpose?

    The main problem with photography equipment is the weight. If you pack everything you will probably not use most of it and you will break your back carrying it around. The art of photography is not about equipment. It is about what you make of your shot.

    Every shoot is a way to achieve something. Of course you may be going on a stroll for the fun of it – no photographic aim. Nothing wrong with that. But if you want to choose some equipment to take with you it helps to have a purpose. Then you can choose suitable equipment for the purpose.

    So, if your photo-walk does not have a specific aim then create one. If you are, for example, going for a walk with the family, then decide what you think will be fun. Take a camera body and a wide angle lens perhaps? Make the aim to capture people in wide scope. Or, maybe, fix your zoom with a piece of tape so you cannot change the focal length. Then you can walk around to get the shot rather than zooming.

    There are many things you can do to set yourself a task. The idea is to create one thing you can concentrate on photographically during your walk. Work with the equipment you have taken even though you may encounter lots of different things to photograph. Your decision to work with pre-defined and specific equipment will present you with new creative photographic challenges. Set a purpose and develop your photographic skills.

    Purpose determines direction

    When you have a specific aim in mind for a photo-shoot the situation is already specific. You have a purpose to choose your equipment around. The best way to move forward is to plan what you want to do at the shoot location. Your choice of equipment should be closely aligned to what you expect to achieve.

    I find advance planning makes the difference. Even if you have not been to the location you should be able to find out about it. Do a Google search and check out the situation. Also do a Google image search for the location so you can get ideas from shots other people have taken. The idea is to narrow down what you want to get from the location. If you think you need one specific type of lens then take only that. For flexibility I try to take a maximum of two lenses to a shoot. One to tackle the main shoot. One to expand my options if that is possible.

    Lenses are the core of your equipment and tend to be weighty. Limit them to keep the weight down. Flash units, light modifiers, batteries, memory cards, cloths, light meters… there may be other equipment you want to take. If your planning is good you can cut that list. The type of shots you want to take will determine your lenses. The weather and time of day will help you figure out most of the other things you need. It is all about understanding what you are going to encounter. Then, be ruthless. Pack the equipment you need to meet your plan and nothing else.

    The point is…

    …have a purpose. Make sure every time you go out to do some photography you have a purpose in mind and plan to achieve it. That way you will be able to plan to get the most out of the situation.

    By Damon Guy (author and Photokonnexion editor)

    Damon Guy - Netkonnexion

    Damon Guy (Netkonnexion)

    Damon is a writer-photog and editor of this site. He has run some major websites, a computing department and a digital image library. He started out as a trained teacher and now runs training for digital photographers.
    See also: Editors ‘Bio’.

    The easy way to give depth to landscapes

    'Reflections on a lake' - Landscapes need to have depth to be effective. Layering them is the key.

    • ‘Reflections on a lake’ •
    Landscapes need to have depth to be effective. Layering them is the key.
    Click image to view large.
    “‘Reflections on a lake'” By Netkonnexion on Flickr External link - opens new tab/page

    Everybody loves an autumnal landscape.

    Come autumn we are all making great images of the colours and the changes. To be successful a landscape has to look like it has some depth. In this post we are going to look at the simple way to impart depth to a landscape.

    Layers

    The easiest way to create depth with a landscape is to trick the eye. You are not trying to defraud your viewer. You are simply convincing the eye there is more than two dimensions. This is easy to do because your eyes expect to see depth. What you need to do is to enable the eye to actually pick up significant markers that would lead them naturally into a landscape.

    There are lots of markers that you can use in composition. In fact in Easy introduction to ‘visual elements’ in photographs we identified lots of compositional markers called visual elements. When you compose a landscape using layers you are working with lines that create the markers for depth. The lines themselves are visual elements in the picture. They create boundaries for the layers in the picture.

    The example picture above is chosen for its simplicity. In the immediate foreground there is a patch of rock strewn grass. Not of great interest in itself, but it provides two elements. The larger boulder provides a bit of interest drawing the eye into the picture. It also seeks to divide the picture providing a visual balance either side. I will come back to this later.

    The grass-lake boundary is the first line we cross. It is a major visual element in the scene. Its existence creates the foreground layer out of the grass and marks the mid-ground layer as the lake.

    The lake itself is the central interest. In this picture it’s also the mid-ground layer. Great reflections always draw the eye. Then, on the far side of the lake is the next significant element/marker – the far lake shore line. This is the demarcation for the background layer – the trees. It is where the reflections originate.

    The three landscape layers, foreground, mid-ground and background create depth. As the eye, in 100ths of seconds, penetrates the picture your eye/brain system sees the lines marking the boundaries of these clear zones. Immediately, the visual elements become markers for the eye to measure its travel into the picture. Depth has been established. You now see into an image, rather than at a picture. Visually creating layers in your composition, like these, will impart depth to your landscape shots.

    More after this…

    What’s next?

    Once the eye/brain system has seen depth it remains in the minds eye. Of course if you want to sustain the viewers interest you have to find other things of interest. In this picture there are other ways the eye works through the image. The colours and tonal range are important, especially in autumn. The eye loves reds and russets. So that helps, as does the eye working to sustain an interpretation of the reflections. The ‘principle‘ there is the visual harmony between the reflections and the background layer.

    Two other compositional elements control the eye. Normally a central feature of a picture, like the boulder, would draw the eye and hold it there if it was substantial enough. In this case our boulder is of small visual weight. It is not a major compositional feature, but more of a visual element (a ‘form’). You will recall from Simple ‘Principles’ of photographic composition that the ‘Principles’ control the way the eye uses the visual elements. Here the eye flows into the picture by being drawn through the middle, having established depth the eye does not go out the other side of the picture. The trees hold the eye in the picture – they form a barrier. Naturally, the eye is now drawn to cycle around the reflections. Eventually the eye will pick up the next clue.

    This spot was chosen for aesthetics as well as the point of view for the shot because a central entry for the eye established the emphasis of both depth and a major point of focus on the middle ground. If you look carefully the lines that create the lake sides are narrower at the left side than the right. This funnel-effect will eventually channel the eye out of the picture on the right. The eye has a natural tendency to follow trending diagonals – no matter how slight – toward the wider ‘escape’ end. Yet, the boulder maintains a balance in overall visual terms between left and right. Eye movement is therefore under a tension to stay central as well as wishing to follow the flow to the right. This tension keeps the eye focused around the centre of the lake.

    Fickle!

    Yes, it is not a surprise that composition is a fickle thing. This is how I see my picture. In reality we all see it different ways. I have shown you how I rationalised the shot when it was taken. It may not work that way for you. If you have a different view why not discuss it in the comments. I would love to hear your interpretation.

    By Damon Guy (author and Photokonnexion editor)

    Damon Guy - Netkonnexion

    Damon Guy (Netkonnexion)

    Damon is a writer-photog and editor of this site. He has run some major websites, a computing department and a digital image library. He started out as a trained teacher and now runs training for digital photographers.
    See also: Editors ‘Bio’.

    Simple tips to save you from disaster on your photoshoot!

    Am I preaching to the converted?

    Ever gone on a shoot and forgotten something? I have. If you’re like me you will have a bag packed ready. But, check the night before. Things may have changed. Here is some help.

    Checking

    The night before you go is the first time you should check your equipment. That’s the time to realise you need to charge your batteries. Yes, always have more than one – you don’t want to run out. Charge both. If you have an off-camera flash, check they are up to power too. I use rechargeable batteries in my flashes. So I charge them. But you may have standard disposable ones. Have fresh ones on hand.

    Check you have a memory card in the camera and at least one spare. A corrupt card is as good as stopping your shoot if you have no spare. Oh, and make sure you downloaded the previous shoot. I turned up to a shoot once with a card nearly full of my previous shoot. I had not had time to post process them. OK, no problem. Ah! Had I downloaded them? Er… I could not remember. Then, eeek! I had no spare card. One full, no spare. It cost me an hour to find a shop for a new card – I was not impressed with the card either, but no choice. How stupid did I feel when I got back and found out I had downloaded the previous shoot. I could have used the card I had. Better safe than sorry.

    Lenses

    Choose your lenses if you have more than one. Also check they are clean, properly packed and have lens caps. Camera bags are generally made of very harsh material. If the glass rubs against the material it will rub off the coating and may scratch the glass. Look after your lenses and they will last for years. Got clean lens cloths? Make sure you do… you may need to clean up while out. Oh, I have an extender for my 70-200mm. It takes the lens up to 280mm – enough for most long shots. Don’t forget lens accessories. And, if you think you are going to need them, what about filters?

    Camera straps?

    Check your camera straps for damage. The little slits the straps go through gradually wear the strap. If a strap breaks your pride and joy will crash to the ground! Check the straps and zips on your camera bag are good too.

    Got your tripod? Ah, but have you got the quick release plate? I forgot one once and had a day of really hard shots and poor results.

    I normally carry three different light modifiers. They are a little honeycomb for focussed, hard light and a strap on diffuser which directs the light in one direction for soft wide focussed light. Finally, a plastic diffuser for popping on top of the flash for all-round bounce light to give wide-spread light. So, check your modifiers. If you don’t have any get some. Flash is too harsh for most shots.

    Camera?

    Ha ha! I am not joking actually. I once went on a shoot with a great friend. He had a new Canon 7D – proud as punch. He turned up on our shoot with a wonderful camera bag. In it was everything he needed for the shoot – except the camera body. He had left it on the table at home. Fortunately I was able to lend him one of my spares.

    Sundry other items may be important too… Torch? Large plastic sack to cover everything in a sudden shower? Map? Tablets? Sandwiches, drinks, money? Well you get the idea. Everyone’s list is personal, so work out what is meaningful for you.

    Going on a shoot for a day or more is a complex business. Your day can be ruined or shortened if you are not prepared. So why not make check lists. One for the night before, one for the morning before you go. Go through everything you have an then put it on the list. Then, check it all in complete confidence that you will have a great day.