Tag Archives: Night

How to do night photography when starting out

Night shots capture the imagination and the eye.

It is all about making sure that your viewer is drawn into your photograph. The rich colours and strong contrasts are really great for attracting the eye. In this post we will look at doing great night photography.

Night photography is simple

A lot of starters think night photography is difficult. Well it is not difficult, it is different. There is less light – obviously. There is also more light in some ways. This is because the difference between the light and dark portions of your picture are more extreme. In A quick tip to help you see the light (or darkness) we saw that the camera is not as good as the eye in distinguishing wide differences between light and dark. When shooting at night that is something we should remember.

We should not point our camera at a very bright light source at night. This is because it will over-expose quickly and the rest of the scene will remain dark. The darker parts expose slower. Try to find ways to expose your scene where the spread of light is of less extreme whites and blacks.

The concept of night photography is about exploiting light when the rest of the environment is dark. The aim therefore is to make sure you are exposing for the light you want to bring out in your picture. Almost certainly that will mean you need to do longer exposure than for the daytime. As you will see in the video this is not complicated to do. You will need to explore some settings you may not have used before. But photography is all about learning – right? OK…

Here is one idea that will simplify the thinking behind all sorts of exposure situations…

  • Picture a bucket in your mind.
  • Now picture filling it up with a hose.
  • At first you turn the tap a very little.
  • The water trickles out.
  • The bucket takes a long time to fill to the brim, but does get there.
  • Now repeat with the tap turned up more (twice as fast).
  • The bucket fills faster. In half the time in fact.
  • Now repeat again filling the bucket to the brim – tap open fully (speed x4).
  • The bucked fills half as fast again.

The bucket of water is like an exposure. To get the picture light enough you need to fill the camera with the right amount of light (to the bucket rim). At night you have to wait a long time for your exposure to fill to the brim (water at a trickle) because there is less light around. In early evening/dusk you have to wait for the exposure to fill in half the time (tap at half speed) because there is more light before sundown. During the day all that light pretty much zaps the bucket (sorry camera) full of light in double quick time.

OK, now you know all there is to know about exposure. That’s it. All you have to do is practice with the camera settings to wait for a while to fill up at night, wide aperture, long shutter opening to let in as much light as possible.

In the video the CameraLabs team have described the types of setting you might use and how to set them up. The explanation is clear and the settings simple. I think you will learn a lot.

DSLR Tips: Night Photography by CameraLabs
As an aside…

You notice in my bucket analogy how we tested fills? In photography each time you go up or down a stop of light you are halving or doubling the amount of light. Of course, in the bucket situation the timing and change-of-fill speed are not accurate – its only a thought experiment. But you get the idea. I am trying to show you how an exposure builds up over seconds (at night) or thousandths of seconds (during the day). And, the rate it fills is related to the amount of light around. That is measured in stops. Consider reading this article: Definition: f number; f stop; Stop. It will help you to understand the relationship between stops of light and exposure.

How to make your monochrome shots moody

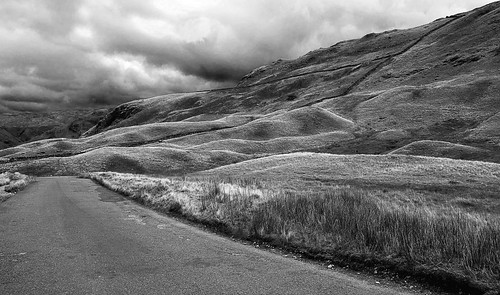
Honiston Tops - The English Lake District. Mono shots are so open to moody interpretation.

Honiston Tops – The English Lake District. Mono shots are so open to moody interpretation. Click the picture to view large
By Netkonnexion on Flickr External link - opens new tab/page

The contrasts in monochrome make it suited to moody scenes.

Yes, we see so much in the gloom! Mono is a great way to express the deep, dark and threatening. It is also uplifting in many ways. Look at how we can enhance our shots…

Landscapes

The beauty of a landscape is not about the weather. It is in the character of what we see in the country and the shapes and forms. However, the weather can complete it. A beautiful day in the scene above can equally light up the sky and uplift the sole, even in this desolate place. Surely colour is more suited to that uplift? Probably. Weather is the icing on the cake. If you can capture it with the contrasts fully expressed you have a winner. The depth of the cloud darkness has expressed the awesomeness of those wonderful clouds. What is great about this type of shot is the depth of the greys and blacks, as well as the highlights of the whites and bright spots. In a landscape the moodiness lies in the contrast through that spectrum. Try to express the full range of blacks right through to whites to bring out the mood.

Subjects

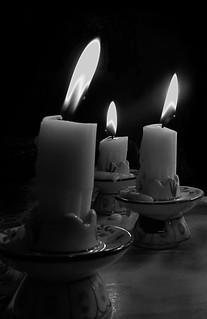
The use of a great subject is really the key to a moody monochrome. Some subjects really lead us to the moody feeling. Candles are a great example. If we are to express a deep gloom the candle is perfect. Candles express our fears of shadowy corners and the lurking danger just out of our sight. They seem to sum up a real essence of the past and the primeval fear that they were meant to chase away.

The moodiness of candles is often created by the type of exposure you take.

The moodiness of candles is often created by your exposure.
Click image to view large.
Moody Candles
By Netkonnexion on Flickr External link - opens new tab/page

Again, it is the contrastiness that does the trick. The brightness of the flame and the luminous glow that hugs so close to the wick really exaggerates the darkness in the background. To take a shot of a candle you need to focus on the flame so that you can expose for the bright spot. This is wonderful for monochrome since the exposure will leave the background really dark that way. Other subjects that bring out the moodiness include dark alleys, dim corners, and the contrasting brighter spots – safe havens in the darkness. Again, look for the deep blacks right through to the bright spots to bring out the moody and threatening in your monochrome.

Faces

It is great to find deep expression in faces too. It’s often contrastiness of the lighting in a portrait that brings out moodiness in the shot. The archetypal villain in the wide brimmed hat, hiding in the darkness underneath it, or on the dimly lit corner, is a great example. Think of the dark and uninviting holes where you see villains portrayed in stories and films. You too can express these things in your photography. It is about the contrasty blacks through to whites again. More black – moody. More white – uplifting! The timeless battle between good and evil.

The moody face, of course, can be more than just deeply-dark to brightly-bright lighting. Often moodiness in the face can be highlighted through sheer expression. It is important to make sure that if you are going for moody that the expression supports the scene. Remember nothing will work if you break the mood. Dark, dim and dank, is trumped by jumping for joy!

By Damon Guy (author and Photokonnexion editor)

Damon Guy - Netkonnexion

Damon Guy (Netkonnexion)

Damon is a writer-photog and editor of this site. He has run some major websites, a computing department and a digital image library. He started out as a trained teacher and now runs training for digital photographers.
See also: Editors ‘Bio’.

Five easy ways to learn about the light/shadow relationship

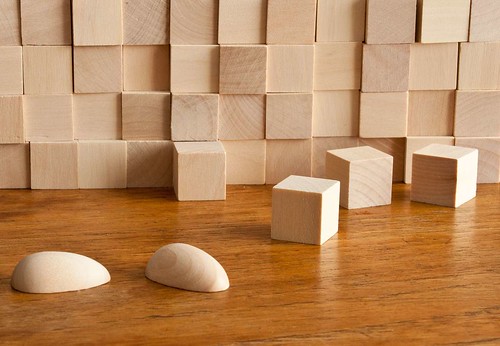
Practice blocks provide a great way to understand light/shadow relationship.

Practice blocks provide a great way to understand light/shadow relationship.
View large About the light/shadow relationship :: External link - opens new tab/page

Our first priority is light – second is shadow.

The relationship between them is one of the great pillars of photography. Learning about them is essential. The key to understanding the use of light is seeing the effect of shadow. In this article I am offering some ways to learn about the light/shadow relationship. If you have not already done so I recommend you read Three little known facts about shadows External link - opens new tab/page first.

The light/shadow relationship – a transition

When looking for a scene the right light and shadows can make or break a shot. We are looking at the light/shadow relationship so we can convey the right message to the viewer. Things with harsh and sharp shadow-lines tend to indicate hard, masculine, tight, dark, angular, tough, solid, artificial, technical. Things with soft shadow-lines showing gradual light-to-dark change are the opposite. They tend to be gentle, mild mannered, lighter, soft, rounded, meek, curved, natural and feminine in appearance. Using the wrong light sends conflicting messages to the viewer. The right light will help your message. The defining aspect of this relationship is the transition from light to dark. The shades between light and shadow are the definition of form. “Form” being the three dimensional shapes we see. The harsh sharp shadows of hard light are great for angular forms. The soft rounded and gradual shadows of a softer light are great for showing rounded three dimensional forms – like faces, eggs and balls.

Creating the right light

Creating light of the right sort is the quickest way to understanding the different types of light and the shadows they create. So, we are looking to bring out the transitional light/shadow relationship through the use of different types of light. This will help us define form in our images and bring out the 3D feel that makes pictures appear to have depth.

You need to be able to create two types of light for these experiments. Hard light – created with an intense beam from a relatively small light source. A torch like this one is excellent for this purpose…

 
The ‘Lenser’ LED Torches

The ‘Lenser’ LED range of torches External link - opens new tab/page is available on Amazon. I personally recommend the excellent LED Lenser 8407 P7 (Black) External link - opens new tab/page torch (advert – left). It is excellent for all types of photography. At night you want a rugged and powerful torch for safety, lighting and to prevent losing equipment. Lenser also sell a coloured filter set for it making this torch great for light painting External link - opens new tab/page too. It’s the top seller (5 star) in the range. Experience has shown it to be an exceptional piece of technology.

You also need soft light – usually generated from a large light source like a window, softbox or photographic umbrella.

Make sure you are using only one light source for your tests. Multiple lights confuse the shadows. The hard and soft lights are best used at the same intensity so you can compare results between them later. If you have one, an off-camera flash with the appropriate modifiers would do the same work. Use a honeycomb or snoot to get the tight beam of a hard light. Use a diffuser or bounce the light off reflectors or walls to create a soft light.

For your first experiments with soft and hard light try out your different light sources. Place a simple object of your choice on a table. For the subject see a small vase, a simple ornament, a small box or something similar. Take a few photographs with both hard and soft light. Then open them on your computer and compare them. What you are looking for is the quality of the shadow. How intense is it – light or dark. How quickly does the light change from light to dark. Is it an abrupt, sharp change? Or, is it a slow, gradual transition? Study your shots to see which you prefer. The light/shadow relationship is best shown in gradual steps. So your shots should show very hard light right through to very soft light.

Experimenting with curves

The use of curved subjects is going to create gradual transitions of light anyway. But curves can also have quite hard shadow-lines if the light is also hard. Using something rounded will show the point. A small ball, an egg or something similar are great for testing the hard or soft light effects. I have several wooden eggs for this purpose. They make test subjects for thinking through individual or group portrait shots. They help in planning shoots and lighting set-ups. They are a very cheap way of making your mistakes before the shoot! Give them a try.

Using a rounded subject, try your hard and soft tests again. This time take shots from at least eight light-positions in a circle round your egg. You must stay in the same position to take each shot. That way you will see all the different angles of the light/shadow relationship as a graduation as you move the light round for each shot.

In your computer ask the same questions about the hard edges and soft graduations of light through shadow. Imagine the eggs are faces. Which will work best on a face – those hard sharp lines or the soft graduations?

Experimenting with lines

For working with more hard-edged objects I have 50 wooden children’s building blocks. I use these in the same way as the eggs. They help me plan lighting and sets/props positions for shoots.

Use one block to start. Repeat the exercise as you did with the eggs. Take eight shots using different light positions around the cube. Keep the camera and cube in the same position from the start. Just move the light to each of the eight positions around the cube. Repeat the exercise for the hard and soft light sources. You will see that the results for a hard edged object is very different to the soft edged eggs in the previous experiment. Concentrate on how the light transitions in the light/shadow relationship shown by each shot.

This time, you are asking the same types of questions… about the quality of the shadow. How intense is it? How quickly does the light/shadow relationship transition, and so on. Again, study your shots to see which you prefer. You will have a different type of result because the edges are much harder than the rounded eggs. The shadow shapes will be very different too.

The wooden blocks are useful. The set I use for this purpose is advertised to the left. It has rounded blocks and a variety of shapes. This gives you the opportunity of trying out a whole range of effects and test lighting set-ups.

Experimenting with specifics

You have experimented with rounded subjects and hard edged ones above. Now it is time to look at the other possibilities.

Try mixing rounded and square edges. Try out a few scenes using the blocks to map out props. If you have other toys around use the blocks to create little still life scenes with the toys or other objects. The idea is to try and creatively use the toys, blocks and egg to make a scene. But you must concentrate on creating sympathetic shadows. Look always for the way you can understand the balance in the light/shadow relationship and make it complement your theme.

Suppose you depict a robot war. Your best light will be hard and very direct. The harsh sharp curves will help create a chaotic and harsh environment. Try depicting a love scene between two figures. You want to use soft, diffused light to carry the romantic mood.

You see my point. You are trying out in miniature what you want to do in the real world to emphasis your message.

I used to use several action figures for testing out scenes with people. But the kids broke them eventually. These days I use cheap wooden artists dummies. They are fun to use and give a very good idea how to set up lighting for poses. The one I use is advertised to the left. It is really great for lighting tests.

The Importance of Eggs

Finally, here is a video which I posted earlier this year. It focuses on the angles of light in the light/shadow relationship. It will show you the point of the eggs exercise. So you can see how it is all done. He shows you the principles. However, you will need to try out for hard and soft light and hard and soft edges – which the video does not show… Enjoy!

The Importance of Eggs (a previous post on Photokonnexion).

Shooting very long night exposures

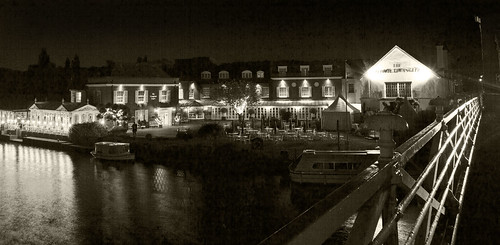
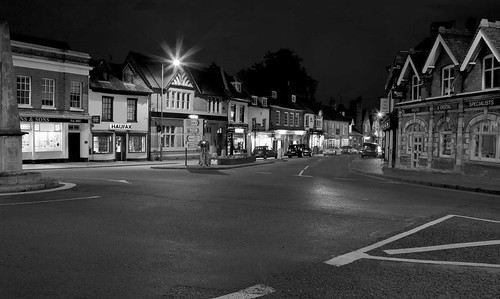
Lights from any building generate a surprising amount of light at night.

“The Compleat Angler” – This hotel, pictured from Marlow Bridge, Buckinghamshire UK generates a surprising amount of light. Click image to view large.

Shooting by moonlight or other dim lights

It’s true. You can shoot in almost total dark with a digital camera. You make exposures of many minutes and use really dim lights – the moon, stars and low-level hand-held lights are enough for the camera to pick up.

Previously…

In other articles about night photography we looked at Planning and Preparing for a Night Shoot and Out on a Night Shoot – Night Composition. We also looked at Six things you must know for night shoots including the basics of controlling the camera and the sort of settings used. It is worth following up on these articles before proceeding.

Night light

Out of town, away from the urban lights, dark is really dark! Many urban dwellers don’t realise that unless the moon and stars are out our eyes are pretty poor in complete dark. Yet, when the moon is out, and the stars, we can see pretty well. In fact our eyes are not well adapted to this darkness. However, the digital camera can pick up amazingly small amounts of light. In the photograph above the EXIF data is…

Model – Canon EOS 5D Mark II
ExposureTime – 10 seconds
FNumber – 11
ExposureProgram – Manual control
ISOSpeedRatings – 100
Flash – Flash not fired
FocalLength – 25 mm
ExposureMode – Manual
White Balance – Manual – Cloudy
SceneCaptureType – Standard

Ten seconds is a reasonable time with all that light knocking around. Remember that an exposure is like filling a bucket with water. As light enters the camera it fills the exposure, making it brighter and brighter as the shutter is open longer. So, in very low light situations you can take photos with very long exposures.

One thing to consider is how to set the length of exposure. Most cameras cannot time your exposure if it is going to be longer than thirty seconds. You can buy automatic ‘intervalometers’ – devices which count intervals of time. They will be able to set your camera off for longer exposures than thirty seconds. However, on the camera there is normally a setting called ‘bulb‘. This will allow you to time a period yourself and close the camera shutter when you are ready. You can find out more about the bulb setting (B setting) in: What is the ‘Bulb’ Setting?

The video

In the following video, Mark Wallace takes us through the process of taking a photograph by moonlight. He is using a two minute exposure. Besides nearly getting eaten by coyotes (OK I exaggerate) he gets some well lit shots. Remember he is out in the country where there are no lights and is just using the ambient moon/star light.


Uploaded by snapfactory External link - opens new tab/page on May 1, 2011

By Damon Guy (author and Photokonnexion editor)

Damon Guy - Netkonnexion

Damon Guy (Netkonnexion)

Damon is a writer-photog and editor of this site. He has run some major websites, a computing department and a digital image library. He started out as a trained teacher and now runs training for digital photographers.
See also: Editors ‘Bio’.

Six things you must know for a night shoot

Night photography is fun. A little foreknowledge makes your night shoot easy

Night photography is fun. A little foreknowledge helps make it easy

Night shoots can yield great images with a little thought.

There are a few things that will help you get better results. Understand your equipment, ensure you have a steady base, work with your settings. After that it’s about your photographic skills.

1. Before your shoot

Plan ahead for your night shoot. A little thought about night composition is useful. Consider your safety too. In the dark it’s easy to injure yourself, break equipment and lose things. These two articles will help to prepare you:
Preparing for a Night Shoot
Out on a Night Shoot – Night Composition

2. Equipment

You will need to use longer exposures on a night shoot. This means that to get a sharp image you should use a tripod. Most night exposures in an urban environment are from about two seconds to about 30 seconds. Some could be much longer than that, especially if you are outside urban areas where there is little light pollution.

You cannot get a sharp image hand-holding your camera for extended exposure periods. Tripods provide a stable platform at at any time. At night they are essential. If you don’t have a tripod there are alternatives, although I have not found any as effective and flexible as a good tripod.

You can use any of your ordinary day equipment on a night shoot. Lenses, cameras and even flash can be used with no problem. However, you may need to use your equipment in very different ways to the daytime. Also, be prepared to get very different results. You will need to experiment to get familiar with your equipment in night conditions.

You can’t use a Flash-light (torch) when you are shooting, it will affect your local light conditions and the shots you take. Switching a torch on and off will also cause night blindness. You have wait while your eyes adjust to the change in light levels each time. You can get away with a red-light LED torch. I have one that I can wear on my head and it has a red and white light. Red lights don’t spoil your night vision so much. They do affect the shot. So don’t forget to turn them off when shooting.

It’s best to work with the ambient light if you can, especially in urban areas. Using your equipment at night requires that you have a finger touch familiarity. You will probably be surprised if you have been using your camera a lot. You may know many of the buttons by touch anyway. However, some buttons you may not know. Practice builds familiarity.

3. Anti-vibration compensation

One button you may not be familiar with is the one to turn on/off vibration compensation motors. These motors, usually in your lens, help stabilise your shots (Canon: Image Stabilisation; Nikon: Vibration Reduction). They help reduce movement from hand-shake. On a tripod the motor causes vibration which is amplified by the tripod – making the situation worse. This is not just a night shoot trick to reduce vibration, it should be used any time you are using a tripod. It helps your image to be sharper if you reduce anything that causes vibration or movement.

4. Auto-focus (AF) and Manual focus (MF)

At night it is quite likely AF will not work. It might appear to be ‘hunting’ for a focus but not find it. Don’t worry! If you focus on the margin between a light and dark spot it will work again. AF works by detecting contrasts. Anyway, it is better to turn off AF and use MF. Manual focus is much more precise at night. It also stops the lens from ‘hunting’ for a focus point.

5. Flash

Think about how you want to use your flash. If you are using auto-settings your flash may fire when you don’t want it to go off. Read your manual to find out how to turn it off. You will also find a way to change the light intensity of your flash. On-camera flash is a particularly poor tool at night and is very difficult to use to any effect at all. My advice is turn it off for your night shoot work. If you must use flash, consider off-camera flash. Now that IS fun!

In general, you don’t need flash on a night shoot for general shots. In an urban environment the lights are sufficient from the streets. However, the length of your exposure could be very long. You might usefully use off-camera flash to manually fire to illuminate something, a statue, a tree, a car… whatever. The pattern of flashes you fire will determine your local lighting. In the dark flash will only effectively light a small area around where it is fired. So, don’t expect it to light up your whole shot. There will be an article later on night-lighting shots.

6. Settings for a night shoot

If you are using auto-settings on a night shoot you will have problems. There may be a night-mode setting on your camera. Don’t expect to get great results with it. Best results come with manually setting the camera up yourself while doing a night shoot. You should consult your manual if you really want to use pre-programmed settings.

Learn how to use manual settings from the start. A night shoot is great fun. Getting the results you want makes it really worthwhile. Use ‘M’ – manual mode. This is the only certain way to get the results you want. Remember, the length of the exposure is the critical setting on a night shoot. You will be working with long exposures all the time. The shutter may be open between a tenth of a second through to, well, possibly hours. It’s more likely you will start with settings of around 1 to 30 seconds. After 30 seconds you will need to change to the ‘B’ or bulb mode setting on DSLRcameras.

Long exposures are like filling a bucket with water. Over time the bucket gradually fills up. Over a long exposure light fills the shot making it brighter and brighter. Even moderate local lights may overwhelm areas of your long exposure with brightness. However, without a longer exposure you will not get enough light for the darker areas of the scene. Here are some basic pointers.

  • A wide Aperture lets in more light (settings around f4 or less are wide open). You will have a lot of bokeh in the background with a wide aperture. To avoid that you will need a longer exposure (and a narrower aperture).
  • A high ISO will permit faster exposures. High ISO settings will create a lot of digital noise in the final image. To avoid that you should use low ISO and a longer exposure.
  • Longer exposures (shutter speed or time value) give you greater clarity and a wider depth of field in your shot. However, the camera will be much more vulnerable to vibration. (Tripod – remember?).

You will need to adjust your settings to create the correct exposure. If you have not used manual settings before you should consider this simple set up…
(Assumption: urban environment at night, some street lights and other lighting)
– Set ISO to 100 (Low ISO will give low noise – the best quality image).
– Set aperture to f8 for close focus. Landscapes/long focus, use f14.
– Set Time value (shutter speed) to about two seconds.
Now take a shot and check the screen to see what it is like (“Chimping”)
Black? Too dark? – OK, turn the shutter speed on one click and try again, and again, until your shot looks right.
In fact the internal light meter will show you when the exposure is correct. When you push the release button half way, the needle in the bottom of the viewfinder (DSLR) will be centred.

A little experimental work with longer or shorter shutter speeds will give you an opportunity to try out a few shots. Having a go is the best way to move forward with night shots. Everyone messes up quite a lot of shots to start with until you get the feel for the correct exposure. It’s really rewarding when it goes right! Have fun…

By Damon Guy (author and Photokonnexion editor)

Damon Guy - Netkonnexion

Damon Guy (Netkonnexion)

Damon is a writer-photog and editor of this site. He has run some major websites, a computing department and a digital image library. He started out as a trained teacher and now runs training for digital photographers.
See also: Editors ‘Bio’.

Five tips to create a winning image with ‘mystery’

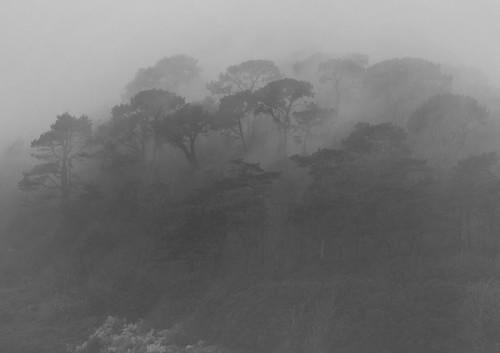
"Mysterious Landscape". Creating an air of mystery draws your viewer into the picture

“Mysterious Landscape”. Creating an air of mystery draws your viewer into the picture.

Keep the viewer looking and you have a winning image

Sometimes it’s what the viewer cannot see that makes the image powerful. The ultimate aim of your picture is to draw the viewer into the image and keep them there thinking about what they see. One way to do that is to create a mystery…

Something unseen

In a previous article I discussed the way a title is part of your overall communication. You can capture the imagination of the viewer by hinting with your title. Something that cannot be seen, but could be there, draws the attention. The viewer wants to find what is behind the hint. Give them something to look for but don’t show it. Mist is a great device for this. The very thought of a misty forest is primeval and mysterious.

Darkness

Darkness creates a sense of menace if it is done right. Anything with lurking shadows and moody lights creates the sense that something may be there – but not quite seen. This is a situation ripe for the use of under-exposure and low lights. It does not have to be a night scene. However, use of low lights, threatening colours and impenetrable shadows brings on the mystery. Mood and threat make a great combination. Both urban scenes and moonlight landscapes are ideal. I am sure you can let your imagination run wild!

Around the corner

I used to manage parks. When we were designing new landscapes we often tried to give an air of mystery. People enjoy going to parks much more if there is a sense of the unknown around the next corner. Walks and views were designed to give people somewhere to go where they could not initially see the destination. So it is with photographs. Create a path, steps, road – anything – that leads somewhere you cannot see. Make the viewer look down the line expecting to see something, which at the end, is not there. An implied destination is a great way to draw in the viewer.

Hidden faces

One thing humans love to see is a face. We train ourselves from birth to take in peoples faces, understand them, communicate with them. Deprive the viewer of a face and the mystery is on. Masks are great fun. A deliberately hidden face is an immediate mystery. Wide-brim hats in dark places are powerfully mysterious. We have a compulsion to find out who the mystery person is – and it immediately captures our attention.

Illusion

Perhaps the most timeless way of creating mystery is to fool the eye. You know something is wrong and you cannot see what. Your eyes tell you one thing, you feel there is something else. A good illusion has you visually chasing around the image to find the issue. If you create a good illusion you will have a great image based on mystery. There are lots of places on the web to find out about photographic illusions.

 
There are other ways to create a sense of mystery. We would love to hear about mysterious images you have created. Please leave a comment below with a link if you have an image online.

By Damon Guy (author and Photokonnexion editor)

Damon Guy - Netkonnexion

Damon Guy (Netkonnexion)

Damon is a writer-photog and editor of this site. He has run some major websites, a computing department and a digital image library. He started out as a trained teacher and now runs training for digital photographers.
See also: Editors ‘Bio’.
Can you write? Of course you can!
Write for Photokonnexion...

We would love to have your articles or tips posted on our site.
Find out more…
Write for Photokonnexion.

Some quick tips for still life inspiration and shots

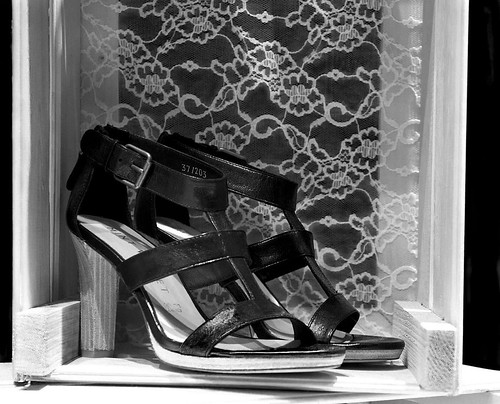
You can find some surprisingly artistic displays in shop windows.

You can find some surprisingly artistic displays in shop windows. It is easy to get some great ideas for still life work later. Or, you can just photograph them in the shop.
Click to view this image in full size.

Get some easy but creative still life shots

I love shop windows. I especially like those boutique type shops where the owner has a sense of art. Shop window displays are by nature well designed, artistic and attractive. Well, they are if the owners want to entice people into the shop. Here is an idea to help you out with your still life shots.

Still life inspiration

Window displays are usually simple and attractive. The shop owner doesn’t want to spend a lot of money on the display. They do want it to draw customers into the shop. Take advantage of this artful situation. Look at the the picture above. It’s a simple box constructed from rough wood, lined at the back with a scrap of net curtain. Wow. Effective. You could display all sorts of things in this. There are also dozens of ways to light it. Here is a simple and effective way to really emphasize your product, your still life, your collection… you name it. Great inspiration. So, take a walk up the high street and see what still life shots you can think of from peering into shops. (More after the jump…)

Display photography

The shot above, ‘Shoes in a box’, was actually taken in a shop window. I do quite a lot of these. The shots are easy to do. They give you great ideas too. More to the point, if you take them after dark they are usually under pretty good lighting too. One walk up the high street after dark about every month and you will come back with a crop of great still life photographs. Everyone will think you have great creative skills. In fact you are getting ideas from shops and getting some great practice.

Here are some points to help you and some things to consider…

  • Remember to be properly prepared for night photography.
  • Turn off auto-focus – focus manually. Auto-focus will focus on the window glass if reflections get in the way.
  • If you use a flash make sure that you know how to turn it’s power down. Shop window shots are quite close-up and flash is pretty intense. It is possible to overpower the shops’ display lights. This will seriously change the character of your shot.
  • Use a diffuser on a flash to make sure you don’t get hard light flashes off the shop window.
  • Reflections from street lamps on the glass? Hang your coat on a tripod to block the light beams or get your friend to hold the coat up.
  • Use off-camera flash. It is best when shooting through glass. You can angle the flash away from the axis-of-light to your camera. Camera mounted flash tends to give a strong flash-reflection right in front of you.
  • Shoot from the side (at an angle), not straight at the glass. You will be less likely to see your own reflections in your shot.
  • If you do this at night make sure you have a friend for safety and help.
  • Don’t look suspicious. If you work openly and tell people what you are doing if asked everyone will laugh and be on their way. I have done this for a number of years and never had an ‘incident’.
  • If you are accosted or you appear to have upset someone then stop what you are doing, apologise and move on.
  • No-one, including the police can make you delete a photograph. See: The Right to Take Photographs (UK relevant).

I have had some great fun and some great ideas with window-shooting over the years and you will too.

By Damon Guy (author and Photokonnexion editor)

Damon Guy - Netkonnexion

Damon Guy (Netkonnexion)

Damon is a writer-photog and editor of this site. He has run some major websites, a computing department and a digital image library. He started out as a trained teacher and now runs training for digital photographers.
See also: Editors ‘Bio’.