Tag Archives: Light modifiers

How to do DIY diffusion – great light from simple tips

 • DIY Ways to diffuse light •

• DIY Ways to diffuse light •
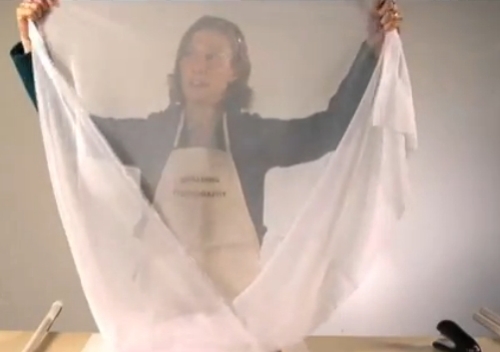
Image taken from the video.

Inexpensive photography equipment!

Following on from the Save money and improve your scene lighting yesterday, we have another video showing how you can provide yourself with an inexpensive light diffuser. It will be quite as good as any professional diffuser and in fact you make it have variable diffusion effects.

Professional and amateur alike use quickly and easily made DIY solutions for their photography. They know they can make things to the specification they require without the equipment costing the earth. In most photographers studios you will find materials and adaptations to be able to do all sorts of ‘quick makes’ with materials, frames and stands. It just makes sense to save money and do it how you need it, rather than spend a mint on something you only use once.

DIY Ways to Diffuse Light


Playgallery  External link - opens new tab/page

Comments, additions, amendments or ideas on this article? Contact Us
or why not leave a comment at the bottom of the page…

By Damon Guy (author and Photokonnexion editor)

Damon Guy - Netkonnexion

Damon Guy (Netkonnexion)

Damon is a writer-photog and editor of this site. He has run some major websites, a computing department and a digital image library. He started out as a trained teacher and now runs training for digital photographers.
See also: Editors ‘Bio’.

Can you write? Of course you can!
Write for Photokonnexion...

We would love to have your articles or tips posted on our site.
Find out more…
Write for Photokonnexion.

Save money and improve your scene lighting!

DIY Reflectors, Bouncer, and Absorbers

• DIY Reflectors, Bouncer, and Absorbers •

Professional equipment costs so much!

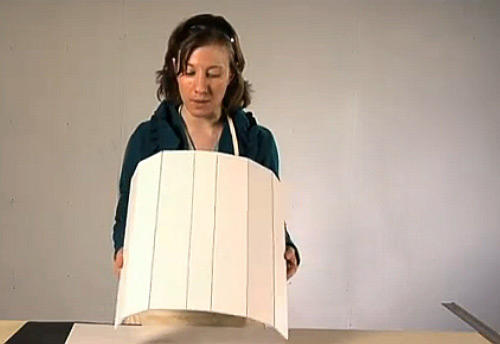
But easily made DIY lighting equipment can do the same as professional light diffusers and absorbers. There is so much you can do to create your own effects. It is pretty easy too. With some simple tools and materials you can have the same outcomes as from a professional studio. The video shows you not only how to make the simple reflectors, bouncers and absorbers, but also shows how they can be used. If you want to get really good with them you will need to practice your photography with them – that is the fun part!

Light reflectors, bouncers and absorbers

The use of flash or studio lights is a great way to light your subjects. However, flash is very harsh and studio lights are often expensive. You can make the reflectors, bouncers and absorbers very cheaply and they can also help adjust the light colour. Bright white board and silver reflectors help to modify the light colour from domestic lights. You may still need to adjust the light balance on your camera, but the reflections will give much more controllable light against the skin tones and clothes of your subject.

Why do we use reflectors and bouncers? These are part of a general class of photography equipment called light modifiers. Anything which changes the light from a light source is a light modifier.

With most lighting situations we have only one main light called the key light. Other lights should not be as strong as the key light. They should also have strength in proportion to the key light. We get that proportion by using reflectors and bouncers to distribute the light around our subject. This ‘fill’ light helps the light on the subject be less harsh. Bounced or reflected light creates soft shadows that wrap around curves and lessen the intensity of darkness in the shadows.

On the other hand absorbers actually cut down the reflections and help the darkness get more intense. This too has its uses. We can make shadows darken and help cut down the effect of light bounced off other things near the subject. The use of absorbers helps define shadows and create darker areas of the scene.

And now to the video…

DIY Ways to Reflect, Bounce, and Absorb Light


Playgallery

Comments, additions, amendments or ideas on this article? Contact Us
or why not leave a comment at the bottom of the page…

An easy lesson in beautiful bokeh

Beautiful photographs depend on beautiful light.

In this video one of the modern lighting masters shows how to make great bokeh. Using a simple experiment with various lenses and apertures, you can see how its done. Then, he does some great street photography. Finally, he gives you some creative ideas. You can do creative thinking for doing your own bokeh shoot.

“Bokeh” is the Japanese for “blur” or “haze”. You can find out more about it in our bokeh definition in the Photokonnexion Photography Glossary.

Creating Bokeh: A Lighting Tutorial


From Jay P. Morgan. TheSlantedLens

Points to remember

In the video Jay P. Morgan identified four important points about making bokeh. They were…

  • Get as close to the subject as you can
  • Get as far away from the background lights as possible
  • Keep the aperture wide open
  • Shoot small light sources

These valuable points are really all you need to remember to make your own beautiful bokeh images.

find out more...Photokonnexion tips by email
If you enjoyed this article please sign up for our
daily email service.
                                                 Find out more…
#11030#

By Damon Guy (author and Photokonnexion editor)

Damon Guy - Netkonnexion

Damon Guy (Netkonnexion)

Damon is a writer-photog and editor of this site. He has run some major websites, a computing department and a digital image library. He started out as a trained teacher and now runs training for digital photographers.
See also: Editors ‘Bio’.

Easy introduction to light modifiers – don’t miss out (pt 2)

Light modifiers manipulate light.

Photographic lights are shaped and controlled by the light modifier. With it you create the lighting you need. Use the right modifiers and you create the scene you want. Knowing which one to use is crucial. The resources set out here aim to help you understand what light modifiers are and what they can do.

In a previous post, Easy introduction to light modifiers (pt 1), we examined:

In this post we are looking at more of these useful tools for controlling light.

Grids

Much more open than the honeycomb are a variety of other types of grid. They are used in front of many different types of light source. The aim of a grid is to…

Beauty dish

The beauty dish is widely used in fashion industry. Photographers love it’s flattering light. Using this dish creates…

Barn doors

Originally used on film sets barn door light modifiers have a special function. They are normally fitted to…

New resource pages

Part one and part two (this post) have added a number of new resources about light modifiers to the photographic glossary. However, as a group of resources they can also be reached from the page of light resources…
Light and Lighting – Resource pages on Photokonnexion
Light modifier resources on Photokonnexion – A new page linked from the Light and lighting page.

Easy introduction to light modifiers – don’t miss out (pt 1)

The "Honeycombe Grid" is a simple device to direct the light in a tight beam.

The “Honeycombe Grid” is a simple device to direct the light in a tight beam. It is an example of a range of grids used in front of lights to harden the light source and prevent the light from spreading out into a wider, more diffused beam.

We use light modification all the time.

Light bounces off everything. The unique light found in every location is from this bounce effect. We also deliberately modify light to create the right light for photography. Look at the options we have available…

Honeycombe

Shown above the honeycombe is a tightly arranged grid. It’s affixed to a studio strobe or an off-camera flash. The light shines through…

Softbox

There are very many different types of soft boxes. However, they have a lot in common. They create a really great soft light…

Simple tips to save you from disaster on your photoshoot!

Am I preaching to the converted?

Ever gone on a shoot and forgotten something? I have. If you’re like me you will have a bag packed ready. But, check the night before. Things may have changed. Here is some help.

Checking

The night before you go is the first time you should check your equipment. That’s the time to realise you need to charge your batteries. Yes, always have more than one – you don’t want to run out. Charge both. If you have an off-camera flash, check they are up to power too. I use rechargeable batteries in my flashes. So I charge them. But you may have standard disposable ones. Have fresh ones on hand.

Check you have a memory card in the camera and at least one spare. A corrupt card is as good as stopping your shoot if you have no spare. Oh, and make sure you downloaded the previous shoot. I turned up to a shoot once with a card nearly full of my previous shoot. I had not had time to post process them. OK, no problem. Ah! Had I downloaded them? Er… I could not remember. Then, eeek! I had no spare card. One full, no spare. It cost me an hour to find a shop for a new card – I was not impressed with the card either, but no choice. How stupid did I feel when I got back and found out I had downloaded the previous shoot. I could have used the card I had. Better safe than sorry.

Lenses

Choose your lenses if you have more than one. Also check they are clean, properly packed and have lens caps. Camera bags are generally made of very harsh material. If the glass rubs against the material it will rub off the coating and may scratch the glass. Look after your lenses and they will last for years. Got clean lens cloths? Make sure you do… you may need to clean up while out. Oh, I have an extender for my 70-200mm. It takes the lens up to 280mm – enough for most long shots. Don’t forget lens accessories. And, if you think you are going to need them, what about filters?

Camera straps?

Check your camera straps for damage. The little slits the straps go through gradually wear the strap. If a strap breaks your pride and joy will crash to the ground! Check the straps and zips on your camera bag are good too.

Got your tripod? Ah, but have you got the quick release plate? I forgot one once and had a day of really hard shots and poor results.

I normally carry three different light modifiers. They are a little honeycomb for focussed, hard light and a strap on diffuser which directs the light in one direction for soft wide focussed light. Finally, a plastic diffuser for popping on top of the flash for all-round bounce light to give wide-spread light. So, check your modifiers. If you don’t have any get some. Flash is too harsh for most shots.

Camera?

Ha ha! I am not joking actually. I once went on a shoot with a great friend. He had a new Canon 7D – proud as punch. He turned up on our shoot with a wonderful camera bag. In it was everything he needed for the shoot – except the camera body. He had left it on the table at home. Fortunately I was able to lend him one of my spares.

Sundry other items may be important too… Torch? Large plastic sack to cover everything in a sudden shower? Map? Tablets? Sandwiches, drinks, money? Well you get the idea. Everyone’s list is personal, so work out what is meaningful for you.

Going on a shoot for a day or more is a complex business. Your day can be ruined or shortened if you are not prepared. So why not make check lists. One for the night before, one for the morning before you go. Go through everything you have an then put it on the list. Then, check it all in complete confidence that you will have a great day.