Tag Archives: Lens

What is the aperture range of a lens?

Photography phactoid number 004

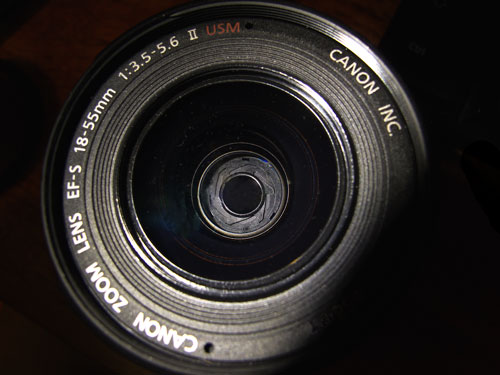
We are used to working with apertures in the range of f16 (small aperture) down to say f3.5 (large aperture). These are commonly available on many consumer lenses. But what sort of aperture range is there for camera lenses?

Working ranges

Some consumer lenses have begun to show quite big ranges. The really popular Canon EF 70-200mm F/2.8 L IS II USM Lens is a great example. I just love that baby! Wow! Excellent definition and clarity and brilliant control of aberrations. An incredible lens – no wonder it is so popular. Well, that lens shows an upper aperture range to f45 on my version (I think the latest version is f32). Now that is a small aperture. That sort of small aperture is used only for very, very bright conditions and long exposures. I don’t think I have ever used such a small aperture.

Pro lenses and specialist lenses

The reasonably priced nifty fifty Canon EF 50mm – f/1.4 USM Lens is another really popular lens. For aperture size however, it is beaten by another Canon lens that is also a 50mm, the extraordinary Canon EF 50mm f/1.2L USM Lens. An amazing lens, the depth of field on mine is so controllable you can focus it so that a wedding ring, looking through the hole, is in focus from front to back. Nothing else in the picture is in focus. Wonderful, but essentially a pro-lens.

Specialist lenses go further. On the minimum aperture size the smallest I have heard of is an f64. I am not sure how practical that is for a lens in the modern digital context. Has anyone some knowledge of that sort of aperture? Please comment below.

In the making of the film in this post: “How good is your exposure?”, they used ex-NASA lenses that were rated at f0.7. Now that is a wide aperture. Talk about a fast lens! Again, probably not practical for most purposes on a modern still digital camera.

In effect then, for modern every-day photography, an aperture range of f2.8 to f32 is acceptable and reasonable. In the pro-lens domain some exceptional lenses might stretch to f1.2 at the wide end. For other lenses, the aperture may narrow as far as f45. Outside of those boundaries you are talking specialist applications and big, big money… barrow loads of it!

Some links about lenses after this…

find out more...Photokonnexion tips by email
If you enjoyed this article please sign up for our
daily email service.
                                                 Find out more…
#11030#


By Damon Guy (author and Photokonnexion editor)

Damon Guy - Netkonnexion

Damon Guy (Netkonnexion)

Damon is a writer-photog and editor of this site. He has run some major websites, a computing department and a digital image library. He started out as a trained teacher and now runs training for digital photographers.
See also: Editors ‘Bio’.

Understanding the photographic lens in simple terms

The lens is a complex piece of equipment with some really easy ideas behind it.

The lens is a complex piece of equipment with some really easy ideas behind it.
Click image to view large
• The Lens •b# By Netkonnexion on Flickr External link - opens new tab/page

The lens – probably the second most important piece of gear.

The lens has become a most interesting piece of gear in its own right. The DSLR would be lost without it and the wide range of possible compositions we can access would be greatly reduced. So, in honour of the modern lens here are a few definitions and resources that I have put online in the Photographic Glossary (P.S. no brain cells will be tortured to death reading these explanations). Take a tour by clicking the links as you read through…

It pays to know what you have in the arsenal

So, there are basically three types of lens as far as the way the lens sees the world. These are…
The long focus lens is the lens that you will use to get out there almost to infinity and see things large!

Then again, it pays to have a view of the world where your eye is King (or Queen of course). The Normal Lens is operational in the range of perspectives and focal lengths of our own eyes.

Then, down at the lower end of the scale is the issue about wide angles. The humble wide angle lens is able to provide wide access to the background.

Have you ever wondered…

I was perplexed for years about this… just what is focal length? Every book I read seemed to make it so difficult. It’s simple really.

Oddly however, on the one hand our lenses are marked something like 50 : 250mm, which is the focal length; but the actual lens is no more than 100mm long. How does that work? Well, its turns out to be something simple called Telephoto lenses.

The whole focal length thing seems to be related to the way that a lens sees the world. So, how do a zoom lens and a prime lens differ?

Has that made it easier to understand about lenses?

I know it is difficult to come to terms with the optics in photography, its a bit dry and technical. I hope that by stripping away the jargon I have made it easier for you. Please leave a comment if you are still in need of help. Tell me what you want to know. I will try to clarify or extend the lens entries in our Photographic Glossary.

Oh! And, don’t be afraid to point out my mistakes and any explanatory shortcomings. It helps us all if I get it right! LOL.

By Damon Guy (author and Photokonnexion editor)

Damon Guy - Netkonnexion

Damon Guy (Netkonnexion)

Damon is a writer-photog and editor of this site. He has run some major websites, a computing department and a digital image library. He started out as a trained teacher and now runs training for digital photographers.
See also: Editors ‘Bio’.

Using a wide angle lens

Using a wide-angle lens.

Unless you have seen the effects of the distortion created by a wide-angle lens or a fish-eye lens it is difficult to imagine how the image is a impacted. In this post we look closely at the actual distortion and impact of the characteristics of these lenses.

In Tips for doing wide angle shots we looked at the type of subject in which you can use a wide angle lens. I pointed out the characteristics and ways the lens affects the image. In this video we look more closely at the impact of the lens on the image/eye. The commentator shows the effect of various types of moves and perspectives the lens affects. A simple and informative examination of the wide angle lens.


Photography tutorial: How to use wide-angle lenses | lynda.com – A Lyndapodcast


Tips for doing wide angle shots

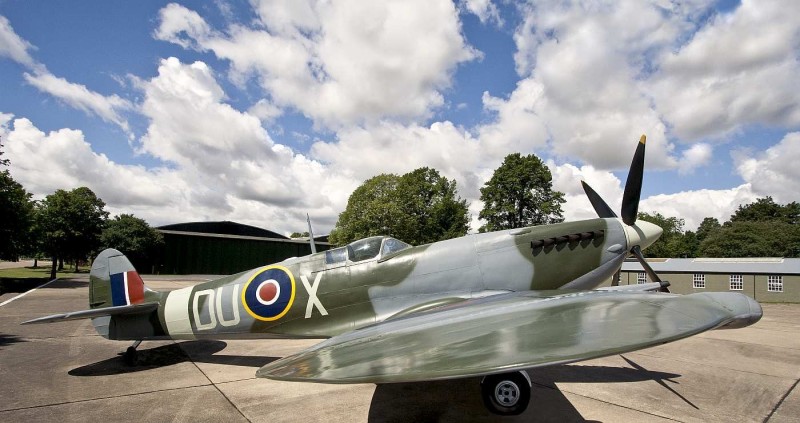
Retired aeroplane - wide angle photography really brings out certain features of a shot.

• Retired aeroplane •
Wide angle photography really brings out certain features of a shot.

You can do wide angle photography with most zoom lenses

I am surprised how little the wide end of the zoom focal lengths are used. Keen starters often forget wide! We are going to look at what you get for going wide angle photography work.

But I don’t have a wide angle lens?

No? Have a look. Most people buy their first lens as a kit lens with their first DSLR. Very often these lenses are in the focal length range of 18mm to 70mm. With a bridge or compact camera they are built-in. To benefit from this article you just need to set the focal length to the wider end. Any lens which can open up below 35mm will be working on the wider end. Wide angle photography is available to nearly everyone. Read on!

What is a wide angle lens?

A wide angle lens is considered to have a focal length considerably less than a ‘normal’ lens. Lenses are measured against the old SLR standard of 35mm film. Today we have 35mm digital sensors. These are used in “full-frame” cameras (as against the smaller ‘cropped sensor’ or ‘APS-C’ camera of most DSLRs). A ‘normal’ lens for a ‘full frame’ is a 50mm lens. A 35mm focal length or less is considered to be great for wide angle photography. Many wide angle lenses are around 24 – 35mm. For APS-C sensors, focal lengths wider than around 25mm are considered to be getting into the wide angle photography range.

Below 24mm there is a class of lenses called an “ultra-wide angle” lenses. These are around 24mm to around 18mm. In this case, depending on the camera they are built for, they would show some distortion and a tendency to create fish-eye shots or actually be a fish-eye lens. Some lenses, like a 16mm lens for a DSLR will be a fish-eye on a full-frame sensor. However, the same lens mount on a camera with a cropped sensor would use the lens as for ultra-wide angle photography. The fish-eye distortion would not be seen at all.

Many smaller focal lengths exist. Some digital cameras with very small sensors (compact cameras for example and some point-and-shoot models) have wide angle capability of around 8mm, possibly 6mm. These focal lengths are not practical for a DSLR. There are special design features involved to use them at this short focal length which are not feasible in larger cameras.

With all that in mind… here’s my first tip. If you are looking for a lens for wide angle photography, know your sensor size. Look at the manufacturers specification carefully to see that the lens is suitable for what you want on the camera you’ll be using. If you buy the wrong lens/sensor mix you may not get what you expect – although you will get a perfectly good lens!

What is wide angle photography?

In general wide angle photography tends to emphasise a difference of size and distance between a photographic subject in the foreground and one in the background. The result is an optically distorted view magnifying distance between objects, but allows a greater depth of field than a normal lens. This creates a pleasingly large foreground object and by comparison a tiny background one even though the distance between them is quite short.

The exaggeration of the size of foreground objects provides opportunities for composition that really emphasise the expanse of the background. In the picture above the large relative size of the Spitfire wing emphasises the shape and prominence of the aircraft in the foreground. Meanwhile the foreshortening of the foreground-to-background distance has really given the clouds a powerful strength in this shot. They appear to be trending toward the centre-distance. Appropriate for an aircraft don’t you think? At the same time the expanse of the airfield itself is also felt because of the relative smallness of the buildings and the width of the scene captured by the wide angle.

Find ways to exaggerate the relative sizes of foreground and background objects. For example, Spitfire vs. buidings. Where you can use perspective lines (eg. receding clouds) through the scene. This will help you develop a strong composition in your wide angle photography.
More after this…

Interior shots

Wide angle photography works best with focal lengths of around 24 to 30mm on most DSLRs. These lenses are great for use in the interior of buildings. This type of lens lets you see more of the scene without having to move a long way back. In a small room that is very useful as you are unable to move back very far anyway. Personally, I love rooms taken on the diagonal from the corner. These shots with a wide angle lens give you the perspectives of the room angles to help provide depth and still get everything in the shot. Do be careful to get the camera straight. If the level is off and you are using the lines of the room to frame the shot it becomes almost sickeningly wrong with a wide angle and there is little you can do to retrieve it! wide angle lenses are very good at bringing out perspective lines in your composition. With some lenses there is some curvature (spherical) distortion. So in a room watch out to correct for that when the lines curve.

Record shots and wide angle photography

If you are taking a record shot, for example, to capture an objects uniqueness, then wide angle photography is useful. The lens emphasises the foreground object, background objects lose prominence. By isolating the foreground object, which is what your record is about, you can make is really stand out with no background distractions. This technique is useful for statues, vehicles, buildings… well you can see the point. Again, be careful. Some wide angle lenses can badly distort in the vertical plane if you are too close, say, to a building. So experiment. Particularly with a record shot, you are trying not to distort as you want the image to be a record of the object as it is.

The artist in you

As an exact opposite to the record shot you can exercise quite a lot of creative licence with wide angle photography. The superb exaggeration of length is great for really long perspective lines or long objects. It’s great fun to take pictures of people with a portrait view. Small people look large and loom over the shot when done close up. Buildings, columns, trees and other tall objects can really be made to loom large. So if you want to really to emphasise certain features a wide angle shot can be really fun.

Portraits and wide angle photography

A current favourite format for portraits is the ‘environmental portrait’. Sounds grand. Actually its about taking pictures of your subject outside in the open air. The wide end of the focal lengths are particularly good for capturing a lot of scene while making it look like your subject is close. And yet it can be a really freeing way to tackle portraits – you can really use the environment to say something about your subject. Picture the proverbial pretty girl in a field of flowers… a lovely wide shot pulls in the expanse of flowers and yet the foreground emphasis is on the subject. Nice. Equally, the right sort of urban environment can be great for emphasising maleness… Again, let your creative juices flow. Study some wide angle photography work of other portraiture artists. It is important to see how the body can be distorted by the lens to artistic effect or emphasis.

Landscape shots and wide angle photography

The landscape shot is one of the popular pursuits for photographers. Yet, as many good photographers have pointed out, they are difficult to carry off well. Wide angle photography can fail miserably with landscapes. Particularly if there is something big like mountains in the distance. The relativity of a wide angle shot is not good with massive background objects. It tends to take the awesomeness out of such a shot. On the other hand, wide angle photography with a foreground is great. It emphasises the lateral extent of the shot. Think beaches and wide landscape vistas. The horizon makes a good marker for the depth of the shot with wide angles (as long as it is straight!). Remember, if you are going to emphasis the foreground and lateral extent of a view have a prominent foreground object to focus upon.

Actually this is an opportunity. Often photographers forget the human element in a landscape. Sometimes you can make your focus the well placed family or an interesting personality, whatever. The human interest is often stronger than people think in a landscape. Wide angle lenses give you a chance to do something others forget!

What now!

Get out there and do it! If you have a wide angle lens, or if you have a zoom that gets you down to those focal lengths, try experimenting with wide angle photography. We often hear people saying ‘get in close’, well here is an opportunity to go out wide.

Damon Guy - Netkonnexion

Damon Guy (Netkonnexion)

Damon is a writer-photographer and editor of this site. He has run some major websites, a computing department and a digital image library. He started out as a trained teacher and now runs training for digital photogs.
See also: Editors ‘Bio’.
By Damon Guy see his profile on Google+.

One big change – one easy step forward (depth of field)

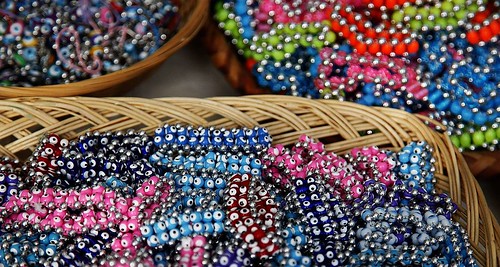
Bracelets - Depth of field is often misjudged. Try it in lots of situations and you will master it.

• Bracelets •
Depth of field is often misjudged. Try it in lots of situations and you will master it.
Click image to view large.
• Bracelets • By Netkonnexion on Flickr External link - opens new tab/page

Every photographer needs to understand depth of field.

Most do get to grips with it. However, when working with a shallow depth of field many photographers misjudge the depth they have to work with. Here is how to work it out.

All too often when using a shallow depth of field the edges of the sharp/bokeh region are well defined. If you get that boundary in the wrong place it is quite easy to spoil the image. For example if you take a portrait with a wide open aperture and the depth of field is too shallow you might find that the eyes are in focus. However, the ears are out of focus and so is the nose. A disconcerting picture! So how do you get over this? Find out by deliberately working at the wide-open aperture end of the range. Push yourself. Open up to a wide aperture and keep it opened up until you feel comfortable you have got control.

Setting it up

Setting your lens to the wide end is easy. Just open up the lens until you have the smallest f.number showing in your screen or viewfinder. Most photographers will have one lens with an f3.5 or f4 aperture (or less). It is possible to buy lenses with much wider apertures. So you may have as much as an f1.2 aperture – which will give you a very shallow depth of field.

What now?

Once you have your lens at the wide open position you keep it there. Then go shoot… a lot.

I know this may seem a tall order but it is fun. Keeping a fixed depth of field dictates much of your perspective on a shot. In order to create nicely composed pictures you will need to move around a lot. You will want to keep your subject sharp. Photographing a range of different sizes of subject means you need to move back and forward to vary the depth of field to fit the subject.

If you take a picture close to you, with a shallow depth of field you will maybe have less than 100mm of sharpness – or much less depending on your lens. If you take a picture focusing at 2 meters from you may find, say, 300mm (12 inches) of sharpness – enough to fit a head into and keep it sharp. If you are working at say 200 meters you may be looking at a really quite wide depth of field – maybe several car lengths.

The point of the exercise is that holding the depth of field fixed makes you walk around and gain experience with your lens. After a while you will be able to judge how much depth of field you will get when shooting at a particular distance. Then you will have mastered your lens at the wide aperture end of the scale.

Getting good control of depth of field is really helpful

You begin to have much more creative control when you have good depth of field control. If you can get you subject finely focussed and sharp – but everything else in a beautiful soft bokeh – your subject will really pull the viewers eye into the shot. Depth of field is all about isolating your subject and making everything else less of a distraction. Control is everything.

Once you have gained control of the extreme end of the open aperture, you can move on. Now make the aperture one less stop open. Do the same exercise. Get to know your lens at this aperture/depth of field combination. Once you have mastered that, move up another stop.

After a while you will have complete creative control over your use of bokeh and the depth of field. An enviable position… you can really be creative when you have such control.

By Damon Guy (author and Photokonnexion editor)

Damon Guy - Netkonnexion

Damon Guy (Netkonnexion)

Damon is a writer-photog and editor of this site. He has run some major websites, a computing department and a digital image library. He started out as a trained teacher and now runs training for digital photographers.
See also: Editors ‘Bio’.

Ten obvious reasons to change your approach and how to do it

Your photograph is not perfect.

You see good quality photographs every day. Why does your photo not match up to the photographic quality in a publication? What can you do? The answer is simple. You need to look at your overall technique.

Things add up…

Assuming a great idea and composition – what can go wrong? In photography every step of the process counts. The more you get right the better the result.

Professional photographers often repeat a shot tens of times to get it right, sometimes more. They aspire to excellence. Care, dedication, persistence and attention to detail add up to technical quality.

What can go wrong?
  1. Bad lighting: There’s no substitute for suitable, interesting light that’s sympathetic to the subject. If the light is wrong, your shot will not work either.
    Solution: Learn everything about the quality of light, hard light, soft light, the colour of light and the properties of light.
  2. The whole picture is soft: You moved the camera while shooting.
    Solution: Pros use tripods – good ones. They use them fast and efficiently because they practice.
  3. The whole picture is soft: You had to hand-hold the shot.
    Solution: Professionals know how to set up a manual exposure that suits the light. Learn to shoot in manual modes. Know what shutter speed/ISO combinations you can use without movement.
  4. The exposure is too dark/light: Common when learning manual camera control.
    Solution: Use RAW, then you can compensate. With RAW you can deliberately manage your exposure too. There is no ‘perfect exposure’ – there is only the result you want. To get the result you want you have to adjust your exposure. (Hint: you can’t adjust your exposure effectively in *.jpg unless you use exposure compensation).
  5. Colours off: If you are shooting in *.jpg you deserve all you get. The white balance is probably wrong. The manufacturers settings are limited. You can’t fix it in processing. Remember, *.jpg is a RAW file developed in-camera to manufacturers settings, not yours. The settings are applied to your shot blind. No wonder they are not what you want.
    Solution: Get it right. It’s easier to shoot in RAW and develop the shot yourself. It gives you fine control and you can develop your shot work the way you want. Something *.jpg cannot do.
  6. Poor focus: Focus is critical to the right technical and artistic result.
    Solution: Learn about: Depth of Field; aperture, Bokeh, Circle of confusion and how they relate to your lenses. Pros know these things intuitively. You can too with practice.
  7. Poor or soft focus from movement: Focus mode is on the wrong setting.
    Solution: Learn to use the correct focus mode (eg. single shot or continuous etc). Also, learn to focus manually. There are situations where auto-focus is poor (eg. in poor-contrast light). Switch off auto-focus to get better results.
  8. The shot is not sharp: A suspect, poor quality or broken lens.
    Solution: Buy decent lenses. All lenses have sweet and sour spots – even professional ones. Cheap lenses have a poorer optical quality and have more sour than sweet spots.
    Solution: Quality costs money. However, look after a good lens it will last longer than your camera. If you choose right, it’ll fit your next camera. It pays to buy the best quality lens you can afford.
  9. Great lens and tripod! My shot’s still not sharp: Sharpness requires attention to the above and these specific details too…
    Solutions:
    one: Turn off vibration reduction functions. On a tripod motors cause vibration, not stop it.
    two: Turn off auto-focus (another motor), or at least the continuous-focus setting (use the ‘one-shot’ setting).
    three: Use ‘mirror lock-up’ (DSLRs). Mirrors clunk up causing tripod vibration.
    four: Keep out of wind, away from vibration and keep your tripod low (don’t fully extend legs).
    five: Use a remote shutter trigger. Button pushing causes vibration.
  10. I did all this and it’s still not right!
    Solutions:
    one: Practice – putting this together takes time and effort.
    two: Return to locations many times to get the right light and conditions.
    three: Post processing! RAW users, this is where you polish the shot up. Since the earliest photography developing the shot has been a key process. RAW processing is another skill to learn. It’s essential, so learn it. Only *.jpg’ers should worry because they have disabled files. If you used *.jpg there is no hope of properly completing the job.

There is a lot to do! Follow the links and keep at it – you WILL succeed.

By Damon Guy (author and Photokonnexion editor)

Damon Guy - Netkonnexion

Damon Guy (Netkonnexion)

Damon is a writer-photog and editor of this site. He has run some major websites, a computing department and a digital image library. He started out as a trained teacher and now runs training for digital photographers.
See also: Editors ‘Bio’.

How good is your exposure?

There is no such thing as the perfect exposure.

The manufacturers might have you believe there is a perfect exposure for every shot. They invest a lot in their cameras and the programming. What should you look for when trying to produce a great shot? Is it about relying on camera auto-settings or is there something else?

The three pillars of exposure

You are probably aware of the three main controls for exposure

  1. ISO – Controls how sensitive your camera image sensor is to light.
  2. Shutter speed – Controls how long your sensor is exposed to light.
  3. Aperture – controls how much light is allowed to reach the sensor.

These essential elements in exposure are inter-related. Each has an impact on the others. They relate to each other in two ways. As each varies it has an impact on the amount of light which reaches the sensor. And, as each varies, they have a special impact on the quality of the photograph…

  1. Low ISO gives a high quality result. High ISO introduces digital noise.
  2. Shutter speed – movement blur introduced at long exposure; movement frozen at short shutter speeds.
  3. Aperture – Wide aperture, shallow depth of field; small aperture gives a deep depth of field.
Control

Controlling these elements to get a final exposure is essential. Highest ISO, widest aperture and a long shutter speed all together is likely to allow too much light into the camera in daylight. The shot will be over-exposed. The opposite is also true. A low ISO, tiny aperture and very fast shutter speed will allow very little light to enter the camera; result underexposure.

Exposure is about a balance. We must work at getting the three pillars to create the right light for the scene we envision. This is the key – creating the right light in the camera to make the scene come out the way we want. Yes, make the scene come out as we want. A photographer makes the picture that they want by controlling the exposure. A snapper captures the scene they see by relying on the camera to make the exposure for them. The difference between the photographer and the snapper is learning to control the camera.

Genius at work

By way of example I want to show you a short documentary video. Stanley Kubric made a period film, released in 1975, called Barry Lyndon. “Lyndon” was set in the 1750’s. It was a ground breaking work.

Kubric envisioned a cinematic experience which was as close to the way the eye would see life by the light of the time. He procured special lenses for his cameras and had them modified to work together. These lenses were F/0.7 Zeiss lenses made for NASA. They allowed the aperture to be open very wide – much wider than most modern lenses will go. As a result Kubric was able to use these fast lenses to film entire scenes only by candle light. This created an atmosphere which paralleled indoor light in the 1750’s. The costumes and set pieces were also of high quality. The overall effect is one of extreme authenticity.

A lot of pictures as dark as shots in this movie would be considered as under-exposed in the eyes of many photographers. Yet the gloom is the essence of the success of the shots. The exposure is correct for these scenes. Kubric went to extreme lengths to get the exposure he wanted. With the proper approach and control you can do the same in your photography.

The one consequence of shooting at such wide apertures is an extremely shallow depth of field. When you see the candlelit scenes you will see how much bokeh there is behind the heads of those in focus. What a gorgeous result.

This video is actually a commentary on “Barry Lyndon” the movie. I have started the video at the scene where the exposure and special lens set up is discussed. Despite this being a movie, the same internal camera conditions apply as in a DSLR. ISO, Shutter speed and aperture still have the same effect on each frame taken. Kubric showed true genius in marrying the camera and the lens into a unique synthesis that recreated the prevailing light conditions of the time. He literally controlled the exposure to emulate life in the 1750s. That is the genius of the man. It is also the supreme insight in photography.