Tag Archives: Lens

Buying Lenses – a quick guide…

Buying lenses

Buying lenses is not as straight forward as it seems. There is a lot to consider.

Critical features to consider when buying lenses

The key to buying lenses is knowing what you want to achieve with your purchase. It is also important to have a clear idea of your budget. However, there are a whole range of other things that have an impact too.

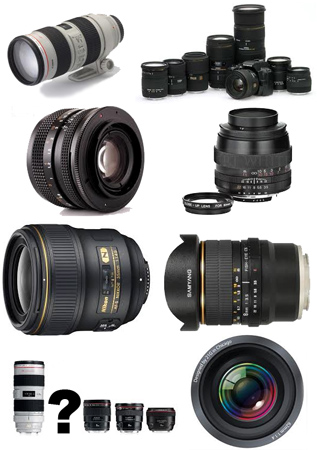
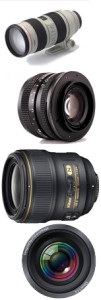
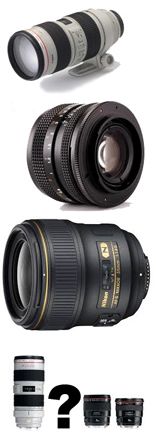
There are a wide range of photographic lenses to buy for most cameras. Each has their own characteristics. A lens can easily cost more than your camera. Take care with your choice. The wrong decision can leave you with a lens that is not suitable to your interest.

Getting started on buying lenses

First of all sit down and write down all the reasons you want a lens. Also, write down all the possible things against buying lenses (of any sort) at this time. Try to convince yourself you really don’t need to buy. In most cases of purchase-fever the buyer gets things they don’t want. So, when spending lots of money you should be careful. Buying lenses is a big investment. If you make the right choice then your purchase may last you through a number of camera bodies. So think carefully and make the right decision up front. That way your money will not be wasted.

I have purchased about thirty lenses over the years. Of those, five were bad purchases. Four were impulse buys – not suited to my needs. In another case, a hasty decision meant I bought a poor quality lens. From this experience I have compiled the list below to help you when buying lenses in future.

Some of the basics for buying lenses

1. Focal Length:

  • a. Measured in millimeters.
  • b. Smaller Focal lengths provide wider angles of view.
  • c. Longer focal lengths show less of the scene and tend to magnify the view.
  • d. Distortion may be found at the extremes of focal length.

2. Aperture:

  • a. Measured in f stops (eg.f2.8 [wide open] f5.6 [medium], f16 [small aperture]).
  • b. Wide aperture lets in most light – faster shutter speeds possible (eg. F2.8).
  • c. Small aperture lets in less light – requires longer shutter opening (eg. F22).
  • d. Wide aperture provides short depth of field.
  • e. Smaller apertures gives sharpness throughout the depth of the picture.
  • f. Zooms – Aperture size gets smaller with increase in focal length.

3. Stabilisation:

  • a. Slow shutter speeds mean more chance of camera movement, which makes blur.
  • b. Stabilised lenses typically give one or two f stops smaller aperture without more blur; the stabilisation compensates for movement.
  • c. Cost is higher if the lens is stabilised.
  • d. Canon = IS (image stabilisation); Nikon = VR (vibration reduction); Sigma = OS (optical
    stabilisation); etc…
  • e. Stabilisation may be in the camera rather than the lens.
General considerations when buying lenses

1. Optical characteristics

  • a. Glass optical quality varies with the production process and ingredients.
  • b. More lens elements/groups reduces light able to pass through the lens.
  • c. High quality optical glass does not reduce light as much as cheap glass.
  • d. Each manufacturer has a specific type of glass for higher quality lenses.
  • e. Optical aberrations come from low quality optical glass.
  • f. Lens optical coatings reduce aberrations and flare.
  • g. Distortions are caused by specific groupings of lenses.

2. Motors/drives:

  • a. Used to drive the aperture control; stabilisation and auto-focus.
  • b. Sometimes noisy – not desirable for wildlife shots.
  • c. Adds a lot of weight to the lens.
  • d. Not necessary on manual-focus prime lenses.
  • e. Some cameras have them only for auto-focus.
  • f. Older lens models have slower, sometimes heavier, often noisier motors.

3. Weight:

  • a. Often forgotten attribute. If you can’t carry it, then it’s no good for you!
  • b. Weight often increases with wider apertures – fast lenses may be too heavy for you.
  • c. Weight will tend to increase the amount of hand-shake movement.
  • d. Stabilisation motors put a lot of weight on the lens too.

4. Sensor optimisation

  • a. Lens focal lengths are usually stated for full-frame cameras (quoted for 35mm sensors).
    But…
  • b. A cropped sensor will still have the same focal length lenses as a full-frame, but image size will multiply it by the crop factor. (See: crop factor).
    So,
  • c. Cropped sensors increase the lenses’ magnification. Eg. Canon APS-C lenses are optimised for the Canon cropped sensor. The crop factor is 1.6. So a 100mm lens on a Canon 450D is actually equivalent to a 160mm focal length on a canon full frame camera like the 5D.
  • d. Different crop factors apply to different manufacturers and cameras.
  • e. Some optimised lenses will not fit different sensor sized cameras – APS-C – check the fit and crop size in the specification for the lens.
More specific issues affecting you when buying lenses

1. Zoom vs. Prime

  • a. Zoom lenses give you a variable focal length; you control magnification.
  • b. Prime lenses have fixed focal length. Move nearer/further to change the angle of view.
  • c. Zooms give you focal control over the framed view.
  • d. Primes tend to be higher quality lenses, sharper, faster (wider apertures).
  • e. Primes more compositionally challenging.
  • f. Primes – colours and exposure control more realistic.

2. Why you want this lens…
Make sure you know why you are buying lenses. Consider these points below:

Fisheye lenses (8 – 18mm on cropped sensor; 14 – 18 mm on full frame)

  • Introduces central focus with peripheral distortion.
  • Highly creative focus provides extreme visual views drawing the eye to the centre.
  • Used primarily for highlighting specific subjects or attributes of the scene.
  • Ideal (according to some) for full-frame sensor work for portraits.

Zoom lenses (long focal lengths 50 to 600mm)

  • Sometimes dubious quality in some parts of the zoom.
  • Flexible for many purposes, but especially wildlife photography at longer focal lengths.
  • Ideal for getting ‘into’ the shot.
  • Creativity related to the placement of the subject in the frame; angle of view variable.
  • Extreme zooms (350 – 800mm zoom ranges)(Very long range lenses greater than 800mm available).
  • Extreme expense – (expect cost around £5,000 for the 800mm sort of focal length).
  • Excellent for specialist wildlife and long range work.
  • Angle of view very limited at extreme end.
  • Very heavy – absolutely requires tripod for longest ranges.
  • Really only supportable for specialist work (professional wildlife photographer).
  • Cheaper to hire for the odd trip.
  • Macro (from around 35mm to 200 mm) (sometimes achieved using extension tubes).
  • Used to get close-up shots of very small subjects.
  • Focal length is artificially extended to magnify for close-up work – aim to get 1:1 or larger result.
  • Can be used for longer views; tends to be at restricted apertures for non-macro work.
  • Great for magnification shots.
  • Great creativity scope.
  • Tilt and Shift.
  • Specialist – for control of where to place sharpness in the depth of field OR how to deal with
    converging parallels (lines in the road or converging verticals in buildings).

Wide angle lenses (16 – 24 mm on cropped sensor) (24 – 35 mm on full frame sensor)

  • Used for getting wide views of the subject; sweeping view across a scene.
  • Some optical distortion at the very wide end accentuates central subjects.
  • Tend to be used by landscapers; often capable of very small apertures (f22 – f36).
  • Standard zoom lenses (35mm to 200mm of varying focal lengths).
  • Provide great flexibility because can change from wide angle to magnification.
  • Quality often highly price dependent.
  • Optical quality variable with change in focal length.
  • Very long focal lengths often have high f-stops (eg. F5.6).

Standard prime lens (50mm)

  • Sees approximately what the human eye sees (full-frame sensor cameras).
  • Slightly wide angle for cropped sensors.
  • Usually good low light performance because of aperture size is usually wide.
  • Approx.. 80mm for cropped sensors – good for portraits.
  • Creativity allows for the same flexibility that the eye sees.
  • Controlled angle of view is determined by photographers position (no zoom control).
  • Standard prime lens (80mm).
Ultimately it is about image quality

When you are buying lenses consider what you are going to get. If you buy a cheap lens you will get a poor picture.

Most modern camera bodies are going to produce pretty good pictures. But if you stick a poor quality, budget lens on a camera it will give you a poor result. A top quality lens will serve you for many years. It will swap between bodies of the same manufacturer. It will produce quality pictures from your body.

On the other hand a poor quality cheap lens will degrade the ability of the camera body. Which will devalue your overall investment. It is pointless upgrading a body to a higher specifications if your lenses are not up to the same performance standard. Buying lenses is about setting your aspirations. Buying lenses of poor quality is about limiting your potential, for now and for years to come.

Buying lenses – checking the various options

The sheer number of lenses available is daunting. Try starting with a lens finder. This great Lens finder on Amazon.co.uk makes buying easier.
Note:
USA users may not be able to get the above “Lens finder on Amazon.co.uk” link. See below…
Link version for USA users: Amazon.com Lens Finder
Please report problems with these links.


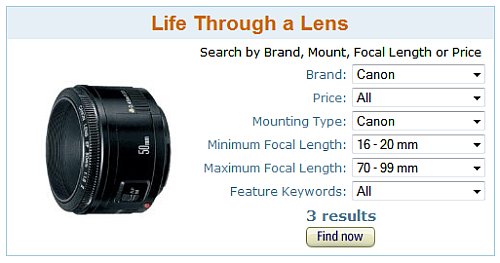
If you are buying lenses enter the important factors for your lens choice. It returns a list of the lenses to suit that purpose. I find this an invaluable tool for helping to me to find a range of lenses from which to make my ideal purchase.

Comments, additions, amendments or ideas on this article? Contact Us
or why not leave a comment at the bottom of the page…

Like this article about Buying Lenses? Don’t miss the next article — sign up for tips by email.

Damon Guy (Netkonnexion) - Author of Buying Lenses

Damon Guy (Netkonnexion)

Damon is a writer-photographer and editor of this site. He has run some major websites, a computing department and a digital image library. He started out as a trained teacher and now runs training for digital photogs.
See also: Editors ‘Bio’.
By Damon Guy see his profile on Google+.

Visual toolbox for photographers

Sharpen up your creative photography…

It’s easy when starting photography to over emphasis the importance of gear. In fact it’s ‘photographers eye’ that really makes the difference. Your vision and insight into a scene are critical to producing a wonderful image.

Sage advice from a world master

The Visual Tool Box by David duChemin is all about the skills of composition. He goes into depth around the background ideas which help you look at a scene. The ultimate success in photography is to make your image a pleasure to view. Aesthetics rule – it’s as simple as that. This book is dedicated to teaching you the tools you need to develop the ‘eye’.

David duChemin says,

These are the lessons I wish I’d learned when I was starting out.
The Visual Tool Box by David duChemin

This is my kind of book. He writes superbly, in simple, readable form. His examples are excellent and the pictures are just amazing. But most of all the book is organised for learners to extend their knowledge in easy, well structured steps. This book is all about putting new tools in your photographic tool box and it achieves that with an ease that any beginner will find a joy.

Composition

The book is packed with examples of the sort of compositional ideas that really work – for anyone. Just look at some of the topics covered…

  • Manual
  • Optimize Your Exposures
  • Master the Triangle
  • Slower Shutter Speed
  • Learn to Pan
  • Use Intentional Camera Movement
  • Use Wide Lenses to Create a Sense of Inclusion
  • Learn to Isolate
  • Use Tighter Apertures to Deepen Focus
  • Use Bokeh to Abstract
  • Consider Your Colour Palette
  • Lines: Use Diagonals to Create Energy
  • Lines: Patterns, Lead my Eye, Horizons
  • See the Direction of Light
  • Light: Front Light, Side Light, and Back Light
  • Quality of Light: Further Consideration
  • White Balance for Mood
  • Light: Reflections, Shadow, Silhouettes, Lens Flare
  • People
  • Experiment with Balance and Tension
  • Use Your Negative Space
  • Juxtapositions: Find Conceptual Contrasts
  • Orientation of Frame
  • Choose Your Aspect Ratio
  • Use Scale
  • Simplify
  • Shoot from the Heart
  • Listen to Other Voices (Very Carefully)

And there is plenty more content to complement and extends these ideas. What’s not shown in a list is the excellent and sage advice throughout the book. I will let David duChemin have the last word…

Pace your-self. Anyone can master a camera; that just comes with time. It’s the other stuff — learning to think like a photographer — that takes so much work and allows this craft to become the means by which you create art.
The Visual Tool Box by David duChemin

And it is thinking like a photographer that you will quickly learn from reading this book.

How to buy this great book

This book was originally published as an ebook. However, it is no longer available in that form. The book has moved into the real world. It will be available on Amazon as a Paperback From 31 Mar 2015.
The Visual Toolbox: 60 Lessons for Stronger Photographs (Voices That Matter)You can per-order the book from Amazon.

Comments, additions, amendments or ideas on this article? Contact Us
or why not leave a comment at the bottom of the page…

Like this article? Don’t miss the next — sign up for tips by email.

Damon Guy - Netkonnexion

Damon Guy (Netkonnexion)

Damon is a writer-photographer and editor of this site. He has run some major websites, a computing department and a digital image library. He started out as a trained teacher and now runs training for digital photogs.
See also: Editors ‘Bio’.
By Damon Guy see his profile on Google+.

Getting the right shutter speed

New Canon Powershot G1X Digital Point-and-Shoot With SLR control

The Canon Powershot G1X Digital Point-and-Shoot With SLR control. Billed by Canon as the “Highest Image Quality Powershot Digital Camera”

Getting sharpness right…

It’s not just about the right camera. It is also about technique and knowing the best way to set up your shot. Getting the right shutter speed takes a little knowledge when you are starting from scratch. Here are some pointers to help you make choices about shutter speed.

Why set your own shutter speed?

Getting full control of your camera is an important aspect of gaining creative control over the outcome of your photographs. Despite what the manufacturers say, you can only achieve so much by messing around with their ‘modes’. Capturing pictures using camera modes other than the basic photographic modes (ISO, aperture, shutter speed) is going to give you a programmed result. In other words ‘modes’ are what some boffin back at the lab has formulated as ‘about right’ for the average photos people take. But, you are not average are you? You want to produce the shot your way. So gaining control over your shutter speed is important.

The long and short of it

Shutter speed gives us creative control in a number of ways. A very shallow depth of field will give great bokeh in the background. But it is difficult to create on a bright day unless you have a fast shutter speed (to reduce the incoming light). Bokeh is created by a wide aperture. A wide aperture lets a lot of light in. If the shutter is open too long the photograph will be overexposed. So a shorter shutter speed is required.

Shutter speed also controls movement blur. If you are taking a photo of a moving object a relatively long shutter speed will create greater blur (example 1/15th sec). A very short shutter speed will tend to freeze the action preventing blur (example 1/500th second).

Sharpness counts

Starting to control your shutter speed is often about finding the best shutter speed that you can handle for a sharp result. So what is the lowest hand held shutter speed you can apply?

Actually, in practical terms, the slowest hand-held shutter speed is reliant on a number of factors…

  • Physical fitness: If you are not strong enough for using your camera weight it is more difficult to hold it steady. Regular practice with your camera will help you build muscles to steady your hand and therefore shoot at lower shutter speeds.
  • Focal length: Longer focal lengths tend to need higher shutter speeds. As you shoot further into the distance the angle of movement seen at the point of focus is more exaggerated.
  • Optical stabilisation: If your lens is optically stabilised this means it will compensate for the tiny movements of your hands. This compensation will help you to reduce hand shake and therefore give you potentially longer shutter speeds.
  • The picture you want to create: Obviously, the picture you want to produce is dependent on how much blur you want in it. So if you want no blur (for the sharpest result) you want a fast shutter speed.
  • The amount of light: Brighter light allows you to have a shorter shutter speed. Knowing when to use a tripod instead of hand-held is the crucial issue here. Most people simply give up if a low shutter speed demands a tripod… For the accomplished photographer many of the best shots are found in low light situations. So shutter speed control is of crucial importance – as important as using a tripod at the right time.
Rule of thumb

Those factors aside here is a rule of thumb. In practice most people do not shoot with a steady enough hand to produce sharp hand-held shots below 1/60th second. Of course, optical stabilisation on the lens will help you get longer shutter speeds. But even then a practical limit of 1/30th of a second is about as low as you can go and be sharp. That is not a shutter speed I would suggest you work with regularly when hand-held.

Best guide to shutter speed

The shutter speed you need to work to is often related to the focal length you are working with. There is a reasonable rule that can help you get a good guide to picking the best shutter speed for your focal length. It is said that the longest shutter speed you can use hand-held for a lens or zoom setting is:

1 divided by the Focal length times 1.5

So, if your lens is a normal lens at 50mm it will have an effective lowest hand-held shutter speed of 1/(50 x 1.5) or 1/75. The nearest (rounded up) setting on your camera is likely to be 1/80th second.

If you are working at 200mm then, 1/(200 x 1.5) or 1/300th of a second will be your lowest working shutter speed. The nearest setting on most cameras will be 1/320th second.

These apply if you are not using optical stabilisation. You can of course work one or maybe two stops faster if you are using stabilisation. You will need to check that figure against your lens specification. Most optical stabilisation systems will give you between one and two stops extra control.

Shutter speed standard

shutter speed is standardized on a 2:1 scale. When you open the aperture on single aperture stop and at the same time reduce shutter speed by a single step the result will be an identical exposure. This table shows the shutter stop standard steps…

  • 1/2000 sec
  • 1/1000 sec
  • 1/500 sec
  • 1/250 sec
  • 1/125 sec
  • 1/60 sec
  • 1/30 sec
  • 1/15 sec
  • 1/8 sec
  • 1/4 sec
  • 1/2 sec
  • 1 sec

The scale extends up above these figures to very high shutter speeds. Up to date DSLRs may allow have shutter speeds of less than 1/5000ths of a second. Very fast indeed. While at the other end cameras will allow long shutter speeds of up to 30 seconds in manual modes (M mode; or Manual) and longer in “bulb mode”.

Each of the steps in the table above will be equal to a change of one stop of light up or down. A change of one stop of light will double the amount of light entering the camera.

As one stop of light is quite a large amount, cameras have become more sophisticated. Most are now marked off with thirds of a stop for ISO, aperture and shutter speed. So your calculations can be quite precise and lie between these values in the table above.

You can read more about stops of light here: Definition: f number; f stop; Stop

Doing it right

Gaining control over your camera is of importance if you want to become a creative master of its full potential. Learning about shutter speed and other aspects of exposure are critical to learning that control. You can have great fun creating bokeh and controlling movement blur. At the same time you can remove that other type of blur – ugly hand-held shake-blur.

Please leave questions and issues for us to discuss if you want to take this further…

By Damon Guy (author and Photokonnexion editor)

Damon Guy - Netkonnexion

Damon Guy (Netkonnexion)

Damon is a writer-photog and editor of this site. He has run some major websites, a computing department and a digital image library. He started out as a trained teacher and now runs training for digital photographers.
See also: Editors ‘Bio’.

Understanding depth of field

Pebbles

• Pebbles •
Depth of field helps the background lose distinguishing features which makes the subject stand out.

It is an important artistic tool.

Depth of field (DoF) provides a way to isolate the subject from the background. Sharpness inside the DoF is of critical importance to our image. The blur outside the DOF helps divert the eye to the sharp subject. So how does DoF work?

Depth of field defined…

The depth of field (DoF) is an easy concept to remember. The DoF is the sharp part of a picture. It is defined by the out of focus parts of the picture on either side of it. A lens can only focus at one point. It is at that point that the image is sharpest. However, on either side of the sharp point is a zone where, to the naked eye, the sharpness is still good enough to be convincing.

The eye can distinguish sharp detail inside the DoF and we want to ensure our subject is in that zone. However, we also want to compose our picture so the unimportant parts of the picture are out of focus. To achieve these things we need to know how to control the DoF. In fact there are three ways to control it…

  • Change the size of the Aperture.
  • Change the focal length
  • the distance of the subject from the lens

As the aperture changes size so does the zone of sharpness we call the DoF. As we open up the aperture wide the DoF gets shallow. As we make our aperture smaller the DoF gets wider and eventually we get sharpness all through to the horizon. Similarly changes to the distance from the subject affects DoF. If I walk away from a subject (and do not change the aperture) the depth of field gets wider (and visa versa). Focal length changes affect the DoF in a similar way.

A Simple Guide to Depth of Field

In this video Dylan Bennett provides the best explanation I have seen on why the DoF changes with the three factors I mentioned above. He uses a simple explanation and some great diagrams to show what is involved.

Dylan Bennett  External link - opens new tab/page

Just to clear up a point…

The analogy that Dylan Bennett uses, “toothpaste squeezed in a tube”, works well for most people learning the idea of DoF. What really causes the DoF to elongate is related to something called the Circle of Confusion (CoC). For more detail you can see information in: “Definition: Circle of Confusion”.

The CoC projected onto the sensor is (notionally) a tiny point of light representing one point of light from the subject. When that part of the subject is in focus the CoC is very small and individually indistinguishable from those around it. Like this it’s a sharp representation of the subject point of light. However, at a point outside the DoF an individual point of light can no longer be represented by a sharp point on the sensor and begins to blend with points around it. It has lost its sharpness. This is because the lens focuses points outside the DoF slightly before the sensor or slightly after it.

Diagram showing various sizes of Circles of Confusion (CoC).

Diagram showing various sizes of Circles of Confusion (CoC) on the sensor sized according to the focus (not to scale). Only CoCs projected from within the Depth of Field are sharp. Our eyes cannot perceive them well as they form sharp points. Ones projected from outside the depth of field are unsharp to our eyes.

Here is the reason why the DoF widens as the aperture gets smaller. When the aperture is small the angle of light that can pass through it from the subject is also small. As a result the CoC for each point of light is relatively small. This is because it can only originate from a small angle of light.

A very small aperture means that the circles of confusion are never big enough for our eye to see. This allows the lens to focus at infinity (say f11 and smaller). When the aperture is wide open the reverse is true. The circles of confusion can be much bigger. Only those rays that the lens will naturally focus will be sharp (a shallow depth of field).

Comments, additions, amendments or ideas on this article? Contact Us
or why not leave a comment at the bottom of the page…

Like this article? Don’t miss the next — sign up for tips by email.

By Damon Guy (author and Photokonnexion editor)

Damon Guy - Netkonnexion

Damon Guy (Netkonnexion)

Damon is a writer-photog and editor of this site. He has run some major websites, a computing department and a digital image library. He started out as a trained teacher and now runs training for digital photographers.
See also: Editors ‘Bio’.

Broaden your lens and focal length knowledge

Mixed lens types

Mixed lens types – What do they all do?

There is a range of lens types…

If you know about the lens types you have, that’s good. But talking and thinking about buying others takes a wider knowledge. Here are two videos to give some insights on lens types. There are some interesting facts too.

Think about your lens types

Before you buy lenses, think about what you want. If you are just learning photography this is important. It keeps you in touch with what’s possible with each of the lens types. Also, it helps you to know what you can do with the skills you have. With each video, try to relate your experience with the lens types they are talking about. Then you will be able to extend your skills with kit you own now.

Another point worth thinking about is what you want to photograph. Long lens types, for example, get you closer to objects in the distance. They make things large in the frame, even when it’s far away. But some subjects are more environmental. So you might benefit more from showing a distant subject in its wider environment. Landscapes are a classic example, but there are others. So, think about what other creative views you can achieve with each of the lens types too.

Introduction to Camera Lenses PT1


Mike Browne  External link - opens new tab/page

Introduction to Camera Lenses Part 2


Mike Browne  External link - opens new tab/page

Comments, additions, amendments or ideas on this article? Contact Us
or why not leave a comment at the bottom of the page…

Like this article? Don’t miss the next one — sign up for tips by email.

By Damon Guy (author and Photokonnexion editor)

Damon Guy - Netkonnexion

Damon Guy (Netkonnexion)

Damon is a writer-photog and editor of this site. He has run some major websites, a computing department and a digital image library. He started out as a trained teacher and now runs training for digital photographers.
See also: Editors ‘Bio’.

Get Photokonnexion tips by email!
We send you tips daily – find out more…

Start email subscription now!

A quiz about lenses… what do you know?

• Lenses • Lens quiz

• Lenses •

Lenses are a wide ranging subject…

and there is a lot to know. It is very easy to make mistakes. So finding out the basics is important. In this lens quiz I will give you the links to resources so can find the simple answers which is also essential information… have fun!

Lens Quiz Questions…
  • Q1. Why do you use a lens hood?
  • Q2. Name the phenomenon that causes light to bend when it hits a lens surface?
  • Q3. How does the optical path differ from the optical axis?
  • Q4. What is another name for an individual glass lens inside a photographic lens?
  • Q5. Is the focal length of an optical lens the same as the focal length of a photographic lens?
  • Q6. How many lenses in a lens group?
  • Q7. Describe what “chromatic aberration” looks like in a picture.
  • Q8. What is projected onto the sensor plane from the lens?
  • Q9. What is the diaphragm in a photographic lens?
  • Q10. Can the focal length be greater than the measured length of the lens body?
  • Q11. What would you normally use a macro lens to do?
  • Q12. Does a wide aperture have a low ‘f’ number or a high ‘f’ number?
  • Q13. Is the shutter in the lens or the camera?
  • Q14. Which is the fastest lens an f1.2, f5.6 or f4.0?
  • Q15. What controls the depth of field?
Where to find the answers…
Answer sheet

You can download a copy of an answer sheet so you can write the answers while looking at web pages.

Our answers…

We will give you our answers on Monday 05th August 2013. In the meantime, have fun!

Comments, additions, amendments or ideas on this article? Contact Us
or why not leave a comment at the bottom of the page…

Like this article? Don’t miss the next one — sign up here.

Damon Guy - Netkonnexion

Damon Guy (Netkonnexion)

Damon is a writer-photographer and editor of this site. He has run some major websites, a computing department and a digital image library. He started out as a trained teacher and now runs training for digital photogs.
See also: Editors ‘Bio’.
By Damon Guy see his profile on Google+.

find out more...Photokonnexion tips by email
If you enjoyed this article please sign up for our
Tips by email service.
                                                 Find out more

Facts about focus… how much do you know?

Orb Out Of Focus

• Orb – Out Of Focus •

Focus is more complex than at first sight.

Focus, and the associated functions on a camera, take a little time to sort out in your mind. Here are some fundamentals and some obscure facts for you to think about.

Focus facts…
  1. When you point your camera at a single colour, blank space, solid blue sky or night sky the auto-focus will ‘hunt’ for some contrast. The lens will be unable to focus but keep trying. If it detects a difference of contrast in the frame it’ll be able to balance it out and use it to create a focus. If your lens is ‘hunting’, find something with a bit of colour or light contrast. Then it will stop hunting and focus. More…
  2. The light from your lens focuses on the “image plane”, the flat surface that is also the surface of the Digital Image Sensor. The circle of light it creates is bigger than the sensor. The light that falls outside the sensor area is normally inferior to the light which falls on the sensor surface. This is because the edges of the lens creates an inferior quality of light compared to the middle part of the lens. More…
  3. There is such a thing as a “fixed focus lenses”… they have no focus capability. They are put in the camera at time of manufacture and set to give a deep focus from a few meters through to infinity. Can you imagine why such a lens would be used in a camera? More…
  4. Bokeh appears in out-of-focus areas. Some people think that the prominent little circular highlights are the bokeh. This is incorrect. In fact bokeh is a statement relating to the quality of the out-of-focus blur. The blur itself is called… blur! More…
  5. Macro lenses are highly effective at focusing at short distances from the lens and to enlarging the image. Actually they will also focus at other distances too. Macro lenses produce a great portrait. More about macro lenses…
  6. When a lens lets light through the light follows something called the optical path. The focus is achieved on the optical path. However, in a DSLR when the mirror is down, the optical path ends up at the eye. The optical path is not the same all the time. More…
  7. Where you focus affects your exposure. Most people assume focus and exposure are two separate things. And, in fact, they are. But, your camera senses the light conditions where you are focusing and sets that focus at the same time as taking readings for the light meter. Change your point of focus and you may change the light reading. Even a tiny movement may change your exposure readings if your focus changes from a lighter to darker surface. Useful to know if you are in a darker environment with bright light sources around. Especially useful if you are trying to learn manual control.
  8. The ‘sensor plane’ is the surface on which the image is projected by the lens. It is the surface of the sensor itself. In former times it was the same surface that the film was laid upon. Any idea what other names might be applied to the same surface in a camera? More…
  9. Sometimes it is important to measure your focus distance precisely. For example if you want to repeat shots or vary the distance form camera to focus-point by a measured amount in a series of shots. Such measurements are often used in forensic photography, macro work and for working out scene sizes and distances. There is only one place where you can take a true measurement from on a DSLR. It is clearly marked. Know what it’s called and where it is? More…
  10. Consider turning off your auto-focus when using a tripod. The motor that works the auto-focus creates vibration that may affect your shot. It is less likely to have an effect on long exposures, but if you get into the habit of doing it you may help to sharpen your shots. Reducing any vibration is good when you are trying to sharpen your shots.
  11. The Plane of focus is a very important concept – it is about where you are focussing. It gives you an idea of what your focus is doing at any angle of the camera. You should really have a good idea about it if you want to make sure you are getting a proper focus on the subject of your shot. More…
Lots more to learn…

Focus is big subject and can become extremely technical. There is a lot more you can learn. These points are just some fun ideas to help you learn about different aspects of focus in general. If you have any comments, other ideas or want me to write about another aspect of focus – leave a comment at the bottom of the page.

Comments, additions, amendments or ideas on this article? Contact Us
or why not leave a comment at the bottom of the page…

Can you write? Of course you can!
Write for Photokonnexion...

We would love to have your articles or tips posted on our site.
Find out more…
Write for Photokonnexion.

By Damon Guy (author and Photokonnexion editor)

Damon Guy - Netkonnexion

Damon Guy (Netkonnexion)

Damon is a writer-photog and editor of this site. He has run some major websites, a computing department and a digital image library. He started out as a trained teacher and now runs training for digital photographers.
See also: Editors ‘Bio’.