Tag Archives: Image Format

How to write great captions for your photographs

A caption about captions

• About captions •
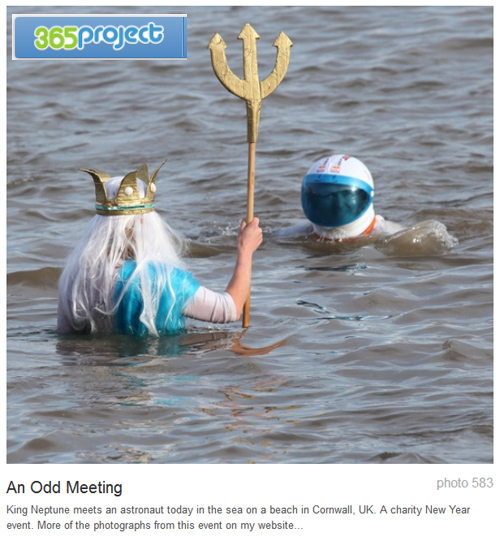
A picture and caption from 365Project, a photographers social networking site.
Click image to view large
About captions – By Netkonnexion on 365ProjectExternal link - opens new tab/page

The power of the image is not just in the picture.

Often the image itself is not the main reason for displaying a picture. Sometimes there is a need for an explanation about your picture or something associated with it. Diagrams, an illustration of a point in the text, secondary ideas, are some of the many good reasons to have a photograph on display. However, to make the point clear you frequently need a caption for the picture.

In What about the title? I discussed how titles impart meaning and context about the picture. They capture an essence of the image in a short phrase.

Captions on the other hand are about good communication. The image, the title and caption together speak to the viewer conveying full meaning. So writing a good caption is essential. If you say anything in your caption that is at odds with the reason for the rest of the communication (picture/title/caption) you will confuse your viewer. So here are some ideas to help your captioning…

  • Think first… Captions like all communications need to be planned. Think about what you want to say, structure it logically, say only what is needed. Once it’s clear why you want it and what it should say, then
    write the caption.
  • Be brief… Say no more than you need. Reserve long explanations for the wider text.
  • Stick to the point… Explain the point of the picture and its relevance. Make other points outside of the caption.
  • Match the text to the purpose… Make sure that the tone of the writing is consistent with the main text, the purpose of the image and the title. If the caption is in a different style to the rest of the communication it will confuse the viewer.
  • Use appropriate caption format… Headshots might just be captioned with a name. Products may be fully captioned. For example “Useful Thingy-Widget showing rear wiring arrangement” explains the product shot. Diagrams should be captioned with a precise abstract of what they show. Detailed explanations go elsewhere.
  • Layout your caption neatly… If the text is arranged in a lopsided way, or if there is a mixture of fonts or other imbalances these will be obvious in a short caption. Try to make the layout attractive to the eye.
  • Resist repetition… If you have a picture of a cake the pointless caption, “Picture of a cake” serves only to frustrate the viewer. “A moist carrot cake is an ideal mid-morning confection”, says a whole lot more and still points out it is a cake.
  • Avoid replication… Do not simply write something in your caption from the main text. Complex explanations in the main text are usefully off-set by a succinct summary in the caption.
  • Avoid cliché… The tired or clichéd phrase in a caption will put off your reader. Try to make captions fresh, invigorating and crisp.
  • Explain or name groups… Six different widgets, three people or four piles of different beans all need to be explained. Name them, number them, explain them – whatever – but make sure the viewer knows which is which and in the correct order.
  • Be consistent… Each of the photographs you use should have a caption. Make sure they are all formatted the same, written in the same style, use consistent references (eg. Dia. 1, Dia. 2 etc) mounted in the page using the same graphical scheme. Deviations will confuse the reader/viewer and throw off their concentration.
  • Include credit, attributes, acknowledgements and links… You would feel cheated if your work was used and not credited. So afford the same courtesy to others if you are using images by other authors.
  • Fact check… Mistakes are glaringly obvious in captions because they are so brief. Check everything, of course, but be especially careful about captions.

Remember, your caption is one part of the communication. The reader sees the picture, title and caption as the full communication. So treat them as a single method of making a point to your reader/viewer. Make all three carry the same message overall. Use this diverse way to communicate with as much impact as possible. Your caption is a vital part of the overall delivery of your point.

By Damon Guy (author and Photokonnexion editor)

Damon Guy - Netkonnexion

Damon Guy (Netkonnexion)

Damon is a writer-photog and editor of this site. He has run some major websites, a computing department and a digital image library. He started out as a trained teacher and now runs training for digital photographers.
See also: Editors ‘Bio’.

Important File formats – JPG

Quick and easy – not very flexible

Digital images come in a range of standard file types which computers, cameras, mobiles and scanners are able to understand. However, they are not able to interpret all image file types. Only those they are programmed to use. It is important that you know about the file types you use because they can seriously affect your photography. I am going to introduce you to .jpg files. They are the most common file types used in digital cameras.

Which file type you have is labeled by the file extension. That is the three characters after the last dot in the file name. If you cannot see this file extension refer to your computer help files to find out how to display extensions.

A file with a .jpg extension, for example ‘myimage.jpg’, is what we call a JPEG file (pronounced – ‘j’- peg). That stands for the “Joint Photographic Experts Group” who formulated the .jpg image standard published in 1992. In digital terms that is a long time ago. However, the JPEG standard has been highly successful and has proved robust. It is not perfect, neither does it do everything.

First and most importantly .jpg files are what is called a ‘lossy compression‘ format. Media files contain a lot of data – very large quantities in fact. Most of that data is used to create colour variations and tones that are very subtle. In a photograph a lot of tones and hues are not noticed by the eye. To save storage space and speed things up your camera dumps a lot of that unseen data when it creates .jpg files. That’s fine as long as the lost data is stuff the eye cannot see in the photograph. The benefit is that the lost data makes files smaller, as well as quicker and easier to move, send and store.

There is a down-side to .jpg files. Every time you open, edit and save a .jpg file it goes through the compression routine – dumping more data. For files you are going to edit on a regular basis this is bad news. Each save will lose some of the data that creates the image. As a consequence the quality of the image will be damaged over a series of edits.

Lossy compression in .jpg files damages the file each edit/save cycle

Lossy compression in .jpg files progressively damages the file each edit/save cycle. Eventually, the loss of data becomes visible. The image is a composite of four versions showing increasing compression left-to-right. Left hand side – the image shows low compression with 60% of the original data still in the file. Right hand side – only 2% of the original data is left. Over-compression, various edits and resizing all have an effect on final quality of the image.
Best viewed large. Click image for full size.

As you can see from the images the damage ruins the picture. However, a low compression is a good optimum. The file is smaller and still of acceptable quality. The small size allows easy use for things like posting on the Internet.

There are other implications of a lossy format. The lost data seriously reduces your options for editing the image. Other file formats keep that data. Most notably these are the ‘RAW’ formats from your camera manufacturer. RAW files are created by the camera directly from each of the sensor points in the digital image sensor in your camera. A RAW file stores all the data. In doing so, the file is preserving the data for you to make significant changes to the image later. These changes are often not possible with a .jpg file. While some small colour changes, brightness and other aspects of the file can be changed in a .jpg file, the degree of change is limited. When editing a RAW file you have a considerable amount of potential to recover over exposure, underexposure, colour casts, hues, tones and other attributes of your photograph.

The JPEG standard has produced a robust file standard that is widely used. The compressed size means a lot of data is dumped. This reduces the editing flexibility for the photographer. On the other hand the file is small and easy to store. It produces a good image as long as it is not over-compressed. However, to guard against loss of quality always retain an original copy of your file. Only edit your file copies so that you can go back to the original .jpg file if things go wrong.

By Damon Guy (author and Photokonnexion editor)

Damon Guy - Netkonnexion

Damon Guy (Netkonnexion)

Damon is a writer-photog and editor of this site. He has run some major websites, a computing department and a digital image library. He started out as a trained teacher and now runs training for digital photographers.
See also: Editors ‘Bio’.

Can you write? Of course you can!
Write for Photokonnexion...

We would love to have your articles or tips posted on our site.
Find out more…
Write for Photokonnexion.