Tag Archives: Holiday

Avoid funny colour casts in your holiday pictures

White balance - grey card

White balance – grey card

Unnatural indoor colours?

Holiday time – out comes the camera and most daytime shots are great. However, indoor shots often get a funny colour cast. Odd yellowish, greenish or blue tones have appeared. The reason? Auto-white balance problems. The condition is curable.

Auto-white balance problems

Outdoors the auto white-balance function works reasonably well. But not in all cases. Auto-white balance aims to iron out colour casts in your photography. The problem is that the camera frequently gets it wrong. There are two main places that can happen…

  • Out of doors when there is a lot of one particular colour around (eg. lots of sky blue; orange/red sunsets or snow)
  • Indoors when there are artificial lights illuminating the scene (ordinary domestic lights, fluorescents and bulbs).

When a lot of one colour appears in your shot. The camera assumes that too much of one colour is a problem. So, it shifts something called the colour temperature toward a neutral grey colour. This takes out the colour cast.

Intentions ruined

If you intended to capture that colour cast (from a sunset for example), the auto-white balance mechanism will ruin your shot. Typically blue skies and white snow tend toward grey. And, the real classic, lovely orange and red sunsets look pink, cartoon-like and flat instead of saturated. Orange and reds are particularly badly affected. So if your sunsets look cartoon pink/grey instead of saturated fire-orange you need to adjust your auto-white balance.
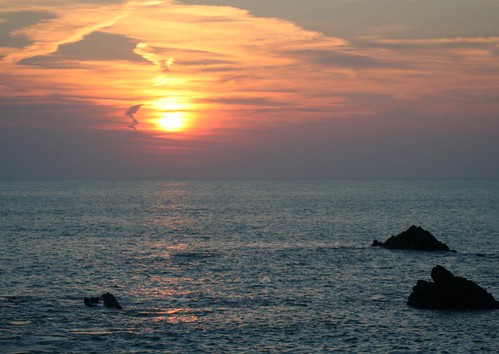
Auto white-balance fail!

• Auto white-balance fail! •

Cartoony pink-grey skies. The auto-white-balance function has colour shifted the orange/red tones toward greys.
Click image to view large
• Auto-white-balance fail! • By Netkonnexion on Flickr External link - opens new tab/page

Artificial light also creates a colour cast. Often the auto-white balance cannot properly adjust for this. The result is odd yellowish, blue or greenish tones in the picture where you did not see them yourself at the time. These also require an adjustment to your white-balance.

Why is there a problem?

Mainly the problem arises because we have made an adjustment in our heads without noticing. Most of the time we compensate for these colour casts and don’t see them. In fact, once we realise there is such a thing as a colour cast we can train ourselves to see it. We certainly see the heavy red colour casts of evening and early morning light. If we look carefully we can also see the yellows and blues from domestic lights – although less strongly.

Remedies

There are two possible ways to tackle the situation…

  • Compensate for colour casts by using a camera pre-set.
  • Correctly set the white-balance so it records the natural colours.

DSLRs have reasonably good pre-sets to tackle well known colour cast issues. On most cameras you will find white balance settings something like these below. The notes explain details…

  • Auto – The cameras best-guess colour match for what it senses. OK most of the time. Poor when there is a predominance of a strong colour.
  • Tungsten – (bulb icon) indoor, tungsten incandescent lighting using bulbs. Cools the colours – often bluish. This setting helps remove blues to warmer tones.
  • Fluorescent – for use under fluorescent lights – will tend to warm up the colours.
  • Daylight/Sunny – (sun icon) indicates the ‘normal’ white balance (may not be present if this is the default setting).
  • Cloudy – (cloud icon) Adds a warmer, yellowish colouration.
  • Shade – This light is cooler (bluer) than sunlight. Shade mode warms the colours a small amount.
  • Flash – (lightening icon) Stark and cool, flash desaturates towards blue. Flash setting compensates with a slightly warmer yellowish tone.
  • Custom – You do a little procedure to get an accurate setting to suit the situation.
Accurate colours

Colour accuracy is important. You really do want a bright blue sky or white snow or saturated red sunsets. The problem is that the pre-sets are averaged out for the “types” of situations encountered. The pre-sets will change the colours from dull flat colours to more representative ones. For example more saturated sunsets will be captured if you use the cloudy setting. However, to get it right you need to adjust the custom white balance.

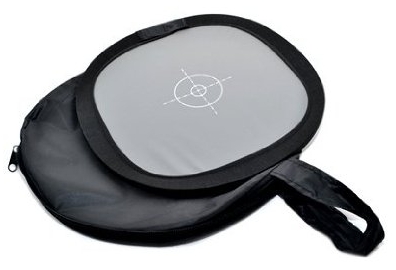
Setting the custom white balance is simple. The camera does most of it. You need a “neutral grey card”. This is simply a card or piece of material set at an average grey colour, normally at 12% grey, which matches the cameras accurate shade for neutral. You can buy these quite cheaply at most camera stores. (See: Range of photographic grey cards).

• The Lastolite Ezybalance •

  • collapsible; durable
  • wipe clean; very light
  • 12% grey; 30cm wide

An easy to use grey-card system. White on one side, grey on the other. The card doesn’t crease, the sprung border stretches the material tight. The card collapses into the supplied case, slipping easily into your camera bag. A great accessory to ensure colour accuracy in your pictures. You should not be without one.Spacer image

To set custom white-balance

It’s easy to set the white balance. However, there are lots of variations for how different cameras do it. Therefore it’s essential to use the right procedure from your manual. To get ready…

  • Place the card about 30cm/12 inches in front of your camera.
  • Zoom in or out to make the grey card fill the frame.
  • Now follow the camera manual “custom white balance” instructions.

To ensure complete accuracy you must do this procedure in the ambient light in which you will be shooting. This is the light the camera will sense and compare to the grey on the card.

More after this…

find out more...Photokonnexion tips by email
Enjoying this article? Please sign up for our
Tips by email service.
                                                Find out more

Shooting with RAW vs. *.jpg

I am sure lots of you are saying, “But I shoot with RAW and this is unnecessary”. OK, that is partly true. You can, with RAW format files change the white balance in the post-processing. Here are two reasons you should NOT do that…

  1. It is time saving to get as much right in the camera as possible. I like to spend my time shooting not computing!
  2. I have rarely met anyone who can remember colours so accurately that they get the post-processing colour and temperature balance right. I like to get them right in-camera as accurately as possible. Then I can safely change them later if necessary.

RAW format is excellent – you have complete control over colour temperature and hues. However, if the picture is wrong from the start, RAW is only as good as your own memory or colour awareness. Artists of many years may be able to remember colours accurately. Very few others can. Beginners especially have very poor colour memory/accuracy. So, use RAW, get it right in-camera – then do your artistic processing from a solid colour-base you know is accurate.

Compensation and accuracy

While both compensation for colour casts, and accurate representation of colour casts both rely on white balance there are differences in how they are treated. Strong colours or a strong colour bias through the picture needs some special treatment. Think about the two different methods above and practice them.

Comments, additions, amendments or ideas on this article? Contact Us
or why not leave a comment at the bottom of the page…

By Damon Guy (author and Photokonnexion editor)

Damon Guy - Netkonnexion

Damon Guy (Netkonnexion)

Damon is a writer-photog and editor of this site. He has run some major websites, a computing department and a digital image library. He started out as a trained teacher and now runs training for digital photographers.
See also: Editors ‘Bio’.

How to prepare for a photo safari and what to take

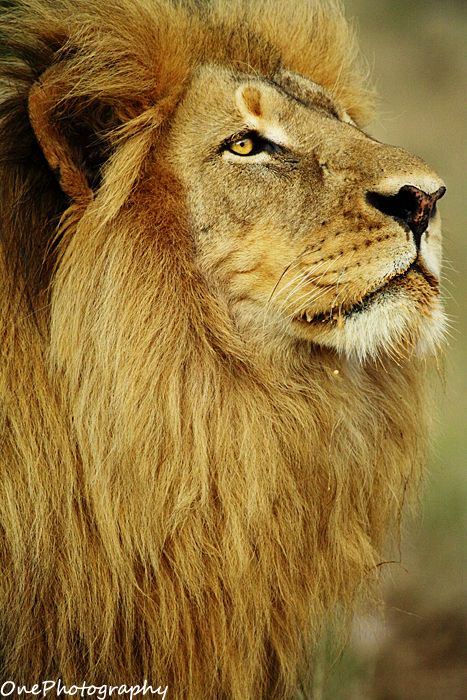
The King

• The King
Image by John de Jager • OnePhotography  External link - opens new tab/page

Going on safari – it’s amazing.

Photographic safaris should be experienced by every photographer at least once in a lifetime. They provide the perfect opportunity to photograph wildlife and nature as they are dedicated tours focusing on photography.

What is on offer on a photo-safari?

Most offer private vehicles allowing the photographers to focus on specific wildlife, spend the needed time with the wildlife to get the shot, and allow for a more flexible approach to the safari. Most importantly, the safari is hosted by an expert wildlife photographer to assist clients with getting the perfect shot and then processing the images.

How should you prepare

• Contact the operator of your chosen photographic safari company and confirm with them what their recommended equipment is. This can vary from area to area, especially with regards to lenses. Some reserves allow vehicles to follow animals off road and one can get away with shorter lenses e.g. 200mm. Other reserves are more restricted and longer lenses are required e.g. 600mm.
• Spend time getting to know your camera and equipment. Wildlife photography is not static. You will see fast moving subjects and shifting light. You should be able to change settings quickly.
• Practice by photographing pets or birds in your local home area. Get a feel for photographing a moving subject. (You can get some more advice on this in our action photography course – Editor).
• Beginners and amateurs, don’t worry! This is exactly why an expert wildlife photographer joins you on safari. The host will assist you with the best camera settings and how to get the best out of your camera.

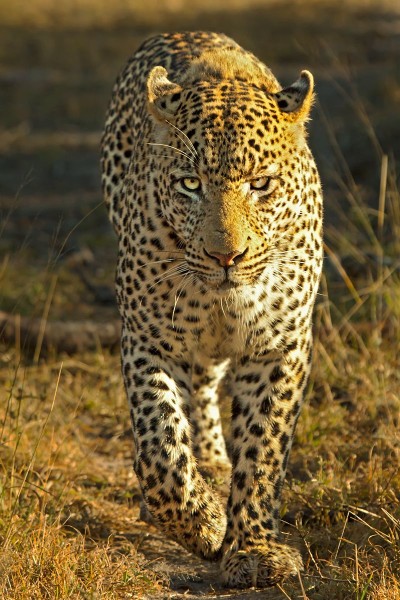
On a mission

• On a mission •
Click to view large
Image by John de Jager • OnePhotography  External link - opens new tab/page

What you should take

Once you are out in the field it is not easy to get more equipment. Think ahead…
• A camera and lens within your price range (some operators offer equipment rental). Lens wise, it is good to have a wide angle lens for landscapes and a telephoto lens for the animals.
• An external flash with spare batteries is well worth having. If you can also bring a wireless flash transmitter to avoid “red-eye”.
• A shutter release switch for star trails and possibly an (intervalometer).
• Take enough memory cards (high speed). I have shot 8GB in RAW images in less than an hour on safari before, so it is important to have enough backup memory space available. Some form of external storage device to transfer images onto after each safari is advisable too. The reason why I suggest high speed cards is because in wildlife photography you will often shoot in high speed continuous mode. Card speeds affect how many frames you can capture in a burst of shots.
• Take spare batteries. You can be out on a drive for many hours at a time.
• A good laptop powerful enough to process images on Photoshop/lightroom or other post-processing software. Some operators offer monitors to uplink to for editing purposes but if not, bring a laptop with dedicated graphics and an RGB LED screen.
• A memory card reader or method of downloading your images to clear your memory cards each day.
• A good lens cleaning kit is essential. Being out in the field leads to dust collection!
• Insure your equipment! Weather can be unpredictable and I have had a client lose a Canon 600mm lens in a freak wind storm that caused a log to fall on the lens. The lens was not insured…!
• Bean bag or vehicle mount to hold your camera nice and still while shooting.
• Plastic packets, waterproof camera sleeves or waterproof material! Thunderstorms are common in Africa through the summer months. So bring something just to cover up that lens or camera.
• Bring a lot of patience! Wildlife photography is often about waiting for the right moment. Under the guidance of your host and guide, this wait will be more than worth it.
• A willingness to learn and share. It is important on these safaris to be willing to learn, not just about photography but about the creatures you are photographing. The more you learn about animal behaviour. the better. It will allow you to anticipate your next shot. Share with the others on safari too. Everyone has some idea or technique that may just help others in the group.
• An ethical respect for nature is very important. Not only is it unethical to disturb animals to get a shot, but it can at times put you and the rest of the clients in danger.
• Adequate protection against the sun (hats, sun cream etc).

John de Jager (Contributing Author)

John de Jager is the owner of Onephotography, a photographic safari company operating in South Africa. They specialize in luxury photographic safaris focusing on rare and endangered species found in South Africa – as well as all the classic wildlife. See OnePhotography on FaceBook  External link - opens new tab/page for regular updates and stunning imagery.

Comments, additions, amendments or ideas on this article? Contact Us
or why not leave a comment at the bottom of the page…

Can you write? Of course you can!
Write for Photokonnexion...

We would love to have your articles or tips posted on our site.
Find out more…
Write for Photokonnexion.

14 easy ways to put the romance back into your your relationship using photography

Sometimes photographers forget…

We want to be following our passion so much we forget about the other special passion in our lives. It’s no surprise our spouse’ gets fed up with photography. They probably feel pushed aside by our hobby.

If you want your spouse or partner to accept your photography you have to find ways to include them and make them feel special too. Help them enjoy the fruits of your photography. Here are some ideas to turn your photography into togetherness…

A gift of choice

• Let your spouse choose a subject, framing and place for a photo. They will be flattered that you want to do that for them. Actually it will be fun. They get your attention on what they like. You show off your skills. You both get something you will treasure.

A lasting bond

• Build a lasting bond – share an interest. Find out about your partners main interest – cooking, a pet, reading, fast cars – a sport maybe. Whatever they love is something you can photograph. Get interested in their passion – it has photographic potential to draw you together.

A gift…

• Look up ways to make photographic gifts. There are lots of craft sites around the web. Make a gift for your spouse. Finish it is beautifully so it will be treasured. Surprise them.

The little things mean so much

• Buy your partner a small but meaningful gift they will love – flowers, special chocolates, a tie – something you would not normally buy. Hide a photo that says, “I love you” in with the surprise gift.

• Express your love in a photo. Frame it. Present it to them when they least expect it and tell them how much you love them. The photograph will be a reminder of a special moment.

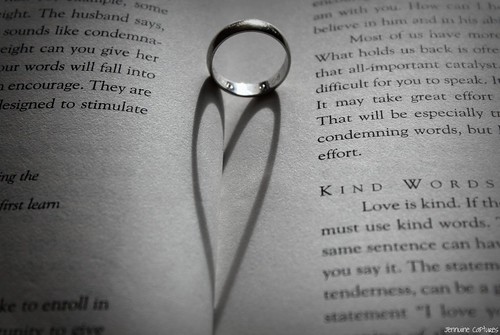
Heart in hand

Heart in hand • By Damon Guy


• Take a photo that says “I love you” in some way. Leave it for your partner to find when you are not there. Write a special message on the back – help them feel the photograph is special.

• Take great photographs of your children. Caption them… “I am so proud of you for being such a great mum/dad” Frame the photos and present them to your spouse as a surprise.

• Make a romantic photograph. Put a caption on it that agrees with the mood of the shot. Leave it where they’ll find it later (car seat, under a pillow, in their shoes… in a letter. Make it special and unexpected.

A big gesture

Nothing says “I love you” more than a true commitment…

• Tell your spouse you will do something they choose this weekend. Spend the time with them, take your camera. Your spouse will enjoy it, you get to photograph something different. By dedicating time to them you are saying I love you… and you’ll have photos as proof!

• Book a table at your spouse’ favourite restaurant. Tell them to dress up in their best party outfit, or buy a new one. Tell them you want to do this because they are the special person you want to photograph. Tell them you love them. After the portrait, have a great evening together. Give your partner the photo as a reminder.

• Take your partner away for the weekend. Visit places you can enjoy together and record it photographically. Make an album of the things you did together. Put a loving message on the front page.

• Tell your partner that they can choose the holiday destination this year. Let them have the holiday they want. You will be there to do the photography. Make a great photo-album to commemorate the holiday where they did what they wanted.

Bring back the romance…

Sometimes romantic moments are so far apart we need a reminder…

• Make a picture that your spouse will find sexy, romantic, exciting… whatever best emphasises the right mood. Frame and wrap it. Present it in a sexy, romantic, exciting way as the mood of the photo suggests. Follow up with the promise contained in the photograph.

• Take some candid, every day, photographs of your spouse. Look for those moments when they are doing the things you love to see… smiling, chatting, when those cute dimples appear. When you have about 10 shots of those things that you find attractive about them, make up a little album. Write a romantic message on page one that tells your spouse this is why you love them…

Love is…

These things help us stay close to our partners. A little love and some frequent gestures keep things vibrant. Your partner will appreciate your photography if those little pictures say “I love you”.

find out more...Photokonnexion tips by email
If you enjoyed this article please sign up for our
daily email service.
                                                 Find out more
#11030#

By Damon Guy (author and Photokonnexion editor)

Damon Guy - Netkonnexion

Damon Guy (Netkonnexion)

Damon is a writer-photog and editor of this site. He has run some major websites, a computing department and a digital image library. He started out as a trained teacher and now runs training for digital photographers.
See also: Editors ‘Bio’.

Can you write? Of course you can!
Write for Photokonnexion...

We would love to have your articles or tips posted on our site.
Find out more…
Write for Photokonnexion.