Tag Archives: High ISO

Low light action shots – tips for getting them right

“Low light action shots” is contributed by Melanie Hyde (Bio) of PaintShopPro.com Low light action shots | External link - opens new tab/page.

Low light action shots need care to get them right.

Low light action shots need care to get them right.

Action photography itself can be extremely challenging. Being in the perfect place at just the right time, capturing that incredible moment. Then, hoping to transport anyone who sees your photo across time and space to take them back to the moment the image was taken. It’s a truly a magical experience, whether you’re taking the picture or the viewer.

Given the challenges that come with action photography, removing most of the light only makes it all the more difficult.

There is good news. The same principles of action photography and proper exposure apply. It’s just a little more challenging to get those low light action shots.

Light sources for your low light action shots

When it comes to taking low light action photos, you’ll need to combine the available light sources. This will help to make the most of the situation. First, take a look around and identify whether the lighting is constant or variable.

Constant Light

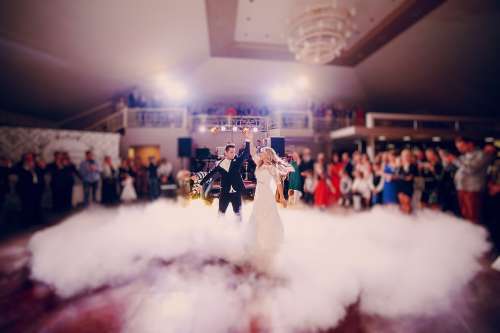
Constant light occurs within your setting when you can isolate out a source for a shot. Framing the shot is important so that the light is consistent for that shot. The next shot may have a different source – you need to isolate the light for that too. For example, if you were shooting a wedding reception, you might capture an image of the bride and groom on the dance floor. Then, you turn around and capture an image of the bride’s parents dancing across the room. Depending on the setting, the lighting may be different between the two subjects but consistent within each shot.

When lighting is consistent, operating your camera becomes much easier. The camera can adjust to meet the needs of the low light action shots. Here are a few points to keep in mind when shooting with constant low light:

  • Shoot in shutter priority mode so the camera can adjust.
  • Use Auto White Balance so the camera can adjust.
  • Manually control your ISO.
Variable light

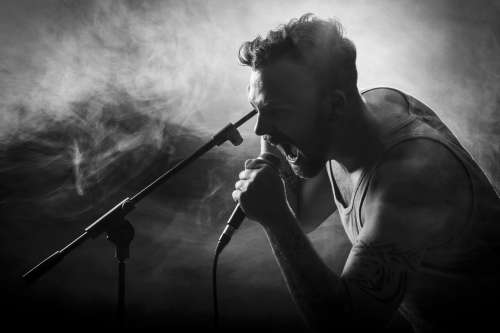
Variable light occurs when light sources are constantly changing and are inconsistent across your field of view. Imagine you’re photographing the lead singer at a rock concert. You may have to deal with strobes, spotlights and pyrotechnics. The constant changes in light sources will cause your camera to struggle to automatically expose the image correctly.

Low light action shots with variable light sources can confuse your camera - go manual.

Low light action shots with variable light sources can confuse your camera – go manual.

When dealing with variable light conditions it’s usually best to go manual. In this situation, remember to:

  • Manually set your aperture and shutter speed.
  • Manually set your White Balance.
  • Manually set your ISO.
Balance aperture, shutter speed, and ISO

You have three ways to control the way your camera exposes an image. Aperture, shutter speed, and ISO. To successfully capture great low light action shots, you must be able to manipulate these elements. Select settings that allow you to capture the highest quality image for the ambient light conditions.

The exposure triangle helps you to keep your shot’s exposure within the capability of the camera and lens. So when going manual your settings should allow these three essentials to balance. Look in your viewfinder to get the needle settled in the centre for a proper exposure. For more detail check out The Exposure Triangle – An aid to thinking about exposure.
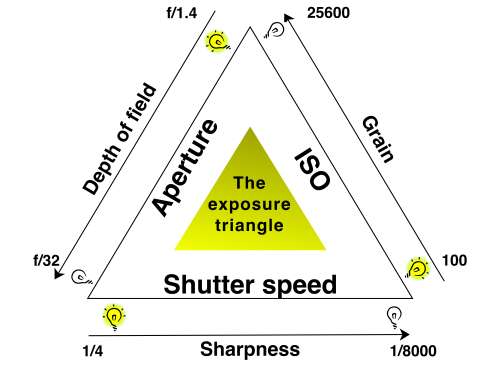
The exposure triangle is an idea that helps you balance aperture, shutter speed and ISO for a good exposure.

The exposure triangle is an idea that helps you balance aperture, shutter speed and ISO for a good exposure.

Start with shutter speed

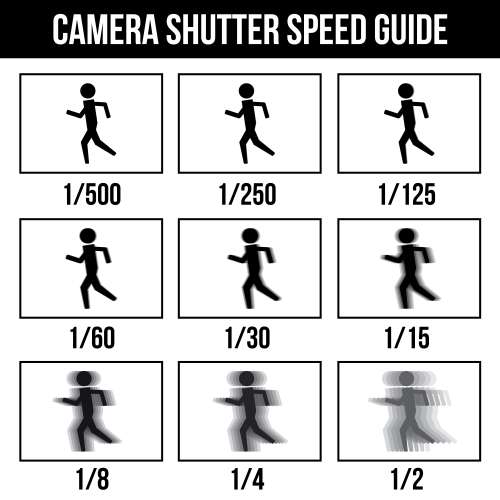
Low light action shots are by definition going to be in difficult light for your camera. Getting your shutter speed right can be tricky. However, it has a huge impact when shooting movement in low light. The following diagram will help you select the right setting.
Camera shutter speed guide.

Camera shutter speed guide :: Low light action shots need the right camera speed. If the shutter speed is too low you get blurring.

You have to select a speed that is fast enough to capture the motion clearly and without blur. The speed should still slow enough to deal with the lack of light. For action shots, it’s always best to use the fastest shutter speed that the light allows. It is a balancing act so you will need to practice.

Select the widest aperture for your low light action shots

In action photography, capturing crisp and clean images is usually the priority. When shooting with low light settings, it’s crucial to get as much light to your sensor in the small amount of time that your shutter is open as possible.
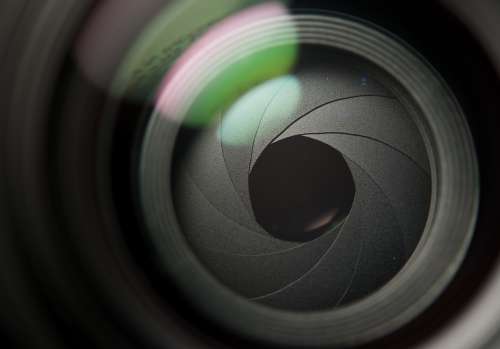
For low light action shots use a wide aperture to increase the incoming light.

The aperture sets the initial amount of light coming into the lens. For low light action shots use a wide aperture to increase the incoming light.

To accomplish this, use the widest aperture that your camera allows. While shooting in shutter priority mode, you allow your camera to do this automatically. Shooting in manual mode however, you’ll need to keep a close eye on your exposure. You need to make sure that your images are not underexposed in the low light.

Using high ISO

Are your images are consistently coming out blurry with your aperture is as wide as can be? Consider stepping up your ISO settings.

Your low light action shots can really win the day if you get your ISO right.

On the dance floor the light is almost always difficult. Your low light action shots can really win the day if you get your ISO right.

By changing your ISO, you alter your camera’s sensitivity to light. The higher the ISO, the more exposed your image will be. Just be cautious: using a higher ISO may introduce more “noise” to your photos. This noise can often be reduced or corrected in a post-processing software like PaintShop Pro Low light action shots | External link - opens new tab/page or Lightroom Low light action shots | External link - opens new tab/page. (Shooting in RAW is especially helpful with noise reduction).

Check your work as you go

Throughout the shoot, use your histogram. (See: Can you use the histogram on your camera?) It will help to make sure you’re exposing your images correctly. The histogram shows the distribution of the type of light in your shot. It aims to help you capture a consistent amount of light across the full spectrum of your image.
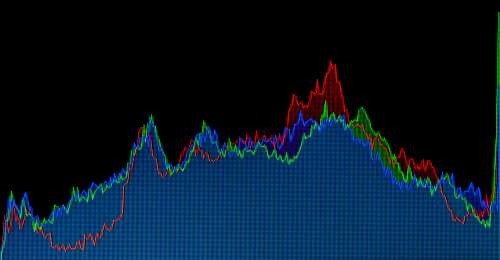
The histogram on your camera helps you ensure effective use of light in your exposure.

The histogram on your camera helps you ensure effective use of light in your exposure.

The histogram on your camera helps you ensure effective use of light in your exposure.

You’ll also want to make sure that your white balance looks good and adjust accordingly. In most cases, your camera is going to be able to set white balance automatically, but you may need to tweak it; especially if your lighting is wildly inconsistent.

Increase your odds

Low light action shots are all about being in the right place at the right time with the right equipment.

Use the fastest lens you can find. The wider the aperture, the more light your lens allows to strike your camera sensor. Anything higher than F2.8 will cause you to struggle with exposure.

Set the camera to continuous drive. This equips your camera to capture a burst of images every time you press the shutter release and gives you a better chance of capturing that perfect picture.

Use a fast memory card. Your camera can only capture images as fast as it can write them to the memory card. If you snap too many images in rapid succession, you’ll have to wait for the card to catch up with your camera and you might miss “the shot.”

Be prepared to shoot…a lot. You’re going to have a lot of images that are no good. So remember to keep tinkering with your settings. The key is shooting lots of images at different settings until you get the perfect mix.

Don’t forget to have fun

Low light action photography can be both challenging and fulfilling. As you refine your skills and your eye for lighting, action, and composition, remember to regularly experiment and try new settings.

Comments, additions, amendments or ideas on this article? Contact Us
or why not leave a comment at the bottom of the page…

Like this article? Don’t miss the next — sign up for tips by email.

Simple videos showing how camera settings work

Understanding the relationship between ISO, Aperture and Shutter speed…

These are the three critical factors in the exposure relationship. Getting a feel for how they work together is the essence of controlling your camera. Several people asked me to find a simple explanation for the way this relationship works after seeing this post yesterday: How to work with your camera settings – a simple, fun lesson.

The key point

The three settings, ISO, Aperture or Shutter Speed are set up on your camera in stops, or fractions of stops. The stop is a photographers way of measuring light in the camera.

The most important thing to remember is that a stop of aperture is the same as a stop of ISO, and in turn a stop of shutter speed. As they equal each other, you can keep them in balance. If you put one setting up a stop (or fraction of a stop) you can put one of the others down a stop (or fraction) and you will get the same exposure. This allows you to change your settings to get a different result (more bokeh, less movement blur etc) but retain the same exposure levels.

The two videos below will help you to understand the way the settings work. I have given you two versions of the same information. They both present differently, and they both have snippets of information that are different from the other. However, they both cover the same material. I hope that one or both of them will help you to see how the settings work. Enjoy!

Aperture Shutter Speed and ISO, Photography 101

The second video covers almost identical material but shows some of the points through the camera viewer. This helps you to see the context of the settings easier.

Exposure (Aperture, Shutter Speed, ISO)

Now try out your new knowledge…

Now you can try out CameraSim in yesterdays post. Try varying the settings for yourself like they did in the videos and see how they work together to get an exposure balance.

By Damon Guy (author and Photokonnexion editor)

Damon Guy - Netkonnexion

Damon Guy (Netkonnexion)

Damon is a writer-photog and editor of this site. He has run some major websites, a computing department and a digital image library. He started out as a trained teacher and now runs training for digital photographers.
See also: Editors ‘Bio’.

Can you write? Of course you can!
Write for Photokonnexion...

We would love to have your articles or tips posted on our site.
Find out more…
Write for Photokonnexion.

A quick look at image stabilisation

Image Stabilisation

Image Stabilisation

Image stabilisation helps you get a sharper picture.

Good images rely on a steady hand or a tripod. You also get a help from the image stabilisation in your camera or lens. These systems help your lens stay steady. Here we are going to get a look at what is involved and how to use it.

What is image stabilisation?

The term “Image stabilisation” represents a number of technologies used to reduce blurring caused by camera movement during exposure. It compensates for movement in two planes. These are referred to as pan (lateral twisting or yawing movement) and tilt (vertical or pitching movement).

Camera movement is recorded as blur when the shutter is open long enough for the movement to be captured. The slower the shutter speed the more likely it is that the movement will be detected. The tiny, but continuous movements of our hands tend to make hand held shots a little soft. Longer exposures will be even softer since the tiny movements will continue blurring the shot throughout the exposure.

Using an image stabilisation technology allows a mechanism to off-set or compensate for the movement not prevent it. Extreme or large movements will still cause blur during the exposure. However, image stabilisation systems are designed to compensate for the movements created by the almost imperceptible movements of our hands while hand-holding a shot. Typically recent image stabilisation systems will compensate for exposures four to sixteen times longer than could be hand held without the compensation. This would mean that instead of using a shutter speed of 1/250th of a second, you can use image stabilisation to get a shutter speed of around a 1/30th of a second and still get similar image quality. This could significantly improve the light levels in your exposure.

Types of image stabilisation

Optical image stabilisation: This type is mounted in the lens. It uses high speed motors to shift a lens element around changing its orientation to compensate for the movement of the camera. It is highly accurate, compact and fast. It does add quite a lot of weight (and expense) to the photographic lens unit overall. However, it performs really well under all types of movement even fairly extreme movement that might be found in panning for example. It will not prevent the gross movement blur, but will compensate for the tiny variations while panning for example.

In-camera stabilisation or sensor shift stabilisation
This technology uses motor technology to move the Digital Image Sensor to compensate for the movement of the camera. This method concentrates the stabilisation in the camera body and therefore it is only paid for once on the purchase of the camera body (unlike lens-based systems). Sensor shift technology tends to mean the lens is lighter too making handling easier for some people. This type of system does not cope as well as lens-based systems for more extreme movements. Long focal lengths and telephoto lenses will tend to exaggerate the degree of movement of a beam of light hitting the sensor. Consequently the sensor needs to be able to compensate for more extreme vibrations or movements to get the same image quality as a lens system. As the sensor shift system is limited by its range of movement it has limited tolerance at the more extreme end of the range.

Stay sharp!

Many learners find that the softness they get when using a DSLR is very frustrating. While image stabilisation helps, it does not cure the problem. Remember that these systems can only compensate, not prevent, movement blur and softness. So you need to take other steps to make your shots sharp. Here are some issues to consider regarding image stabilisation…

High ISO (in manual control modes): Raising your ISO can help reduce movement blur because you are making the sensor more sensitive to light. Your image sensor will be exposed more readily allowing you to still have a faster shutter speed to take your shot – then movements don’t have time to make the shot soft. Remember, high ISO may increase your digital noise, particularly with very high ISO levels (say 800 or more).

One way to overcome this softness created by hand movement is to raise the and set a faster shutter speed The point and shoot mode or auto mode of your camera will do this to ensure your get sharp shots in most daylight situations. Of course this means a short exposure which may not be suitable for your shot.

Wide aperture(in manual control modes): This too will allow more light into the shot and will allow you to have a faster shutter speed. However, the depth of field will be reduced and that will reduce your sharpness in some areas of the shot.

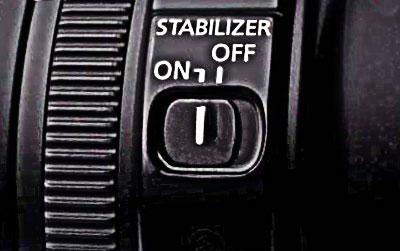
Use a tripod: Using a tripod is probably the best way to get a sharp shot. In most situations you should turn off your image stabilisation to use a tripod. The motors that do the stabilisation actually create vibration in the tripod and can cause softness. Some systems compensate automatically for being on a tripod so read your technical manual to get guidance for your camera.

Panning: This will definitely create movement blur. But some image stabilisation systems have mechanisms to reduce the vertical movement while panning. In this case make sure you know how to switch to this mode. The difference it can make to getting a moving object sharp is surprising.

Mirror lock-up: Vibration is caused when the reflex mirror in a DSLR flips up. You can lock up these mirrors while you take the shot. The procedure for that is different on every camera so check the manual for the correct method. The image stabilisation mechanisms will not compensate for movement caused by the mirror movement.

Careful use of the shutter button
Don’t stab the shutter button. Roll your finger onto the button gently depressing it. If you stab at it there will almost certainly be an erratic movement that the image stabilisation will not be able to compensate for.

Eagerness!
While enthusiasm is great, taking the camera away from your face too quickly can induce movement before the exposure is complete. Image stabilisation will not compensate for this type of action. Try to count to two before taking the camera away from your face.

Improving overall

Image stabilisation systems vary in their effectiveness according to model, camera, lens, use and how much movement there is. They can be very effective in helping you gain control over your sharpness but they are not the final answer. Sharpness involves a range of techniques and procedures which you will need to learn and practice to improve. Nevertheless, if you are hand-holding a shot you will get significant improvements in sharpness by using these systems. If you want to know a little bit more detail about image stabilisation you can see some more detail in Definition: Image stabiliser; Image stabilisation.

find out more...Photokonnexion tips by email
If you enjoyed this article please sign up for our
daily email service.
                                                 Find out more
#11030#

Can you write? Of course you can!
Write for Photokonnexion...

We would love to have your articles or tips posted on our site.
Find out more…
Write for Photokonnexion.

By Damon Guy (author and Photokonnexion editor)

Damon Guy - Netkonnexion

Damon Guy (Netkonnexion)

Damon is a writer-photog and editor of this site. He has run some major websites, a computing department and a digital image library. He started out as a trained teacher and now runs training for digital photographers.
See also: Editors ‘Bio’.