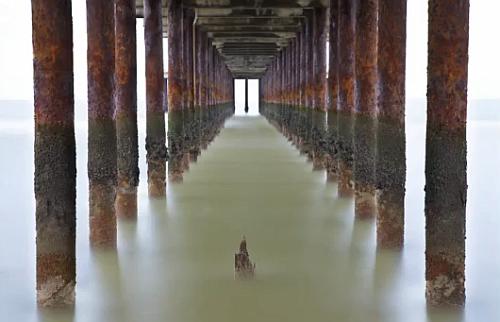
Lee Filters – Big stopper neutral density filter reduces the light by ten stops. You can produce great images like this one from the video.
Sometimes you need a long exposure…
However, to take a very long exposure in daylight will mean too much light will burn out your picture. So you need to turn down the incoming light. For that you use an ND Filter. Here is how they are used.
Remind me, why do I need this?
Remember, shutter speed controls movement blur. If you want to show a car looking blurred as it goes past you might set the shutter speed to about a fifteenth or thirtieth of a second. But what if you want to capture a much less obvious movement or a really slow movement? Say two minutes? Well, normally the amount of light coming in will burn out the shot. Of course you can use a really small aperture (eg: f22) and let less light into the camera. But on a bright day two minutes will still burn out the shot. This is where Neutral Density (ND) filters come in. They are specially darkened filters that cut the light down allowing you to extend your exposure. With one of these you can do some awesome effects.
10 stop Neutral Density Filter (video)
In the video we see the making of a picture (above) by using the Lee Big Stopper Neutral Density Filter. This ND filter is very dark, which takes down the light by 10 stops. It creates a great effect on of the water swirling under the pier. This is the darkest type of ND filter.
ND filter strengths
ND filters can reduce the light entering your camera for up to 10 stops. This allowed 2 minute exposures in the video. However, there is also ND2, then ND4 and ND8. Other strengths exist, but these are the most common. They allow you to have shorter exposures so you can adjust the exposure to the needs of your shot. You can also put them together so an ND8 + ND2 gives you an effective ND10 – the strength in the video.
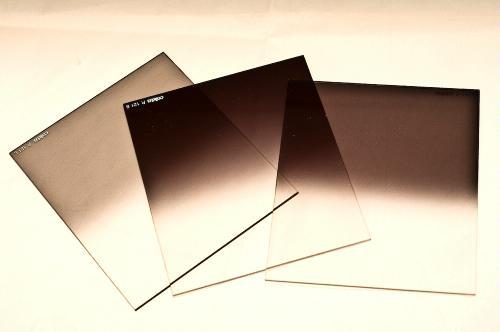
ND Grad.
Another of these type of filter is the graduated Neutral Density, or ND grad. The use of an ND grad is quite specific. It is used to reduce the incoming light from the sky when you have a bright sky and dark ground. If you expose for the ground the sky burns out. If you expose for the sky the ground is too dark. The ND Grad. helps prevent the sky burning out.
The ND Grad. is dark at one end and clear at the other. The two zones meet in the middle where the clear graduates into grey. Put the filter over the lens so the line of clear/grey graduation lies on the horizon, darkening the sky. Now, you can expose for the scene and get even light distribution. The next video will show you how this type of ND is used.
Problems?
No, filters are simple and easy to use. There are some important things to remember…
Always use a tripod. It is impossible to hold a camera steady for more than about half a second. After that your image will start to get blurry.
You need to be quite precise about lining up ND Grads with the horizon. Take a little practice before going out to do the BIG shot.
The darker the ND Filter the more there is a tendency to impact on the white balance. Sometimes you get a blue colour cast, sometimes a red one. You can remove this in post production if you are using the RAW file format. Alternatively you can test the filter with your camera and adjust the white balance setting in-camera to correct for the aberration. Most of the stronger ND filters have this colour-shift tendency. it is exaggerated by the sensor type. CMOS sensors tend to magnify the effect.
Sometimes getting the exposure right is a matter of experimentation. Take a few test shots and make sure you do some “Chimping”.
If you are buying ND filters, especially ND Grads buy square ones. You can buy adaptors for these to fit any lens and it allows you get creative in more ways than round, screw-on filters that only fit one lens.
There are many different kinds of filters which produce a huge range of fun effects in-camera. Many of these effects cannot be processed into the shot later. The square filter system shown in these videos allows you to expand your collection and develop a new set of skills without buying an expensive filter for each lens.

ND Filter set…
3 full ND filters
3 graduated ND filters
Full fitting kit for a range of camera
and lens sizes.
10 Adapter Set + 6 Filter ND2 ND4 ND8 G.ND2 4 8 For Cokin P Canon Nikon Sony LF6
Please leave any questions or comments you have about these in the comments below.
Start Photokonnexion email subscription now!
Photokonnexion Photographic Glossary – Definitions and articles.
Light and Lighting – Resource pages on Photokonnexion
Definition: Post-Production; Processing; Post-Processing; Image Editor; Editor
“Chimping”
Definition: Neutral Density Filters
 Photokonnexion tips by email
If you enjoyed this article please sign up for our
Tips by email service.
Find out more…
By Damon Guy (author and Photokonnexion editor)

Damon Guy (Netkonnexion)
See also: Editors ‘Bio’.