Tag Archives: Eyes

Get down to eye level with animals

Work at the eye level of the animal - get into their world

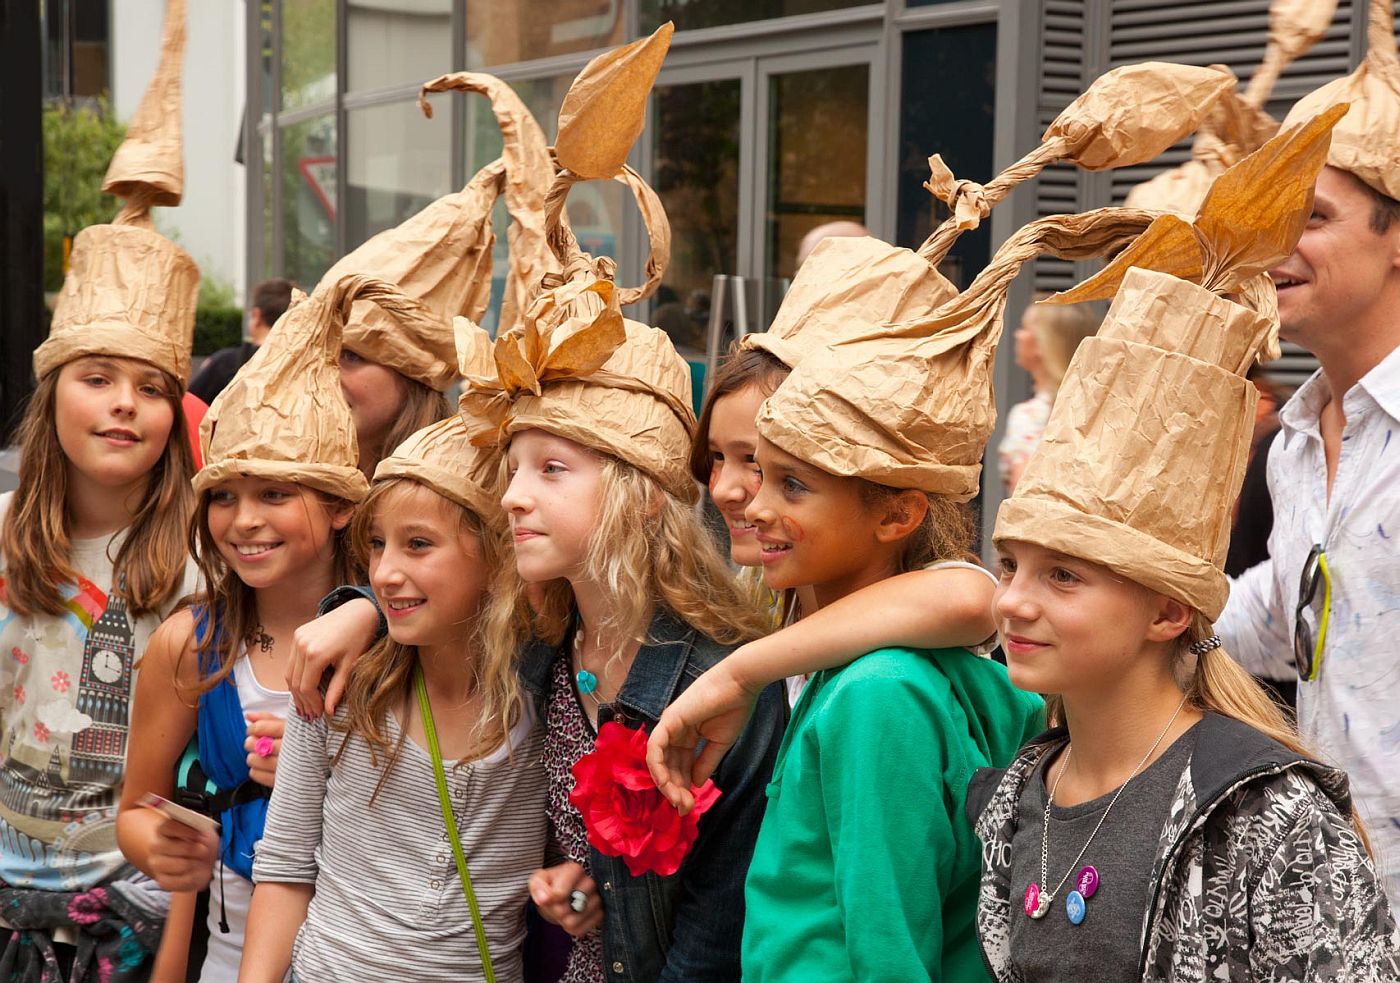
Work at the eye level of the animal – get into their world.

The world at eye level…

Photography can be wonderful because of the alternative views we can get. Often the best photographs are the ones that show us new views, or ones we don’t see from our normal standing position. The world of animals is a particular case in point. Use the eyes as a guide. Work at eye level.

Photographing animals

There is a whole range of animals involved in our lives. Domestic animals and others make great photo-subjects and there is a huge number of different ways to photograph them. Inexperienced photogs often make the mistake of taking the shot from the normal upright standing position. This does two things. It renders the subject “normal” in the eyes of the viewer – because this is the angle they see it normally. This upright position also tends to make the animal seem small and subservient. Both these viewpoints can make your shot look mundane or worse, flat. It will probably be uninteresting to the viewer.

Get down to the eye level of the animal. All of a sudden you are in the animals own world. By engaging directly with the animal at its eye level you create a correspondence with it. Eye-to-eye communication is an excellent way to get to the story of the animal. You see it at its own height. You can also see its world the way the animal does.

The point about this is that you are telling the viewer a new story. It is one they normally stand above. The viewer will have a much better insight from the animal you have pictured. More to the point you will be developing the eye level contact between the pictured animal and the viewer themselves. That contact brings the viewer into the picture. Eye to eye pictures are very powerful.
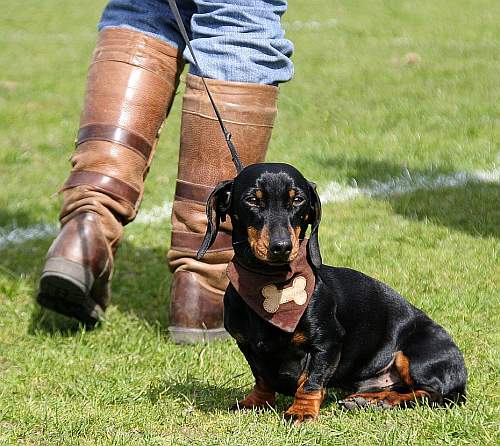
Eye level contact

Getting eye level contact with an animal is very powerful. The line of sight view the animal has, and the impact of the stare, can all be used to good advantage. If your animal has particularly amazing eyes you are also going to gain from the directness of the shot.

Eye level contact with animals and birds is a very powerful way to draw viewers into your picture.

Eye level contact with animals and birds is a very powerful way to draw viewers into your picture.
(Click image to view large)


Of course you can do the same for animals, in many situations. I enjoy doing photography in zoos. When you try to picture animals there, try to get them at eye level too. To do that you may need to get up a little higher. For example monkeys may be above your head height. I have often found a light ladder or folding step useful when photographing this way. It gets you up to their level.

Getting down low is important too. So be ready to lie down or at least bend for some shots. Try to get your shot right into the eyes of the animal subject you are imaging.

Bring the eyes alive

Eyes tend to look dead if they don’t reflect light. So when possible arrange the light or take the shot to see these reflections. They are called catchlights. If the eyes look alive the dynamic feel of the catchlights will add to the drama of the shot. Catchlights are more easily captured at eye level. So taking a picture on a direct line of sight will help to capture the feel of a penetrating eye.

Eye to eye level

All living subjects have eyes. You will always find that they are most important in the power of your shot. If you get your shot with an eye to eye level correspondence you will connect with that power. Animal or human subject, that power will be there. Your photography will benefit from emphasising it when ever you can.

Comments, additions, amendments or ideas on this article? Contact Us
or why not leave a comment at the bottom of the page…

Like this article? Don’t miss the next — sign up for tips by email.

Damon Guy - Netkonnexion

Damon Guy (Netkonnexion)

Damon is a writer-photographer and editor of this site. He has run some major websites, a computing department and a digital image library. He started out as a trained teacher and now runs training for digital photogs.
See also: Editors ‘Bio’.
By Damon Guy see his profile on Google+.

Five simple tips for making street portraits

• The Lady •

• The Lady •
Classic Rembrandt Lighting in a modern street portrait
Click image to view large
• The Lady • by Netkonnexion, on FlickrExternal link - opens new tab/page

There is a beauty in simplicity.

I love to make street portraits, simple characterisations of people in their real lives. The street photographer thrives on the capture of the moment in someone’s life that just says a little about who they are… a moment in the life of a person you will never know. In this post I am going to look at how best to capture a street portrait.

1. Eye to eye

Out there on the street you a part of the scene – creating a momentary rapport with your street subjects. People like to communicate. And, they like to see communication. When you take a street portrait try to get your subject looking at you. If they are, they are communicating with you. The viewer of your photograph will be a part of that correspondence too. It will pull them in. Work at the eye level of your subject. Explore their faces through their eyes. Your capture will have much more power. If you are able to capture them looking in your direction, make sure the eyes are in focus too. This is good advice for any photograph, but it is critical for portraits. If the eyes are out of focus any appearance of communication will be lost.

2. Understanding the background

Every subject exists in some sort of environment. However, street portraits don’t allow much control over the background. Sometimes that can ruin your shot. A street portrait is about your subject. If there is too much going on around your subject then it can be a distraction. It takes the viewers attention away from the person you are showing them. When you are doing street portraits you can control the background in two ways – capitalise on it or get rid of it. If it is interesting, not too distracting, and puts your shot in context, then go for a deep depth of field (say, f11). That way you show your subject in the full light of the city environment. On the other hand if the background is complicated, distracting, or just uninteresting – go for a wide aperture and shallow depth of field. If your subject is away from the background your subject will stand out leaving the background out of focus.

3. The other people round about

If your subject is a part of a group then include the group. However, if they are not in a group portrait the other people round about can add to the shot or create a distraction. Try to make your shot pick out your subject or the group they are in. If you are trying to do a street portrait then your concentration should be on the subject you are trying to show. If you are more interested in your subject with their group then the relationship is important. Fix on that and bring it out.

The point of street photography is to show something coherent. If what you show is simply the chaos of a street scene, most of the time the impact will be lost in the chaos. When there is more than one person in your scene you need to bring out relationships, coherence or some sort of point that makes the shot interesting. There is nothing wrong with capturing a group of people as long as the capture has a point. Tell a story, bring out the meaning.

• Paper hats •

• Paper hats •
Pulling a group portrait together requires a coherence, collective story or central interest to the shot.
Click image to view large
• Paper hats • By Netkonnexion on Flickr External link - opens new tab/page

4. In the best possible light

The character of the light is one of the most important aspects of the shot. There is no single rule for lighting but it certainly helps to have an idea about the basics. In the photo above, “The Lady”, you will notice the triangular patch of light on her left cheek. This is a portrait lighting situation called “the Rembrandt” after the famous renaissance painter who pioneered this lighting. The form of the light/shadow helps show off the shape of the face and highlights the cheeks beautifully. In this case her eyelashes cast an interesting shadow and add character to the shot too.

When you are taking street portraits it helps to know about basic portrait lighting. The light and shadow on your subjects face is important. The wrong light can affect the form and shape of your subjects face, be unflattering or even create odd contrasts or miss-shape the face. It can certainly create a distraction if it is wrong. If you want to know more about how to light the face for portraits then check “Simple positions for classic portrait work”. It is the face that gives the most character to your subject. A beautifully photographed face is the foundation to a great shot.

5. Shoot many shots

No one should just be machine-gunning shots. Look for great shots and take them with care and consideration. On the other hand, you really want to make your trip worthwhile. Concentrate on bringing out some of the points above, but make sure you take lots of shots. Street photography is an uncontrolled situation. To ensure you get the best out of the subjects you see you will need to follow up on as many interesting points as you can. Things change fast – you may not get a second chance. Look, study, consider, frame, shoot – a working sequence of steps for a great shot. If you keep spotting interesting things… do your best to capture them.

find out more...Photokonnexion tips by email
If you enjoyed this article please sign up for our
daily email service.
                                                 Find out more
#11030#

By Damon Guy (author and Photokonnexion editor)

Damon Guy - Netkonnexion

Damon Guy (Netkonnexion)

Damon is a writer-photog and editor of this site. He has run some major websites, a computing department and a digital image library. He started out as a trained teacher and now runs training for digital photographers.
See also: Editors ‘Bio’.

Can you write? Of course you can!
Write for Photokonnexion...

We would love to have your articles or tips posted on our site.
Find out more…
Write for Photokonnexion.

A little known idea that will help your photography every day

Learning photography is about understanding light.

There is a ready source of learning about light you see every day. Photographs and television provide valuable lessons in light. You can learn a lot by observing how light is used in different productions. Look for the way light is cast, which direction it comes from, its colour and it’s intensity. Also look for the way it is used to create mood and atmosphere – these often show off how shadows and hard light or soft light are used. Good producers of still photography, television and film are masters of creating scenes with and manipulating light. Looking carefully at the light itself in such productions will provide great insights for your own photography.

[More about eyes: The Eyes Have It… nine ways to emphasize eyes]

Portrait Reverse Engineering – It’s In The Eyes

In the video we see one aspect of how to see the light. I have written about catchlights before. They are the bright spots in peoples eyes that are reflections of the nearby lights. In this video an examination of catchlights is used to understand the nature of the light used in the portrait session. This is a clever and interesting way to understand portrait lighting. It is also something of a study in television too. Directors use lights to create catchlights for nearly all close shots. So watch out for them as you watch television.

The Michael Andrew Photography School External link - opens new tab/page

By Damon Guy (author and Photokonnexion editor)

Damon Guy - Netkonnexion

Damon Guy (Netkonnexion)

Damon is a writer-photog and editor of this site. He has run some major websites, a computing department and a digital image library. He started out as a trained teacher and now runs training for digital photographers.
See also: Editors ‘Bio’.

Five tips to help your portraiture from the Renaissance

Renaissance Painting - "Portrait of a Gentleman" by Ridolfo Ghirlandaio

“Portrait of a Gentleman” by Ridolfo Ghirlandaio (Part copy of the original)
Renaissance painting can teach us a lot about portraiture.

The way we look at people is a constant in time.

Renaissance Portraits represent the artists view at the time. Our photographs represent our view today. Artists paint to bring out features. We can see lessons in that emphasis to help our portraiture in photography.

The Renaissance painters created a culture of portraiture leaving us with a superb legacy. Their realistic portraits were a study of light and shadow – the fundamentals of art. their study specialised in the face. They wanted the lines and shadows to be flattering, portraying the features in the best possible light – literally. Today we have a lot of portraits by masters who knew how to see light and shadow and pick it out.

Here are five things that we can look at in Renaissance portraits to apply to our own photographic work.

The direction of light

To make the best of the features of our portrait sitter we need to understand light direction. Renaissance portraits tend to have slightly exaggerated shadow lines. As a result we can see which direction the light is coming from. Once we have worked this out we can apply the principle to our own shots. We can place the sitter relative to a light source or move the lights.

Light intensity

In general Renaissance portraits have no highlights on the face. Modern flash and lighting techniques tend to produce harsh, hard lights unless we carefully control it. The Renaissance images sometimes have bright light, but the painters left them as bright, not white. Spots of white, blown out light, are very distracting for the viewer. We should be on the lookout for the brightest spots try to reduce the light intensity. In films the make-up reduces skin reflection. When that is not practical we can instead just use reduced lighting, or diffusion screens.

Angle of incidence

In the picture above there’s quite a strong shadow line on his forehead under the hat line. This is because a hard light is striking the face slightly from above and to the side, not straight on. This imitates the sun, or a high point of light – say, through a window. By looking at the shadows on the face we can see how the light is angled in addition to it’s direction. Different angles of lighting and the shadows responding to it give clues about how the scene is lit. An evening scene with a lamp would show a lower angled light and it would be more yellowish. An evening light would be more straight from the side and tend to be redder. Bright daylight will tend to be from a higher angle. Looking at the angle light strikes the face, and the type of shadows, helps you to imagine how your own portraits could be set up.

Hard and soft light

Sometimes the old masters cheated or messed about with light to emphasise something on the face. In the picture above you will see quite a hard line of shadow down the shadow-side of the nose. This hard line of shadow comes from a harder light. Yet on the cheeks the light is soft – the shadows have a gradual tenancy toward darker areas rather than a hard line. In general, it is difficult to mix hard and soft light lines like this in real life. It is interesting because here it shows how the face is well defined. I think this is because the artist was trying to define a quite rounded face. Too rounded and the face becomes feminine. To avoid that feminine look he has put one or two harsher, sharp lines on the face to bring out the masculine side. For your portraits remember that hard light brings out masculinity and soft light brings out feminine features.

Eyes

Eyes are something of a study for artists and photographers. They establish life and vitality as well as a rapport with the viewer. If you can mark the direction of the eyes so the person in the portrait is looking directly into the viewers eyes then you capture the viewers attention. We are transfixed by eyes that look at us. In a very clear picture the pupils gives us a clue. In most pictures the catchlights in the eyes indicate the direction light in the face, the direction they are looking and also provides vitality and expression in the eyes. In the portrait above the catchlights are small, the picture is reduced in size and low resolution. But the catchlights are present. Have a close look at them. When working your portraits make sure your catchlights are a good shape and are true to the direction of the main light.

Here is a fun exercise

To improve your portrait skills pick a Renaissance portrait. Try to create a modern version of it. Look carefully at the light direction, intensity, angle, relative hardness/softness and the eyes. See if you can get someone to sit for you while you reproduce the light, shadow, catchlights and the pose. Work on the ways that the shadows lie on the face. See how the shadow graduation works. Soften and harden the light to reproduce that softness.

Here is a link to the Google image pages for Renaissance Portrait Paintings External link - opens new tab/page

This is an exercise in light control. You can do it with natural light. You can even do it with a table lamp (although it may create a colour-cast). The idea is two-fold. First, get control of the light. Second, try to reproduce classic portraiture pose. Both are fun, and both will teach you all sorts of lessons about what in the light makes people look the way they do.

The Eyes Have It… nine ways to emphasize eyes

The eyes are often the most important element in a photograph.

"Bison" - The eyes are often the most important element in a photograph. Make them central to your shot if you can. Your viewer will almost always start there.

The most important element of a photograph

The power in the eyes of a person or an animal draws your viewer into your photograph. The stronger and more prominent you make the eyes the more you will capture the attention of your viewer.

There are many ways you can help emphasize the eyes…

Focus:
Nearly always the eyes should have the most sharpness. If the eyes are sharp then you will be able to get the attention of the viewer. You can of course vary your depth of field and your softness for other parts of the picture, as long as the eyes are sharp.

Thirds:
As with any composition the eyes are a significant element. You can really highlight them well if they are on one of the ‘Rule of Thirds‘ grid points. If it is not easy to fit them to a grid point then try to put them on one of the lines of thirds. Both these positions will make them have a more dynamic position in the picture.

Lines:
Often when composing a picture it is possible to use the eyes to join up with other compositional elements. The eyes have two points which implies a line between them. If you are able to put them on a line with something else in the picture the implied line will draw the eyes of your viewer. That implied line is a powerful way to get your viewer involved.

Line of sight:
A very strong compositional tool is to use the eyes of a subject in the picture to point out something else in the picture. This is done by photographing the subject with their eyes looking toward another significant object in the picture. This correspondence helps the viewer to understand the prominence of both the subjects. Lots of expression on the face of the ‘looker’ helps with this one too. Often this is a great ploy for a ‘different’ photograph at a tourist site. Photograph a tourists eyes drinking in the view and you will provide a great interplay between the tourist spot and the other person. You will be showing not only the human element but also the famous place.

On the diagonal:
The eyes are normally seen evenly placed on the horizontal. As that is how we normally see them they are, well, normal. If you ask your subject to incline their head a little so the eyes are slightly on the diagonal they have a new dynamic… er, not normal! Do it, you will see how effective it can be. Not for every picture, situation or face, but a great ploy in a set of photos. The inclined head is often the image that gets picked out. (See: Nadia by Enigma Photos – below).

Rapport:
Often, when taking a portrait, the eyes look alive and dynamic when they appear to make contact with the photographer. Remember your viewer is looking at you when you take the shot, but they are looking directly at the viewer of you shot too. That has a great impact on the viewer. So if you can build a rapport with your subject the eyes really seek out the viewer and have a greater impact as a result.

Catchlights:
The eyes often look dead and lifeless if there are no ‘catchlights’. That is the photographers term for that little flicker of light that you see in the eye… a reflection from a near light source. The catchlights give life, shape and direction to the eye. In fact portrait photographers are obsessive about getting these little compositional elements right in the eyes because they eyes just die without them. Really study catchlights and find opportunities to put them into your shots. Your photos will come alive.

Emotion:
The eyes often convey great emotion. Just look at the eyes of a winner in a sports competition. Wow! They say it all. Now capture the eyes of the loser. Wham! Real impact. Get those eyes in focus right at the moment of the fully expressed emotion and you will have a winner.

Not there…
Sometimes it is what you can’t see in a picture that provides the impact. Eyes, or at least where they should be, can be very impactful if they are not where you expect them.

Here are a few pictures that really show the impact of eyes. I hope that some of them inspire and inform your own shots. Why not leave a link in the comments so we can see your eye shots too.

Eyes, Dwarka  Green eyed little girl, Dwarka, Gujarat, India.

Eyes, Dwarka Green eyed little girl, Dwarka, Gujarat, India.

On this link you can see a really captivating pair of dogs eyes. Wonderful focus and excellent perspective… Beagle eyes External link - opens new tab/page

Here are a really dynamic pair of childs eyes. Wonderful capture! Behind these hazel eyes… External link - opens new tab/page

The eyes have it! Papu in Pushkar, India

The eyes have it! Papu in Pushkar, India


Eye Contact

Eye Contact


Eyes wide shot

Eyes wide shot


After Feeding

After Feeding


Nadia by Enigma Photos

Nadia by Enigma Photos


Eyes wide open by umar.s, on Flickr

Eyes wide open by umar.s, on Flickr

This link takes you to a photograph that is exciting because of what you cannot see… Look External link - opens new tab/page

I've lost sight of the things that matter by Melissa Turner., on Flickr

I've lost sight of the things that matter by Melissa Turner., on Flickr


Wolf by Netkonnexion On flickr

Wolf by Netkonnexion On flickr

By Damon Guy (author and Photokonnexion editor)

Damon Guy - Netkonnexion

Damon Guy (Netkonnexion)

Damon is a writer-photog and editor of this site. He has run some major websites, a computing department and a digital image library. He started out as a trained teacher and now runs training for digital photographers.
See also: Editors ‘Bio’.