Tag Archives: equipment

Seven deadly photography sins

Seven Deadly Sins

Seven deadly sins of photography – it will catch up with you!

Some things you should be careful about…

Photography is full of pitfalls! You will come across them. Keep your eyes wide open. In the meantime here are some of the obvious sins that create problems for all the unwary…

Lust

Drooling over the latest release of some mega-technological update of the latest camera, lens, equipment… Then actually buying it because you think it will make you a photographer! Every photographer has suffered from equipment lust. Not one photographer, ever, has become a great photographer because they have suddenly purchased the latest and most expensive equipment. All that will happen if you succumb is that you will be the same photographer with less money in your pocket. Concentrate on getting better with what you already own. When your excellence surpasses the ability of the camera to show it, then consider moving to something new.

Pride

Carrying your equipment as a badge… If you buy equipment because it looks good, or shows off your purchasing prowess you are misguided. Successful photographers carry equipment because they need it for the shoot. Your pictures will be much better if you buy equipment only because it is necessary. Then use it until it falls apart. Your photography will improve, your pocket will thank you.

Sloth

Not using the equipment you have… If you have the equipment you are not a photographer unless you use it. If you stay in bed and don’t take photographs your photography will stagnate. Get up early, stay up late, travel to distant locations, take thousands of pictures and make lots of friends who also shoot pictures. The only way to enjoy photography is to get out there and do it. Then your photography will improve.

Envy

Being jealous of someone else’s equipment, photographs, ability, lights, job, whatever.. This is a shameful waste of your own time and ability. There is no better camera in the world than the one you own. Your own ability and skill will increase if you spend the time focussing on your photography. Share with others what you enjoy, and enjoy what you have. That way your photography will benefit directly from attention to your own improvement.

Gluttony

Buying more and more equipment, because its on sale, because its new, because it’s, well, photography equipment… Just because it is photography equipment does not make it good. Just because it is cheap does not make it worthwhile. Just because it is on sale does not mean you have to buy it. Good equipment should be well made, well designed and last a long time. Research your needs very well. Question your motives for every purchase. See if you can borrow something to try it first. Buy only what you need every day for your photography. Anything else you can probably do without.

Wrath

Hating on others because… The “Other” camera manufacturers products are not to your taste. If someone has something that is not your thing, or they shout about how good it is, then there is only one response. Celebrate the fact they are photographers. Express joy for their ownership. Rejoice with them over their successes. Getting angry about things you have no control over will do nothing for your photography. It will certainly do nothing to help you make friends. Concentrate on working with your own equipment, your own ability and take joy in your successes too. Then your focus will be on improving your photography. Stay with that.

Greed

Wanting it all now… No amount of wanting will give you what you want now. Money may buy the equipment, if you have the money. If you don’t then save up for it. There is very little money in photography. So make sure you fund the purchases you make with readily available cash. Debt will do nothing for your photography. It will reduce your ability to get to locations and take photographs. Instead, work consistently for well formulated goals. Set up a savings fund to ensure you get what you really need. Concentrate on what you need to do to improve and focus on working with what you have got. If you work and plan for your improvement what you want will come in time and with step by step positive action.

Being a better photographer…

Is really about being a better person. Great photographers have great insights. Those only come with introspection, self-improvement and concentrated, goal directed work. Oh, and you should enjoy yourself too!

By Damon Guy (author and Photokonnexion editor)

Damon Guy - Netkonnexion

Damon Guy (Netkonnexion)

Damon is a writer-photog and editor of this site. He has run some major websites, a computing department and a digital image library. He started out as a trained teacher and now runs training for digital photographers.
See also: Editors ‘Bio’.

How to decide what to take on a photo-walk

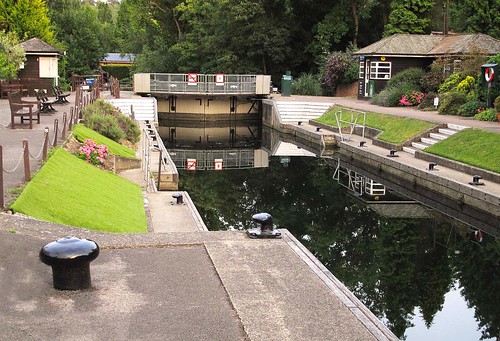
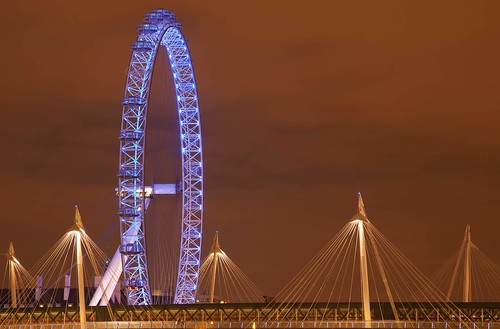
• Evening Walk By The Lock •

• Evening Walk By The Lock •
Click image to view large
• Evening Walk By The Lock • By Netkonnexion on Flickr External link - opens new tab/page

A trip out is a key part of your photography.

The photo-walk is a common photographic activity. Many amateurs take the photo-walk as the main way to enjoy their hobby. So how do you decide what to take with you each time?

The purpose?

The main problem with photography equipment is the weight. If you pack everything you will probably not use most of it and you will break your back carrying it around. The art of photography is not about equipment. It is about what you make of your shot.

Every shoot is a way to achieve something. Of course you may be going on a stroll for the fun of it – no photographic aim. Nothing wrong with that. But if you want to choose some equipment to take with you it helps to have a purpose. Then you can choose suitable equipment for the purpose.

So, if your photo-walk does not have a specific aim then create one. If you are, for example, going for a walk with the family, then decide what you think will be fun. Take a camera body and a wide angle lens perhaps? Make the aim to capture people in wide scope. Or, maybe, fix your zoom with a piece of tape so you cannot change the focal length. Then you can walk around to get the shot rather than zooming.

There are many things you can do to set yourself a task. The idea is to create one thing you can concentrate on photographically during your walk. Work with the equipment you have taken even though you may encounter lots of different things to photograph. Your decision to work with pre-defined and specific equipment will present you with new creative photographic challenges. Set a purpose and develop your photographic skills.

Purpose determines direction

When you have a specific aim in mind for a photo-shoot the situation is already specific. You have a purpose to choose your equipment around. The best way to move forward is to plan what you want to do at the shoot location. Your choice of equipment should be closely aligned to what you expect to achieve.

I find advance planning makes the difference. Even if you have not been to the location you should be able to find out about it. Do a Google search and check out the situation. Also do a Google image search for the location so you can get ideas from shots other people have taken. The idea is to narrow down what you want to get from the location. If you think you need one specific type of lens then take only that. For flexibility I try to take a maximum of two lenses to a shoot. One to tackle the main shoot. One to expand my options if that is possible.

Lenses are the core of your equipment and tend to be weighty. Limit them to keep the weight down. Flash units, light modifiers, batteries, memory cards, cloths, light meters… there may be other equipment you want to take. If your planning is good you can cut that list. The type of shots you want to take will determine your lenses. The weather and time of day will help you figure out most of the other things you need. It is all about understanding what you are going to encounter. Then, be ruthless. Pack the equipment you need to meet your plan and nothing else.

The point is…

…have a purpose. Make sure every time you go out to do some photography you have a purpose in mind and plan to achieve it. That way you will be able to plan to get the most out of the situation.

By Damon Guy (author and Photokonnexion editor)

Damon Guy - Netkonnexion

Damon Guy (Netkonnexion)

Damon is a writer-photog and editor of this site. He has run some major websites, a computing department and a digital image library. He started out as a trained teacher and now runs training for digital photographers.
See also: Editors ‘Bio’.

Thread Size for Photography Equipment

Photography thread size :: Standard tripod and camera thread sizes

• Photography thread size •
Standard tripod thread sizes and camera thread sizes… these are standard throughout the world.
On the left 3/8 inch 16 UNC thread on a Manfrotto camera mount. On the right a 1/4 inch 20 UNC thread for a removable tripod top. The 1/4 – 20 UNC thread (right) is the standard on most consumer cameras.

Interested in Photography Equipment?

You need to know something before you start buying your kit. You need to know the size of that screw thread into the bottom of your camera. It is used on your tripod and a range of other photographic mountings. To fit things to photo-equipment you will need to know the photography thread size(s). Well here are the details you want…

Universal Photography Thread Size Table
Diameter inch Diameter mm Thread size
1/4 6.3500 20
3/8 7.9375 16

These are set out under the ‘Unified Thread Standard’ (UTS). It’s published by the American National Standards Institute (ANSI). The camera thread is a UNC specification for a ‘coarse’ thread. The Standard ISO 1222:2010 Photography – Tripod connections External link - opens new tab/page allows for the same fit in metric size.

Most cameras are fitted with a hole to take a photography thread size of 1/4in – 20 UNC thread. This means…

  • A quarter inch width (1/4 inch)
  • By 20 threads per inch UNC thread

Larger/heavier fittings, pro-cameras and heavy lens mountings may take the larger photography thread size…

  • A three-eighth inch width (3/8in)
  • By 16 threads per inch UNC thread.
Manufacturer awareness – consumer awareness

Quality manufacturers are aware of this compatibility of threads. For example, buying a tripod head and tripod from the same manufacturer usually means compatible thread and mounting standards.

Beware of the equipment range trap. Some “pro-range” equipment may have a photography thread size that differs from the standard “consumer range” photography thread size. That difference is despite being made by the same manufacturer. If you are picking and choosing equipment from different equipment ranges or from different manufactures, check photography thread size compatibility first.

If you do buy differing photography thread sizes on equipment there is probably a converter available. However, it is better to have a direct fit than fiddle around with converters on your expensive equipment.

Converters are available from photo-retailers…

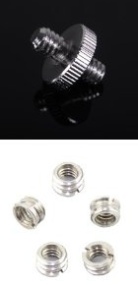
Photography thread size :: Thread adapters
• Photographic Thread Adapters •

Most cameras, tripods and other photo-equipment have mounting screws or threaded holes. If these do not match you have a problem.

Actually, matching a tripod and camera thread is easy. These threads are standard sizes. A variety of adapters are widely available and cheap.

Click the link below to see a some adapters.
Photographic thread adapters

Tripods

Some tripod manufacturers fit the larger sized 3/8in – 16 UNC to their tripods. When buying a tripod make sure you buy it with one of the standard fitting threads given in the table above. Alternatively, make sure you are able to use a converter if needed.

Very old tripods may not have used the same photography thread sizes I gave above. In most cases a digital camera will mount on a legacy tripod. Just check it with a fitting test. But do not force the thread if it is tight. For modern tripods the threads size for the tripod head and the camera fitting is the modern standard.

Tripod heads

Tripod Heads fit onto the same standard photography thread sizes used on the tripod. So buying a tripod head from a modern photography manufacturer ensures a proper fit to a standard tripod screw (one of the two sizes given above). But, make sure you buy the compatible thread size. Obviously, if the tripod mount has the large size thread (3/8 inch), a tripod head with a small sized hole (1/4 inch) will not mount in a stable way on it as you will have to use an inverting converter.

Lighting equipment and stands

A wider range of fittings are found on light stands and light fittings, flash units and special mountings. They tend to meet the same standards of thread sizes on modern equipment. That allows the easy inter-change of photographic kit. Again, modern manufacturers are aware of the standards. So buying lighting equipment from reputable suppliers and manufacturers will usually ensure compatible thread sizes as I give them above.

A lesson learned…

I bought a light stand that looked like a good deal from a Hong Kong supplier. It did not have a compatible screw on the top for anything except the supplied fitting. This meant that the stand is of very limited use and will not fit with any of my other stands or lighting equipment. The moral is, beware of “knock-offs” and cheap imitations. Stick with reputable manufacturers. That message is true of most photography equipment.

Comments, additions, amendments or ideas on this article?
Contact Us or leave a comment at the bottom of the page…

Like this article? Don’t miss the next — sign up for tips by email.

Damon Guy - Netkonnexion

Damon Guy (Netkonnexion)

Damon is a writer-photographer and editor of this site. He has run some major websites, a computing department and a digital image library. He started out as a trained teacher and now runs training for digital photogs.
See also: Editors ‘Bio’.
By Damon Guy see his profile on Google+.

What is the ‘Bulb’ Setting?

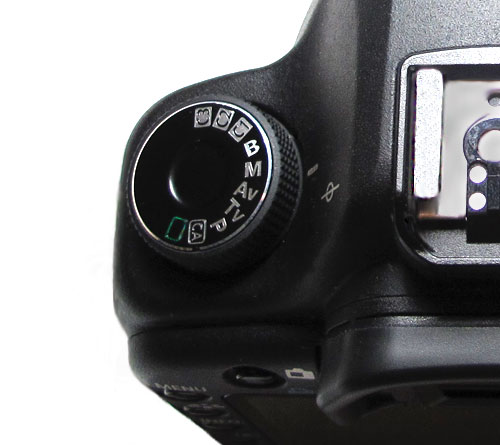
'Bulb' is often set from the modes dial. Once it is set you can take long exposures.

'Bulb' ('B') is often set from the modes dial. Once it is set you can take long exposures.

Very long exposures are fun and provide opportunities to see things that you would not normally see. Movement, light trails and exciting activities are but a few of the captures that become possible. The ‘Bulb’ setting provides the key…

Definition: Bulb Mode; Bulb Setting

Bulb mode | Glossary entry

Bulb Mode; bulb Setting

The ‘B’ setting on the camera ‘modes’ dial stands for ‘Bulb’. On some old film cameras the ‘B’ setting is sometimes known as ‘T’ for time. The bulb mode setting is a shutter speed setting. Digital cameras normally have maximum shutter speed settings up to 30 seconds. For exposures longer than 30 secs you will need to use ‘bulb mode’.

Bulb mode is only found on an adjustable camera. It is a full manual setting. In some very old film cameras the shutter was opened by squeezing an air bulb. Air actuated the shutter while the bulb was squeezed. On releasing it the shutter closed. The name has stuck. In post-war SLRs ‘bulb mode’ was activated by holding down the shutter button until the exposure was complete. On release of the button the shutter closed. The exposure was then complete.

Activating ‘bulb mode’

‘B’ or bulb mode on a DSLR is activated by one of three methods. These depend on the make and model of the camera…

  • Press and release the shutter release button. To complete the exposure the button is pressed again. Then the shutter closes. Most cameras using this method have an auto-closer to time-out the shutter after a default time. So if the shutter button is not pressed again it will close the shutter automatically after, say, 30 minutes.
  • Press and hold the shutter release button for the duration of the exposure. On release of the button the shutter closes. Pressing the shutter button by hand for long exposures will move the camera. Use a tripod.
  • Most cameras can also have the bulb mode activated by electronic remote control. These generally allow for the “press, exposure, press-again” method of shutter control. Remote control minimises movement as you are not touching the camera. When using remote controls Follow the instructions in the manual.

Very long exposures using the bulb mode setting allow a range of photograph types that are not normally available on other settings. For example…
Fireworks, light trails, star trails, moving vehicles at night, lighted streets and buildings at night.

Bulb mode is found on most DSLRs, but may not be found on bridge cameras or point and shoot cameras and some other older, cheap popular cameras.

Comments, additions, amendments or ideas on this article? Contact Us

[refdefB][refdefM]#3190#

Damon Guy - Netkonnexion

Damon Guy (Netkonnexion)

Damon is a writer-photographer and editor of this site. He has also run some major websites, a computing department and a digital image library. He started out as a trained teacher and now runs training for digital photogs.
See also: Editors ‘Bio’.
By Damon Guy see his profile on Google+.

Contribute A Definition?

Send us a definition of a photographic word or phrase...

Send us a definition for our list of photographic words and phrases. Simply write a clear definition and send it in. Include an original picture if you wish. Give us your name and a link to your website and we will credit your work.

#11030#

Contribute A Definition?

Send us a definition of a photographic word or phrase...

Send us a definition for our list of photographic words and phrases. Simply write a clear definition and send it in. Include an original picture if you wish. Give us your name and a link to your website and we will credit your work.