Tag Archives: Depth of Field

A quick and simple method to make brilliant water droplet images

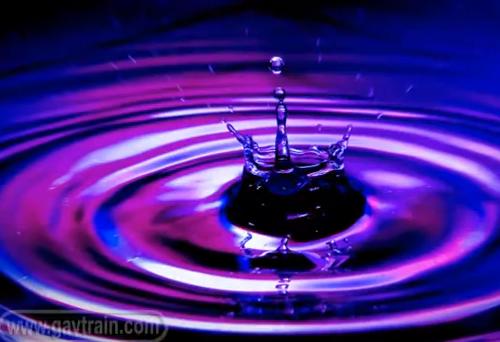
water droplet

• Water Splashes •
The most beautiful scenes in the world include water. Here you can make your own water droplet.
(Image taken from the video)

The close-up world of the water droplet – endlessly fascinating

The captivating thing about water is that it is ever changing and creates a sense of magic in every scene. When you get in close some simple techniques make wonderful images.

How to photograph water droplet impacts

Ever enthusiastic Gavin Hoey takes us through the simple process of creating wonderful water droplet photos. Colour, light/shade and magic water droplet sculptures are the result.

The best bit about this is that you can make these wonderful photos yourself. It is very easy and great fun. When I first did this I spent hours of time on it and got lost in a world of wonderful colours and effects. There are three things to remember that will help you make this a personal and effective shoot…

  • The more shots you take the more great effects you will see.
  • Background colour should be varied. I’ve used wrapping paper to brighten colours.
  • The angle of the camera can affect your shot (not mentioned in the video).
  • Try different camera heights with respect to the water.

After yesterdays blog, the way you see it is about your style. Don’t look for “new”, look for you!

This is a short video (six minutes 50secs), but one that will give you hours of fun and excellent images.
Gavin Hoey  External link - opens new tab/page

No removable flash? Read this: Off-camera flash. It’s a great introduction and recommends an affordable flash unit.

Comments, additions, amendments or ideas on this article? Contact Us
or why not leave a comment at the bottom of the page…

Like this article? Don’t miss the next — sign up for tips by email.

By Damon Guy (author and Photokonnexion editor)

Damon Guy - Netkonnexion

Damon Guy (Netkonnexion)

Damon is a writer-photog and editor of this site. He has run some major websites, a computing department and a digital image library. He started out as a trained teacher and now runs training for digital photographers.
See also: Editors ‘Bio’.

Reflecting on ways to work with the best light

Reflectors

• Reflectors •
A session with reflectors is a way to control the sun
and get the lighting you want on your subject.
[Image taken from the video]

The control of light is not always obvious.

Reflectors and other shapers of light make a big difference to the scene. Often photographers go to great lengths to work with reflectors. Here are a few simple tips to bear in mind when you want to shape light – particularly outside.

When you need a reflector

You can use reflectors in any type of environment. They are best used where you need to even out the light on your subject. Remember that if you are using a reflector the source light is the main or key light. The reflection from your reflective surface is in proportion to the power of the key light. This proportionality is important. Often, more than one light is difficult to balance. Using only one light source you can create a natural balance with the reflectors. It is difficult to get reflected light out of proportion. There is always some loss in the reflection. This ensures that the light on your subject will be less intense than the key light but related to it by its proportion. The result looks more natural.

Shade is as important as light

When you are working in the fullness of light it is common to be confronted with strong reflections from the subject itself. Specular highlights, reflections off of curved surfaces and shiny areas are the most difficult to control. However, bright reflections on larger areas like flat areas of glass or even areas of flesh like bare arms can also be really difficult to control.

If you have these sorts of reflections you can reduce the worst of them using a polarising filter. Of course the only sure way is to reduce the intensity of light overall. This means creating shade. Again, the most important issue here is to reduce the light in proportion to the ambient light around you. This helps the light to remain looking natural because it is derived from the main light once again.

Don’t spend a fortune

For most of us expensive reflectors and shade creators are out of reach. As with most things however, the amateur can create the same effects as the professional without the expenditure.

Reflectors can be created from white sheets, curtains, even large pieces of card. These things can be purchased inexpensively and propped up easily to create the effect you want. What is more important than the material that creates the reflection is the way you use the reflections themselves. It is important in very bright light that the reflections are used to infill darker areas of shadow to even out the contrasts. Then your camera can cope and you will see a more controlled light on your subject.

Shade too can be created easily. Use solid card sheets or even blankets on poles. I do quite a lot of car photography. Often specular highlights can be eliminated by hanging a thin white sheet on two poles in the line of the light. The main light – normally the sun – will penetrate a thin sheet so that a proportion of the light will continue to illuminate the subject. Again, the proportionality is important. Things always look more natural if the light is proportional to the surrounding ambient light.

Using Reflectors – Photography & Video Tutorial

In the video J.P. Morgan, a successful photographer, uses lots of resources and equipment to manipulate light in all sorts of ways. First, he looks at how the light is best exposed to the subject. He uses the light to create a rim light. This helps to reduce large, strong areas of reflection and helps to define the body shape.

When he has the light direction right and well controlled he uses a gold reflector to give the light a pleasant colour – an evening sunlight yellow. This lifts the colour of the faces in the shot.

The other thing that J.P. Morgan does is use the shade and reflectors to create fill. The sun provides the main light but the levels of light off the reflectors allows a lower level light intensity creating a natural light. This does not look like it has been deliberately projected at the subjects. It is a soft light that beautifully wraps around the children. It evens out the contrast between the brighter light and the darker areas.

Look at the way the equipment is used in the video. But spend your time afterwards thinking about how you can substitute affordable reflector materials and ways to create shade. Making your own kit can be fun and just as effective brand equipment.

The video is just over six minutes.

The Slanted Lens DSLR Lighting Tutorials  External link - opens new tab/page

If you want to buy an affordable reflector set, here is the one I use. These reflectors work very well and are flexible in the way they can be used. The whole set also folds away into a great compact bag. The pack contains five effects (silver, gold, white reflector/diffuser, grey and black)…

42″ Photographic light reflector set (5 in 1)
Ex-Pro 5 -in- 1 Photographic Light Reflector – 42″ (110cm) Silver, Gold, Black, White & Translucent, Collapsible.
This is an excellent reflector set, robust and effective as well as easy to store. I highly recommend this as a standard piece of equipment.


Comments, additions, amendments or ideas on this article? Contact Us
or why not leave a comment at the bottom of the page…

Like this article? Don’t miss the next — sign up for tips by email.

By Damon Guy (author and Photokonnexion editor)

Damon Guy - Netkonnexion

Damon Guy (Netkonnexion)

Damon is a writer-photog and editor of this site. He has run some major websites, a computing department and a digital image library. He started out as a trained teacher and now runs training for digital photographers.
See also: Editors ‘Bio’.

Seeing the subject… refining your vision

Beat it up!

• Beat it up! •
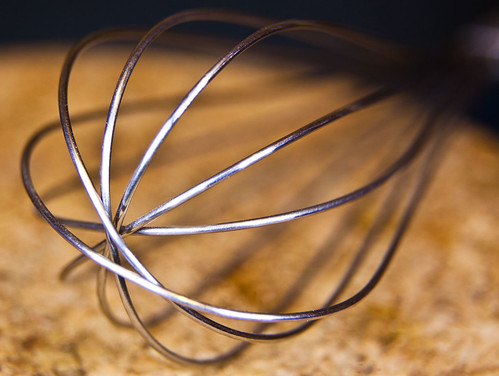
Click image to view large
Beat it up! By Netkonnexion on Flickr Photographers eye :: Seeing the subject… refining your vision | External link - opens new tab/page
To really look at a subject you have to see it as you have never seen it before.

Cultivating the photographers eye…

What the “eye” really means is difficult to define. One thing’s sure. As “photographers eye” develops you see things differently. Refining your vision to see differently is how you develop your version of the ‘eye’.

Looking at the scene

In Working the scene I described how to walk through the scene, understand the angles and ideas that relate to the scene and ways to find “the” shot. At first it is not a simple process. You are developing a habit. Doing things that you would not do naturally.

Standing up and using the camera from your normal eye position makes your subject look like you always see it. Surprisingly, it is also the same way most others see it too. Where is the novelty, interest and insight in that? Photographers eye, Seeing the subject in a different way requires refining your vision.

Well, you can change it all by studying your subject from new angles, new light and with new perspectives.

What if the scene is a close up subject?

A wonderful thing about photography is the ability to isolate a subject, get in close to it and examine it in a way we normally do not try to do with our eyes.

The challenge is to do things differently so we can see things differently. In this blog I often urge people to get in close – fill the frame. That is one way to see a subject anew. There are others. Below, there are some ideas to get you to see your subject differently.

Photographers eye – Getting in close:

Really close means a macro lens. If you don’t have one then you can get some macro extension tubes. These are an inexpensive way to do macro photography. However, the way to see things differently is to try and see the subject in ways that are different to the everyday perspective. Using a macro lens, tubes, or even very close with an ordinary lens you need to be versatile. Get around your subject, see it from at least ten different positions. Try to make every shot different. Take every shot as if you are seeing the subject as a new object. Don’t just look at the whole subject, get right into the tiny detail, all of the tiny details. (See Amazon search results for macro extension tubes External link - opens new tab/page).

Photographers eye – Getting the Angles

Developing your vision is not just about details, even if there are lots of them. Try taking each detail from a whole range of angles, under, over and from the back too. Angles on a subject help to start you looking at the aesthetics of an object. Look for curves, pleasing intersections, great lines, diagonals… Anything that helps you to see the beauty in a subject and shows it in a new way.

Photographers eye – Using different lenses

If you have them, explore the subject using a range of lenses. Get wide. Go long. Try fish-eye. Work with a prime. Go with whatever lenses you’ve got. The idea is to show the subject in a variety of different ways. Every lens has its peculiar characteristics and distortions. Training your eye to see a subject in different ways by using different lenses is one way to become sensitive to photographic perspectives. You will begin to see how a camera sees. If you only ever use one lens you will begin to see everything in a plain way. If you can see things in a variety of different ways you will begin to start looking at things differently.

Photographers eye – seeing different light, different exposures

Light is the essence of everything we do in photography. While you are working with small subjects (like in my picture above) you can make changes to the light. You can use ambient light, window light, natural light, reflected light and domestic lights. Then there are coloured lights, soft light, hard light, and even laser light. Then, you also have dozens of different ways to use artificial photographic lights too. Added to these different illuminations you can also develop a whole range of exposures. You can explore your subject as under-exposed, over-exposed, dark or bright. You can use shadows, different light angles, different light heights. There are literally thousands of ways to light and expose any one subject. Explore as many of them as possible.

Other variables:

Try different backgrounds, different colours and different textures on your subject. Vary through monochrome, colour, colour intensity… try it against black or against white. Use different depths of field, more bokeh, less bokeh. Blur, movement… Try everything. Just make it you mission to look for the different way of doing it.

Refining your vision – developing photographers eye

Developing your vision as a photographer is about understanding the way you can shoot things differently to other people. You are trying to deliver to your viewer a different view of the world. To find what you are good at, what your unique perspective is, you must explore a universe of different approaches. Work with new angles, light variations, colours… well everything discussed above and more.

When you see a new subject get into it, explore it, by trying everything you can to see it anew and in a new light (literally). After a while, with practice, you will develop the photographers eye. To do that you must learn to see new ways that you can take a shot without actually needing to take it. Then you will be envisioning the shot in advance. You will also be developing your eye – your unique eye. You will have learned to see differently and to have put your particular style into your shots.

Comments, additions, amendments or ideas on this article? Contact Us
or why not leave a comment at the bottom of the page…

Like this article? Don’t miss the next — sign up for tips by email.

By Damon Guy (author and Photokonnexion editor)

Damon Guy - Netkonnexion

Damon Guy (Netkonnexion)

Damon is a writer-photog and editor of this site. He has run some major websites, a computing department and a digital image library. He started out as a trained teacher and now runs training for digital photographers.
See also: Editors ‘Bio’.
Visual toolbox for photographers

Sharpen up your creative photography…

It’s easy when starting photography to over emphasis the importance of gear. In fact it’s ‘photographers eye’ that really makes the difference. Your vision and insight into a scene are critical to producing a wonderful image.

Sage advice from a world master

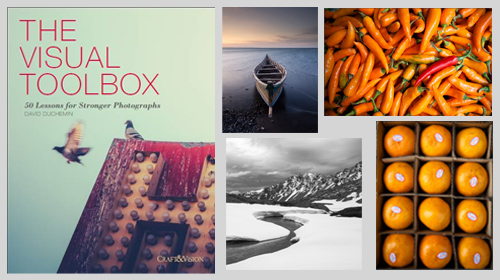
The Visual Tool Box by David duChemin is all about the skills of composition. He goes into depth around the background ideas which help you look at a scene. The ultimate success in photography is to make your image a pleasure to view. Aesthetics rule – it’s as simple as that. This book is dedicated to teaching you the tools you need to develop the ‘eye’.

David duChemin says,

These are the lessons I wish I’d learned when I was starting out.
The Visual Tool Box by David duChemin

This is my kind of book. He writes superbly, in simple, readable form. His examples are excellent and the pictures are just amazing. But most of all the book is organised for learners to extend their knowledge in easy, well structured steps. This book is all about putting new tools in your photographic tool box and it achieves that with an ease that any beginner will find a joy.

Composition

The book is packed with examples of the sort of compositional ideas that really work – for anyone. Just look at some of the topics covered…

  • Manual
  • Optimize Your Exposures
  • Master the Triangle
  • Slower Shutter Speed
  • Learn to Pan
  • Use Intentional Camera Movement
  • Use Wide Lenses to Create a Sense of Inclusion
  • Learn to Isolate
  • Use Tighter Apertures to Deepen Focus
  • Use Bokeh to Abstract
  • Consider Your Colour Palette
  • Lines: Use Diagonals to Create Energy
  • Lines: Patterns, Lead my Eye, Horizons
  • See the Direction of Light
  • Light: Front Light, Side Light, and Back Light
  • Quality of Light: Further Consideration
  • White Balance for Mood
  • Light: Reflections, Shadow, Silhouettes, Lens Flare
  • People
  • Experiment with Balance and Tension
  • Use Your Negative Space
  • Juxtapositions: Find Conceptual Contrasts
  • Orientation of Frame
  • Choose Your Aspect Ratio
  • Use Scale
  • Simplify
  • Shoot from the Heart
  • Listen to Other Voices (Very Carefully)

And there is plenty more content to complement and extends these ideas. What’s not shown in a list is the excellent and sage advice throughout the book. I will let David duChemin have the last word…

Pace your-self. Anyone can master a camera; that just comes with time. It’s the other stuff — learning to think like a photographer — that takes so much work and allows this craft to become the means by which you create art.
The Visual Tool Box by David duChemin

And it is thinking like a photographer that you will quickly learn from reading this book.

How to buy this great book

This book was originally published as an ebook. However, it is no longer available in that form. The book has moved into the real world. It will be available on Amazon as a Paperback From 31 Mar 2015.
The Visual Toolbox: 60 Lessons for Stronger Photographs (Voices That Matter)You can per-order the book from Amazon.

Comments, additions, amendments or ideas on this article? Contact Us
or why not leave a comment at the bottom of the page…

Like this article? Don’t miss the next — sign up for tips by email.

Damon Guy - Netkonnexion

Damon Guy (Netkonnexion)

Damon is a writer-photographer and editor of this site. He has run some major websites, a computing department and a digital image library. He started out as a trained teacher and now runs training for digital photogs.
See also: Editors ‘Bio’.
By Damon Guy see his profile on Google+.

Shooting waterfalls and moving water… great for Autumn

Moving water shots

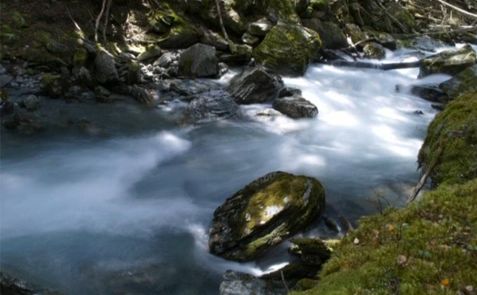
Moving water shots are some of the most romantic landscape shots. They are really easy and fun to do. (Image from the video).

Wow! September already…

With Autumn around the corner I am thinking about great projects for the when the leaves start to turn. Here’s a great idea for you to follow up to make the best of the Autumn colours.

Why Autumn

The summer is great for doing wide open landscapes. Especially around the Golden Hour or at dawn when the light has those wonderful reds, golden or yellow colours.

Autumn is better for doing great shots under the forest canopy and those great shadowy dell shots. The Sun’s lower in the sky and there is reduced contrast with fewer distracting bright spots peeping through the trees from the sky. The light is great and the lower aspect is better for creating contrasts in moving and falling water. On top of that the autumnal colours are exciting. More to the point the range of Autumnal colours create depth and contrast. That is something that uniform green of the summer months tends to reduce.

So think about doing your waterfall and forest shots in the next two months or for your local Autumn. You will really benefit from greater contrasts, colours and light angles.

How to blur water for a dreamy effect

To get you started on great water shots here is an introductory video on the way to slightly blur water in your shots. It helps to make the water take on a more motion-filled ethereal dreaminess.
Uploaded by: Gordon Laing (28 Dec 2007)

A couple of extra tips

Sometimes, especially when working under trees with those hidden waterfalls you will get large contrasts with the surrounding environment. Such contrasts often cause highlights that are distracting. Here are a couple of extra tips to help get past this distraction…

  • If you find you are doing a shadowy moving water shot in the trees but the brightness is still too high try using a polariser filter. This will help to increase the contrasts and overall reduce the incoming light. Polarisers reduce the light by up to about two stops which really helps when working with water. It will also reduce sharp reflections which can be confusing in moving water – especially under trees.
  • If you need to reduce the light even more you can try a Neutral Density filter (ND filter) This type of filter is like sunglasses for your camera. You can find out more here… and here is a range of resources on filters.

Comments, additions, amendments or ideas on this article? Contact Us
or why not leave a comment at the bottom of the page…

Like this article? Don’t miss the next — sign up for tips by email.

By Damon Guy (author and Photokonnexion editor)

Damon Guy - Netkonnexion

Damon Guy (Netkonnexion)

Damon is a writer-photog and editor of this site. He has run some major websites, a computing department and a digital image library. He started out as a trained teacher and now runs training for digital photographers.
See also: Editors ‘Bio’.

Can you write? Of course you can!
Write for Photokonnexion...

We would love to have your articles or tips posted on our site.
Find out more…
Write for Photokonnexion.

Getting the right shutter speed

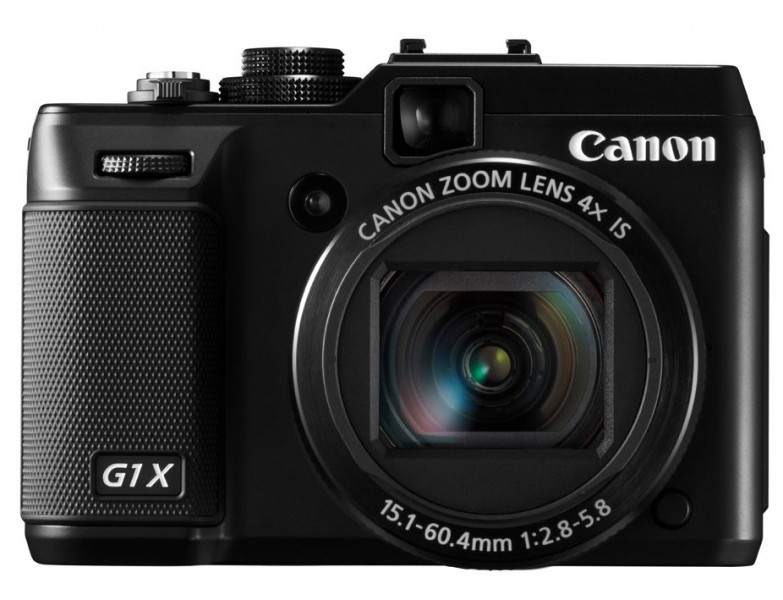
New Canon Powershot G1X Digital Point-and-Shoot With SLR control

The Canon Powershot G1X Digital Point-and-Shoot With SLR control. Billed by Canon as the “Highest Image Quality Powershot Digital Camera”

Getting sharpness right…

It’s not just about the right camera. It is also about technique and knowing the best way to set up your shot. Getting the right shutter speed takes a little knowledge when you are starting from scratch. Here are some pointers to help you make choices about shutter speed.

Why set your own shutter speed?

Getting full control of your camera is an important aspect of gaining creative control over the outcome of your photographs. Despite what the manufacturers say, you can only achieve so much by messing around with their ‘modes’. Capturing pictures using camera modes other than the basic photographic modes (ISO, aperture, shutter speed) is going to give you a programmed result. In other words ‘modes’ are what some boffin back at the lab has formulated as ‘about right’ for the average photos people take. But, you are not average are you? You want to produce the shot your way. So gaining control over your shutter speed is important.

The long and short of it

Shutter speed gives us creative control in a number of ways. A very shallow depth of field will give great bokeh in the background. But it is difficult to create on a bright day unless you have a fast shutter speed (to reduce the incoming light). Bokeh is created by a wide aperture. A wide aperture lets a lot of light in. If the shutter is open too long the photograph will be overexposed. So a shorter shutter speed is required.

Shutter speed also controls movement blur. If you are taking a photo of a moving object a relatively long shutter speed will create greater blur (example 1/15th sec). A very short shutter speed will tend to freeze the action preventing blur (example 1/500th second).

Sharpness counts

Starting to control your shutter speed is often about finding the best shutter speed that you can handle for a sharp result. So what is the lowest hand held shutter speed you can apply?

Actually, in practical terms, the slowest hand-held shutter speed is reliant on a number of factors…

  • Physical fitness: If you are not strong enough for using your camera weight it is more difficult to hold it steady. Regular practice with your camera will help you build muscles to steady your hand and therefore shoot at lower shutter speeds.
  • Focal length: Longer focal lengths tend to need higher shutter speeds. As you shoot further into the distance the angle of movement seen at the point of focus is more exaggerated.
  • Optical stabilisation: If your lens is optically stabilised this means it will compensate for the tiny movements of your hands. This compensation will help you to reduce hand shake and therefore give you potentially longer shutter speeds.
  • The picture you want to create: Obviously, the picture you want to produce is dependent on how much blur you want in it. So if you want no blur (for the sharpest result) you want a fast shutter speed.
  • The amount of light: Brighter light allows you to have a shorter shutter speed. Knowing when to use a tripod instead of hand-held is the crucial issue here. Most people simply give up if a low shutter speed demands a tripod… For the accomplished photographer many of the best shots are found in low light situations. So shutter speed control is of crucial importance – as important as using a tripod at the right time.
Rule of thumb

Those factors aside here is a rule of thumb. In practice most people do not shoot with a steady enough hand to produce sharp hand-held shots below 1/60th second. Of course, optical stabilisation on the lens will help you get longer shutter speeds. But even then a practical limit of 1/30th of a second is about as low as you can go and be sharp. That is not a shutter speed I would suggest you work with regularly when hand-held.

Best guide to shutter speed

The shutter speed you need to work to is often related to the focal length you are working with. There is a reasonable rule that can help you get a good guide to picking the best shutter speed for your focal length. It is said that the longest shutter speed you can use hand-held for a lens or zoom setting is:

1 divided by the Focal length times 1.5

So, if your lens is a normal lens at 50mm it will have an effective lowest hand-held shutter speed of 1/(50 x 1.5) or 1/75. The nearest (rounded up) setting on your camera is likely to be 1/80th second.

If you are working at 200mm then, 1/(200 x 1.5) or 1/300th of a second will be your lowest working shutter speed. The nearest setting on most cameras will be 1/320th second.

These apply if you are not using optical stabilisation. You can of course work one or maybe two stops faster if you are using stabilisation. You will need to check that figure against your lens specification. Most optical stabilisation systems will give you between one and two stops extra control.

Shutter speed standard

shutter speed is standardized on a 2:1 scale. When you open the aperture on single aperture stop and at the same time reduce shutter speed by a single step the result will be an identical exposure. This table shows the shutter stop standard steps…

  • 1/2000 sec
  • 1/1000 sec
  • 1/500 sec
  • 1/250 sec
  • 1/125 sec
  • 1/60 sec
  • 1/30 sec
  • 1/15 sec
  • 1/8 sec
  • 1/4 sec
  • 1/2 sec
  • 1 sec

The scale extends up above these figures to very high shutter speeds. Up to date DSLRs may allow have shutter speeds of less than 1/5000ths of a second. Very fast indeed. While at the other end cameras will allow long shutter speeds of up to 30 seconds in manual modes (M mode; or Manual) and longer in “bulb mode”.

Each of the steps in the table above will be equal to a change of one stop of light up or down. A change of one stop of light will double the amount of light entering the camera.

As one stop of light is quite a large amount, cameras have become more sophisticated. Most are now marked off with thirds of a stop for ISO, aperture and shutter speed. So your calculations can be quite precise and lie between these values in the table above.

You can read more about stops of light here: Definition: f number; f stop; Stop

Doing it right

Gaining control over your camera is of importance if you want to become a creative master of its full potential. Learning about shutter speed and other aspects of exposure are critical to learning that control. You can have great fun creating bokeh and controlling movement blur. At the same time you can remove that other type of blur – ugly hand-held shake-blur.

Please leave questions and issues for us to discuss if you want to take this further…

By Damon Guy (author and Photokonnexion editor)

Damon Guy - Netkonnexion

Damon Guy (Netkonnexion)

Damon is a writer-photog and editor of this site. He has run some major websites, a computing department and a digital image library. He started out as a trained teacher and now runs training for digital photographers.
See also: Editors ‘Bio’.

Ansel Adams – Master Photographer

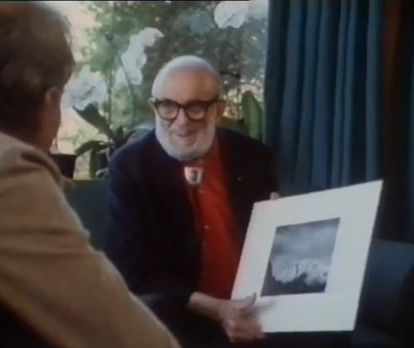
Ansel Adams Video

• Ansel Adams BBC Master Photographers (1983 •
Ansel Adams speaks about his photography and his development.
Picture taken from the video.

Exquisite insights to a legend.

The videos I show are usually for you to quickly watch and learn. This one’s different. It’s longer (34 mins.). And, there is so much in it that you will want to watch it over and over again. The wonderful insights run deep and some show us how much photography has changed.

Ansel Adams’ ideas, photographic insights and depth of feeling is magnetic. He was probably one of the first philosophers of photography. He was one of the undoubted masters too. I hope you enjoy this video as much as I did.

Ansel Adams – “BBC Master Photographers” (1983)

Uploaded by: Rob Hooley External link - opens new tab/page

Can you write? Of course you can!
Write for Photokonnexion...

We would love to have your articles or tips posted on our site.
Find out more…
Write for Photokonnexion.

By Damon Guy (author and Photokonnexion editor)

Damon Guy - Netkonnexion

Damon Guy (Netkonnexion)

Damon is a writer-photog and editor of this site. He has run some major websites, a computing department and a digital image library. He started out as a trained teacher and now runs training for digital photographers.
See also: Editors ‘Bio’.