Tag Archives: Buying equipment

Buying Lenses – a quick guide…

Buying lenses

Buying lenses is not as straight forward as it seems. There is a lot to consider.

Critical features to consider when buying lenses

The key to buying lenses is knowing what you want to achieve with your purchase. It is also important to have a clear idea of your budget. However, there are a whole range of other things that have an impact too.

There are a wide range of photographic lenses to buy for most cameras. Each has their own characteristics. A lens can easily cost more than your camera. Take care with your choice. The wrong decision can leave you with a lens that is not suitable to your interest.

Getting started on buying lenses

First of all sit down and write down all the reasons you want a lens. Also, write down all the possible things against buying lenses (of any sort) at this time. Try to convince yourself you really don’t need to buy. In most cases of purchase-fever the buyer gets things they don’t want. So, when spending lots of money you should be careful. Buying lenses is a big investment. If you make the right choice then your purchase may last you through a number of camera bodies. So think carefully and make the right decision up front. That way your money will not be wasted.

I have purchased about thirty lenses over the years. Of those, five were bad purchases. Four were impulse buys – not suited to my needs. In another case, a hasty decision meant I bought a poor quality lens. From this experience I have compiled the list below to help you when buying lenses in future.

Some of the basics for buying lenses

1. Focal Length:

  • a. Measured in millimeters.
  • b. Smaller Focal lengths provide wider angles of view.
  • c. Longer focal lengths show less of the scene and tend to magnify the view.
  • d. Distortion may be found at the extremes of focal length.

2. Aperture:

  • a. Measured in f stops (eg.f2.8 [wide open] f5.6 [medium], f16 [small aperture]).
  • b. Wide aperture lets in most light – faster shutter speeds possible (eg. F2.8).
  • c. Small aperture lets in less light – requires longer shutter opening (eg. F22).
  • d. Wide aperture provides short depth of field.
  • e. Smaller apertures gives sharpness throughout the depth of the picture.
  • f. Zooms – Aperture size gets smaller with increase in focal length.

3. Stabilisation:

  • a. Slow shutter speeds mean more chance of camera movement, which makes blur.
  • b. Stabilised lenses typically give one or two f stops smaller aperture without more blur; the stabilisation compensates for movement.
  • c. Cost is higher if the lens is stabilised.
  • d. Canon = IS (image stabilisation); Nikon = VR (vibration reduction); Sigma = OS (optical
    stabilisation); etc…
  • e. Stabilisation may be in the camera rather than the lens.
General considerations when buying lenses

1. Optical characteristics

  • a. Glass optical quality varies with the production process and ingredients.
  • b. More lens elements/groups reduces light able to pass through the lens.
  • c. High quality optical glass does not reduce light as much as cheap glass.
  • d. Each manufacturer has a specific type of glass for higher quality lenses.
  • e. Optical aberrations come from low quality optical glass.
  • f. Lens optical coatings reduce aberrations and flare.
  • g. Distortions are caused by specific groupings of lenses.

2. Motors/drives:

  • a. Used to drive the aperture control; stabilisation and auto-focus.
  • b. Sometimes noisy – not desirable for wildlife shots.
  • c. Adds a lot of weight to the lens.
  • d. Not necessary on manual-focus prime lenses.
  • e. Some cameras have them only for auto-focus.
  • f. Older lens models have slower, sometimes heavier, often noisier motors.

3. Weight:

  • a. Often forgotten attribute. If you can’t carry it, then it’s no good for you!
  • b. Weight often increases with wider apertures – fast lenses may be too heavy for you.
  • c. Weight will tend to increase the amount of hand-shake movement.
  • d. Stabilisation motors put a lot of weight on the lens too.

4. Sensor optimisation

  • a. Lens focal lengths are usually stated for full-frame cameras (quoted for 35mm sensors).
    But…
  • b. A cropped sensor will still have the same focal length lenses as a full-frame, but image size will multiply it by the crop factor. (See: crop factor).
    So,
  • c. Cropped sensors increase the lenses’ magnification. Eg. Canon APS-C lenses are optimised for the Canon cropped sensor. The crop factor is 1.6. So a 100mm lens on a Canon 450D is actually equivalent to a 160mm focal length on a canon full frame camera like the 5D.
  • d. Different crop factors apply to different manufacturers and cameras.
  • e. Some optimised lenses will not fit different sensor sized cameras – APS-C – check the fit and crop size in the specification for the lens.
More specific issues affecting you when buying lenses

1. Zoom vs. Prime

  • a. Zoom lenses give you a variable focal length; you control magnification.
  • b. Prime lenses have fixed focal length. Move nearer/further to change the angle of view.
  • c. Zooms give you focal control over the framed view.
  • d. Primes tend to be higher quality lenses, sharper, faster (wider apertures).
  • e. Primes more compositionally challenging.
  • f. Primes – colours and exposure control more realistic.

2. Why you want this lens…
Make sure you know why you are buying lenses. Consider these points below:

Fisheye lenses (8 – 18mm on cropped sensor; 14 – 18 mm on full frame)

  • Introduces central focus with peripheral distortion.
  • Highly creative focus provides extreme visual views drawing the eye to the centre.
  • Used primarily for highlighting specific subjects or attributes of the scene.
  • Ideal (according to some) for full-frame sensor work for portraits.

Zoom lenses (long focal lengths 50 to 600mm)

  • Sometimes dubious quality in some parts of the zoom.
  • Flexible for many purposes, but especially wildlife photography at longer focal lengths.
  • Ideal for getting ‘into’ the shot.
  • Creativity related to the placement of the subject in the frame; angle of view variable.
  • Extreme zooms (350 – 800mm zoom ranges)(Very long range lenses greater than 800mm available).
  • Extreme expense – (expect cost around £5,000 for the 800mm sort of focal length).
  • Excellent for specialist wildlife and long range work.
  • Angle of view very limited at extreme end.
  • Very heavy – absolutely requires tripod for longest ranges.
  • Really only supportable for specialist work (professional wildlife photographer).
  • Cheaper to hire for the odd trip.
  • Macro (from around 35mm to 200 mm) (sometimes achieved using extension tubes).
  • Used to get close-up shots of very small subjects.
  • Focal length is artificially extended to magnify for close-up work – aim to get 1:1 or larger result.
  • Can be used for longer views; tends to be at restricted apertures for non-macro work.
  • Great for magnification shots.
  • Great creativity scope.
  • Tilt and Shift.
  • Specialist – for control of where to place sharpness in the depth of field OR how to deal with
    converging parallels (lines in the road or converging verticals in buildings).

Wide angle lenses (16 – 24 mm on cropped sensor) (24 – 35 mm on full frame sensor)

  • Used for getting wide views of the subject; sweeping view across a scene.
  • Some optical distortion at the very wide end accentuates central subjects.
  • Tend to be used by landscapers; often capable of very small apertures (f22 – f36).
  • Standard zoom lenses (35mm to 200mm of varying focal lengths).
  • Provide great flexibility because can change from wide angle to magnification.
  • Quality often highly price dependent.
  • Optical quality variable with change in focal length.
  • Very long focal lengths often have high f-stops (eg. F5.6).

Standard prime lens (50mm)

  • Sees approximately what the human eye sees (full-frame sensor cameras).
  • Slightly wide angle for cropped sensors.
  • Usually good low light performance because of aperture size is usually wide.
  • Approx.. 80mm for cropped sensors – good for portraits.
  • Creativity allows for the same flexibility that the eye sees.
  • Controlled angle of view is determined by photographers position (no zoom control).
  • Standard prime lens (80mm).
Ultimately it is about image quality

When you are buying lenses consider what you are going to get. If you buy a cheap lens you will get a poor picture.

Most modern camera bodies are going to produce pretty good pictures. But if you stick a poor quality, budget lens on a camera it will give you a poor result. A top quality lens will serve you for many years. It will swap between bodies of the same manufacturer. It will produce quality pictures from your body.

On the other hand a poor quality cheap lens will degrade the ability of the camera body. Which will devalue your overall investment. It is pointless upgrading a body to a higher specifications if your lenses are not up to the same performance standard. Buying lenses is about setting your aspirations. Buying lenses of poor quality is about limiting your potential, for now and for years to come.

Buying lenses – checking the various options

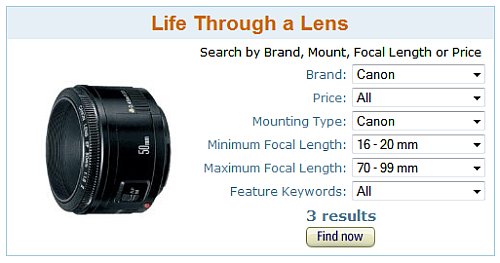
The sheer number of lenses available is daunting. Try starting with a lens finder. This great Lens finder on Amazon.co.uk makes buying easier.
Note:
USA users may not be able to get the above “Lens finder on Amazon.co.uk” link. See below…
Link version for USA users: Amazon.com Lens Finder
Please report problems with these links.


If you are buying lenses enter the important factors for your lens choice. It returns a list of the lenses to suit that purpose. I find this an invaluable tool for helping to me to find a range of lenses from which to make my ideal purchase.

Comments, additions, amendments or ideas on this article? Contact Us
or why not leave a comment at the bottom of the page…

Like this article about Buying Lenses? Don’t miss the next article — sign up for tips by email.

Damon Guy (Netkonnexion) - Author of Buying Lenses

Damon Guy (Netkonnexion)

Damon is a writer-photographer and editor of this site. He has run some major websites, a computing department and a digital image library. He started out as a trained teacher and now runs training for digital photogs.
See also: Editors ‘Bio’.
By Damon Guy see his profile on Google+.

Looking good – the essence of the professional photographer

Looking good :: To be a pro-photog just look the part...

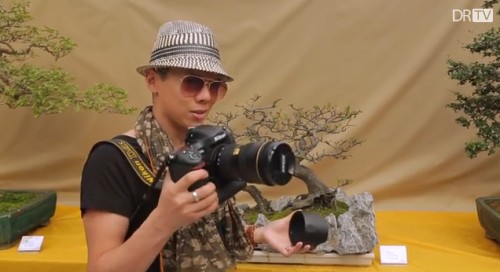
Looking good is obviously the main aim here!
(Image from the Video).

The important part of being a pro-photographer…

Looking good and owning the top kit is essential. Otherwise we won’t know you are a successful photographer (not!). In this hilarious spoof on professionalism the video provides a humorous insight into looking good as photographers. Maybe some see themselves that way. Maybe it’s how others see us too!

How to look like a Pro Tog


DigitalRev TV Looking good :: DigitalRev TV | External link - opens new tab/page

Creative comedy

The video takes a poke at photogs who are a bit “up themselves”. And, perhaps some are a little over the top. Creative comedy like this is needed to make us laugh at ourselves sometimes. Looking good is important as in any business. It is also something we should not do to excess.

What we should not be doing…

We are all proud to be photographers. It is a passion and a lifestyle. It is also a competitive business and an actively developing one. The video shows us something we should be careful about. Gear lust is an affliction that many beginner photographers have. They spend all their time scouring the magazines and websites for the latest and greatest equipment. Looking good and having the latest technology seems to be the aim. The truth of that is that it is not what photography is about.

What we should be doing – it’s not about “looking good”

Photography is about getting pictures. It is about making those pictures good enough so they create an unforgettable image in the mind of the viewer. It is worth remembering that…
Despite excellent technology you can

  • Still make mistakes.
  • Produce a picture that says nothing.
  • Make a picture that’s ugly and of no value.

In other words, bad pictures can come from great technology. Also, excellent images and art can be produced using non-cutting edge equipment. Just look at any number of photography websites – Instagram is one example where all sorts of art is produced without top quality DSLR equipment.

Photography is about how you take your picture and what you show in it. Our passion is a unique synthesis of art and technology. But the technology can range from a simple pin-hole box “camera” to the worlds leading-edge DSLR. Both can surpass each other if used in the right way.

The lesson in this…

Looking good with up to date equipment can be important. But don’t aspire to the most expensive and up-to-date equipment just because looking good makes you fit the part. Concentrate on getting your technique and your skills right. Learn to produce great images. Understand your art – your pictures will be much better for that focus. Give up any obsession with the new and shiny.

Comments, additions, amendments or ideas on this article? Contact Us
or why not leave a comment at the bottom of the page…

Like this article? Don’t miss the next — sign up for tips by email.

Damon Guy - Netkonnexion

Damon Guy (Netkonnexion)

Damon is a writer-photographer and editor of this site. He has run some major websites, a computing department and a digital image library. He started out as a trained teacher and now runs training for digital photogs.
See also: Editors ‘Bio’.
By Damon Guy see his profile on Google+.
Buy a good tripod – nothing beats it

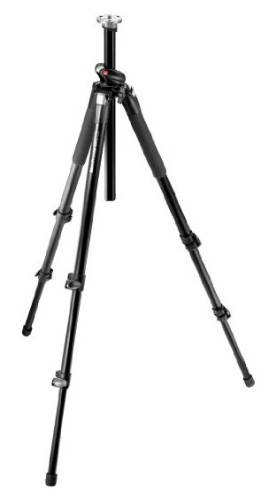
Good tripod as an all-rounder - Manfrotto 055XPROB Tripod

A quality, versatile and robust tripod is essential. Buy a good tripod – you will not regret it! The result will be seen in every image.

A good quality tripod?

Nothing beats a good tripod. Most people don’t use them until they have struggled with sharpness problems for a long time. Then, without thinking, they buy a cheap tripod. Later they have to think again. That’s because cheap tripods fail, wobble and don’t give you the shot flexibility you need. To save problems later, I suggest you buy a good tripod now.

Why buy a good tripod?

Too many of my students and colleagues have told me tales of three legged woes. Remember, it is a common mistake to think any old ‘three legs’ will make your camera stable. This is simply not true. In all cases, a quality tripod really will help stability – and other things.

So, here are some reasons to go for a quality purchase from the start…

Quality Tripod:
Cheap & cheerful:
 Solid, stiff at the joints and stable.  Limited by poor engineering. Variable stability.
 Reliable, highly engineered and robust fittings.  Fittings regularly break.
 Quality, hard wearing paint or specialist coatings.  Poor or no paint – highly reflective aluminium. Liable to corrosion/wear.
 Quality footings seal the legs to stop water/dirt entering tubing.  Legs left unsealed let dirt in and grit quickly wears the joints.
Strong enough for a specific DSLR size and lens. Check the tripod specifications. Wobbly with anything larger than a bridge camera. No specifications available.
Quality materials used in construction. Materials matched to designed use and weight needs. Unknown quality aluminium/plastic.
 Top platform precisely engineered – no movement and good fitting for the tripod head/camera.  Wobbly platform, poor clip, loose fitting. Screws sometimes damage the camera. No interchangeable head option.
Quality joints on legs for long life and stable grip. Leg joints quickly wear and become wobbly with poor materials.
 Multiple leg positions to allow adjustment on uneven ground/tight spaces.  Fixed leg position.
 Fully adjustable top column to allow multiple height/angle adjustments.  Wobbly top column. Only up and down adjustment available.
 Legs can be adjusted to many wide/varied angles.  One angle for legs.
Stiff tripod legs to prevent movement when the legs are fully extended. Wobble increases as the legs extend to full length because joints are poor fit.
 Reversible top column – so you can under-sling your camera to get near the ground.  Not reversible.
 Proper hand grips.  No hand grips.
Quality Tripod head:
Cheap & cheerful head:
 Well engineered, interchangeable tripod head option available.  No interchangeable head fitting – or low quality flip-up with low quality quick release.
Well engineered, camera safety lock on the tripod head to prevent camera unlock/drop off. No camera safety catch.
Strong, accurately engineered, wear resistant, quick release plate on the tripod head for fast camera fitting/removal. Fixed camera position – or low quality/breakable flip-up with plastic quick release.
Manufacturer has a range of well engineered tripod heads and other accessories available. Manufacturer not committed to market and does not make tripod heads or non-interchangeable tripod head fitted.
A cheap tripod will not be your friend

There are other reasons to buy a good tripod, but you get the idea. A cheap tripod will do little for camera stability. The engineering quality is reduced to keep the price down. I am not one to advocate gear lust or spending money where it is not worth it. However, I have come across each of the design and quality flaws above. From personal choice and experience it’s clear only the best is good enough when making your camera stable.

Adaptability

While a quality tripod is great, you normally need to buy a good tripod head too. Cheap tripods usually without them, or have poor quality ones. A good tripod head is an investment for life. Inter-changeable heads are very useful. I have five heads for different purposes: for macro work; small cameras; panoramas; and one for precise adjustment. My most versatile head I use every day for general purpose work. The Manfrotto 322RC2 Heavy Duty Grip Ball Head External link - opens new tab/page is precise robust, reliable, versatile and has never let me down.

Buying a tripod

Buying a tripod is not simple. There are many online advertisements and many brands. How do you choose the right one for you? Largely it is about personal requirements. Look closely at the type of photography you normally do. Try to isolate the important aspects of your photography that will influence the way you use a tripod. Find the properties that best fits the purpose for your tripod. For example, if you do a lot of beach photography you should look for a tripod that has good seal caps on the legs to keep seawater and sand out of the legs. If you do macro photography in the field then you might want a tripod that will turn your tripod head upside down to hang your camera just above ground level.

You should also consider the tripod head. That is the part of the tripod that the actual camera is mounted upon. It gives you flexibility to point your camera without moving your tripod around. Good quality tripods are usually sold only as a set of legs. The tripod head is purchased separately to ensure a good match to its intended use. Reputable tripod manufacturers normally also have a range of heads to match their tripod products.

Weight is a big issue in the field

Many photographers forget about weight. A heavy tripod is great in a studio. It is stable and floor vibration is reduced. However, when you are out and about the studio tripod is just too much to lug around.

I have one tripod model with a steel frame I use in my studio. Also, I have a nearly identical model in carbon fiber. I keep the latter in the car for field work. The difference in weight is just over a Kilo. For practical field use the studio tripod is useless. Unfortunately, it is simply too heavy to carry far.

On the other hand, my carbon fibre tripod is a delight to use in the field. It is easily carried and it performs as well as my studio tripod. However, there can be shortcomings.

Near a road or in windy conditions, vibrations are a problem. So, I hang my camera bag under the tripod platform. The additional weight cuts down vibration and keeps the tripod feet stable. In fact, that is a small price to pay for the reduced weight. Furthermore, it keeps my camera bag off the ground.

The camera bag trick is only possible because carbon fibre is really stiff. Remember, flimsy (but light) aluminium frames are vibration prone. They cannot perform well in windy field conditions or where vibration is found. Moreover, cheap tripods often do not have an under-slung hook to hang your bag.

What should you pay?

Almost certainly, the cost of a tripod indicates its quality. Good tripods use quality materials and tend to be highly engineered. Good engineering and good materials are not cheap. So, if the price of a tripod is in the range £15 – £30 it is unlikely to be long lasting. Further, it will be of limited stability – especially after a little wear under field conditions. Tripods can actually transmit vibrations to your camera from the ground and wind. So, good stability and properly engineered joints are really important.

In the UK good quality tripods start at around £40. You can pay many hundreds of pounds, especially for a professional grade tripod. So, setting yourself a budget is important. Don’t overspend.

Balance quality and cost

The over-riding factor is what type of photography you will be doing with the tripod. Remember, the properties you need are your guide. However, as we said above, pay attention to the tripod quality you need too. There is a balance between good quality and cost. You have to be the final arbiter in how much you pay. Think about it, err on the side of quality with a tripod. A bad quality decision will impact the image quality of your shots.

The manufacturers

So, buying the right tripod is about knowing your own needs. It is also about knowing what type of properties your photographic interests demand of your tripod. Going direct to the manufacturers site and look at their explanations for each of their tripods. You will find more detail there. Moreover, make sure you look up the specifications. There lies the answer to many of your questions about the quality and performance of a tripod. Also, beware of the claims made for ‘general purpose’ or ‘light weight’. Without detailed specifications those terms indicate poor quality engineering or materials.

There are a good range of quality tripod manufacturers. Some names worth checking are listed below as a starting point…

    • Manfrotto – High quality engineering, wide range of accessories and designs for many purposes. Many models meet the needs of professional photographers.
    • Manfrotto on Amazon (associate link).
    • Benro – Strong, very robust, many designs for many different environments and purposes.
    • Benro on Amazon (associate link).
    • Gitzo – Quality engineering, some innovative ideas. Considered by both amateur and professional.
    • Gitzo on Amazon (associate link).
    Where to buy

    It is worth considering where you buy your tripod too. Manufacturers with proven reputations tend to have wide distribution networks. However, they often do not sell their products on their own websites. If they do have their own web shop, the products are often expensive.

    Reputable manufacturers depend on their agents and distributors world wide. If they undercut those agents they would not sell their products overseas. So, check their sites. Find what you want. Then, find a dealer near you who can supply it. Alternatively, go online to a dealer who sells the products. You will often get much better prices for shopping around. Another point, reputable manufacturers often have a list of dealers on their site you can contact who are local to you.

    Specialised tripods

    The range of quality tripods has become very broad. Today tripods are available for nearly every type of camera. Small point and shoot cameras, smart phones, bridge cameras, mirrorless and other cameras all have their own tripod requirements. Likewise, they also have their own quality requirements.

    I recently bought a cheap plastic smart phone clip to mount on a small tripod. It cost me very little. Because it was so cheap, I thought nothing of quality issues. It also broke the third time I used it. My phone dropped to the ground. Luckily the glass did not shatter. It could have been an expensive mistake. The replacement good quality, lockable smartphone clip cost about 25% more. However, there is no way my phone is going to fall out of the clip now! It was still cheaper than £20 (bought 2020).

    I have also benefited from buying good quality ‘Joby’ or ‘GorillaPod’ flexible tripods (associate link). They are quite expensive. However, you can do great things with them. Flexibility and adaptability are really useful in a tripod.

    The point is this…

    The lesson is, think carefully, find out everything you can. Then, make a quality purchase – get the best you can afford.

    Nowadays, I take my time making a tripod purchase. Consequently, my new tripod suits the purpose I have in mind. But, more important, my camera is safe. In addition, I have the flexibility I need to make the critical shot and I get sharp results. Taking care to seek out a quality tripod helps a photographer get stand out results.

    Comments, additions, amendments or ideas on this article? Contact Us
    or why not leave a comment at the bottom of the page…

    Like this article? Don’t miss the next — sign up for tips by email.

    Damon Guy - Netkonnexion

    Damon Guy (Netkonnexion)

    Damon is a writer-photographer and editor of this site. He has run some major websites, a computing department and a digital image library. He started out as a trained teacher and now runs training for digital photogs.
    See also: Editors ‘Bio’.
    By Damon Guy see his profile on Google+.
Tripod myths – why are amateurs tripod shy?

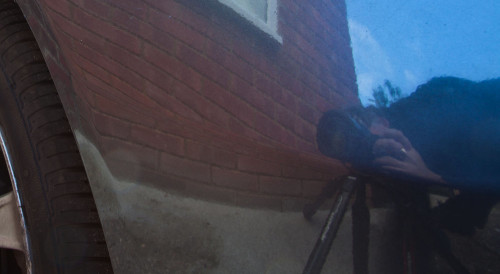
Me and my tripod - reflected in paintwork - tripod myths

• Me and my tripod – reflected in paintwork – tripod myths •
I use a tripod most days in some pretty tight situations. They are
quick, effective and give great results!
[Image by Damon Guy • Click to view large]

Tripods improve your results – fact!

Tripod myths can be heard regularly. Actually they make life a lot easier and faster. So, why are amateurs tripod shy? Why buy cheap? Why is simplicity apparently so difficult for tripod starters? Read on…

What are the tripod myths?

Over the years I have heard all the excuses. Here are some things I have heard…

  • I’ll miss the moment!
  • Tripods are too much bother.
  • I can shoot great shots hand-held.
  • It slows me up.
  • I like to walk the scene…
  • They are cumbersome, get in the way and heavy.
  • It’s not possible or easy to use it all the time.

I am sure there are other issues. But let’s look at these in detail.

Tripod myths: Missing the moment?

Every photographer gets lucky sometimes. They happen to point the camera pointing right and, snap, they got it.

Let’s be honest. How many times does that lucky capture happen? “Journalists?”, I hear you say? Actually, they rarely get lucky either. Photo-journalists train in preparation, planning and investigation. Being there and aware when the event happens is not an accident. They get the story time and time again.

If you plan for your tripod you will get the shot too. You won’t miss the shot getting your DSLR out either.

Forethought and planning are good photographic habits. Cultivate and develop these skills. You get the shot, and it’ll be sharper. If you are going to shoot, do it properly. Have both camera and tripod ready. Don’t be a victim of tripod myths, be in control of your photography.

Too much bother? One of the tripod myths that is just silly

What can be too much bother about getting a sharp, properly framed image? Loading a tripod is no more trouble than putting your camera in the car. It takes only 15 seconds to set up. The tripod will also give you time and scope to take a great shot. It holds your camera for lens changes and while scouting the next shot. Bother? Not really.

Bothered people think tripods are hard work. Do they realise how much the picture is improved? Attention to detail over your shots is what makes excellent images. Taking a quick snap may be no bother. Its unlikely to yield a great image either. This is one of the tripod myths that does not stand up!

Tripod myths: Great hand held shots

There are lots of situations where great light and a steady hand can get a sharp result. Congratulations. The time and effort you put into your photography is paying off. However, of all the situations I take pictures in, only about a third can be hand held. High ISO might help. More likely digital Noise would spoil the image. Better to take a longer exposure and use, say, ISO100. Quality is important.

Tripod myths will limit you to one third of your potential as a photog. It makes you a limited photographer. Tripods extend your shooting time, flexibility and quality of image.

Tripod myths: It slows me up

Yes, finally, a fact! Tripods make you think about your photograph. Perhaps not one of the tripod myths, more of a tripod mistake.

Since digital cameras became common I see a lot of machine-gun photography. A keen photog arrives, sprays off a hundred shots… Then, off they go. Wow.

Spend the first few minutes considering options. Proceed with a plan and with care. Cover all the shots you need. Sometimes you will get new ideas. Great, get more shots.

Once, at an aircraft museum with a keen photographer I was alone in minutes. My friend shot out of sight. We met up later. He had over 1000 pictures. He was elated. I had less than seventy shots. “Ah!”, he said. “You should’ve left the tripod at home!”

Later that week things turned around. He had eleven fair shots and one really good one. He had spent hours and hours in post-processing and missed lots of sleep. My more careful approach paid off. I had more than 40 quality images. As he looked at them he kept saying, “I took a picture of that too, but it didn’t come out”. And, “How did you get that one to look so good?”. My care, quality and composition paid off. The tripod helped me think about my photography and take care. I only spent about two hours in post-processing too. Most on simple tweaks. I had plenty of time for other shoots that week.

One question… Who was really slowed up here?

Tripod myths: Working the scene

One of my regular jobs involves 15 – 20 finished pictures of a scene. Picture order and camera height is important. We often work in low light. Space is restricted at many sites. We are not allowed to do any post-processing.

This is fast work. In 15 minutes I make up to 35 shots at a high enough standard to meet the needs of a court case.

Does a tripod hold me up or prevent me working the scene? Does it prevent my shots? On the contrary. I could not do the job without it. I would have to take many more shots. My shots would be less flexible. I would not achieve court-ready sharpness and detail. Without a tripod I could not work the scene properly.

Tripod myths: Cumbersome, heavy, intrusive?

Sometimes. A tripod can be badly adapted for what you are doing. So, if you are going to do something a lot, buy the right tripod. Travel a lot? Get a light one. Work on beaches a lot? Choose sealed feet to keep the sand out. Working special scenes? Get a special tripod. General photography? Buy general.

If you have the wrong equipment you can rightly claim it’s no good! So, buy the right equipment for the job. Make sure you get a quality piece of equipment. You spend thousands on your camera and lenses, so there is little point in spending only ten on your tripod. Quality workmanship and materials are important to producing quality images. You would not accept less with your camera so why with your tripod? This is one of the tripod myths that does stand up – if you have the wrong equipment. Get it right and you have a friend for life.

Sometimes ya gotta go with the flow…

I am not saying tripods are everything. In fact there are many situations where they are not suitable or you can’t use them. Also, we all enjoy the freedom and creativity of hand-held shots sometimes. If we fall prey to tripod myths we will never get past auto settings and bright daylight shots.

All I am saying is, don’t limit yourself. Get past the tripod myths. Buy a tripod and make sure you know how to use it. Your photography will improve if you use it a lot. Use it only a little and you’ll pay a penalty.

Why not look at some of the options now…

General tripods for DSLRs  External link - opens new tab/page
Manfrotto – Quality tripods for committed photographers  External link - opens new tab/page.

Also check out this post and recommendation…
Buy a good tripod – nothing beats it
Manfrotto 055XPROB Tripod Legs Only – Black External link - opens new tab/page

Comments, additions, amendments or ideas on this article? Contact Us
or why not leave a comment at the bottom of the page…

Like this article? Don’t miss the next — sign up for tips by email.

Netkonnexion

Damon Guy (Netkonnexion)

Damon is managing editor of Photokonnexion.com with professional experience in photography, writing, image libraries, and computing. He is also an experienced, webmaster and a trained teacher. Damon runs regular training for digital photographers who are just starting out.
See also: Editors ‘Bio’
By Damon Guy :: Profile on Google+

Umbrellas and softboxes

umbrellas and softboxes

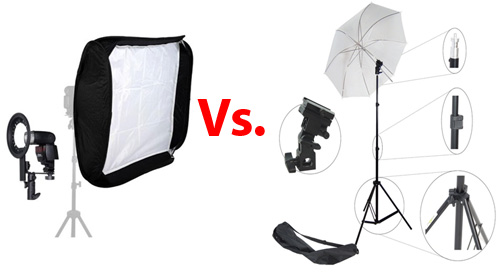
• Softbox Vs. Umbrella •
Umbrellas and softboxes seem to have similar characteristics… or do they?

What IS the difference?

Photographers learning to use lights find it difficult to understand the difference between a softbox and umbrella set-up. It is important to understand if you want to have control of light.

The nature of soft and hard light

Hard light is not some mutated form of ordinary light. It is a type of light that is focussed and which shows a hard transition from bright to dark. The shadow line is a sharp contrast. On the other hand, soft light wraps itself around curves and has a soft transition from light to dark.

The definitions of hard and soft light tell us much about the characteristics of the light but not how the light is formed. Well, it turns out that the light source, its shape, size and focus or diffusion as well as distance from the subject all have an impact on the characteristics of light.

Photographic umbrellas and softboxes

In the video Mark Cleghorn examines the characteristics of photographic umbrellas and softboxes. He does some great shots with both. Pay attention to the way he uses the lights and what characteristics he points out. Distance and size of the sources play an essential role in the formation of the softness and hardness of the light. His experiments are interesting and show you how the nearness of a large light source can create softness. It seems counter intuitive, but it is correct.

The first half of this video is very useful and you will learn a lot about Umbrellas and softboxes as light sources. The second half showcases advanced features of Photoshop. This is a less useful section if you are only interested in the practical issues for umbrellas and softboxes. You can safely skip it.

Lastolite Umbrella Versus Softbox from Lastolite on Vimeo  External link - opens new tab/page.

Types of lights

There are many types of light source that can generate light for umbrellas and softboxes. For most situations it is best to use off-camera flash units. The more expensive studio flash units are more for professional use. If you are just starting out they will be more powerful than required for most general purpose needs. Off camera flash helps give you flexible use. It is also easily controlled. You can work with both umbrellas and softboxes with an off camera flash.

Fortunately, most umbrellas and softboxes units designed for off-camera flash will mount most types of flash units. When looking to purchase lights think about what you want to achieve. Then buy the flash unit needed to meet your need.

Below is an example of a photographic umbrella set…

DynaSun W968S Professional Kit with Holder, Umbrella, Stand and Bag for Cold Shoe Mount Flash Gun Flashgun  External link - opens new tab/page
This is a high quality but affordable photographic umbrella unit. The complete package includes everything you need except the off-camera flash unit. The inclusion of the small carrying bag makes the whole thing neat and well presented.

When it comes to the purchase of a soft box these too have the universal fittings for off camera flash units (although studio units are also available). Here is an example softbox…

24″ 60cm x 60cm EZ-Fold Studio Softbox Kit with 2 x Diffusers and Ballhead Bracket for Portable Flash and Speedlite  External link - opens new tab/page
This is a high quality, well produced softbox with easily adjustable fittings and a variety of ways to set up light diffusion within the unit.

Of course both these units are among many others in the field. You can see the various types of each on these search pages…
Photographic umbrella – Search page on Amazon  External link - opens new tab/page

Softboxes – search page on Amazon

These various examples include studio light units, always on bulb mountings and fittings for off-camera flash. Check for what you want before you buy. The most flexible is for off-camera flash when you are starting out.

No removable flash? Read this: Off-camera flash. It’s a great introduction and recommends an affordable flash unit.

Comments, additions, amendments or ideas on this article? Contact Us
or why not leave a comment at the bottom of the page…

Like this article? Don’t miss the next — sign up for tips by email.

Damon Guy - Netkonnexion

Damon Guy (Netkonnexion)

Damon is a writer-photographer and editor of this site. He has run some major websites, a computing department and a digital image library. He started out as a trained teacher and now runs training for digital photogs.
See also: Editors ‘Bio’.
By Damon Guy see his profile on Google+.
Visual toolbox for photographers

Sharpen up your creative photography…

It’s easy when starting photography to over emphasis the importance of gear. In fact it’s ‘photographers eye’ that really makes the difference. Your vision and insight into a scene are critical to producing a wonderful image.

Sage advice from a world master

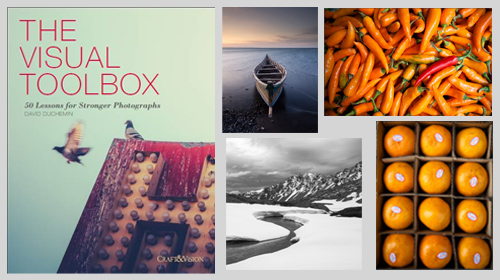
The Visual Tool Box by David duChemin is all about the skills of composition. He goes into depth around the background ideas which help you look at a scene. The ultimate success in photography is to make your image a pleasure to view. Aesthetics rule – it’s as simple as that. This book is dedicated to teaching you the tools you need to develop the ‘eye’.

David duChemin says,

These are the lessons I wish I’d learned when I was starting out.
The Visual Tool Box by David duChemin

This is my kind of book. He writes superbly, in simple, readable form. His examples are excellent and the pictures are just amazing. But most of all the book is organised for learners to extend their knowledge in easy, well structured steps. This book is all about putting new tools in your photographic tool box and it achieves that with an ease that any beginner will find a joy.

Composition

The book is packed with examples of the sort of compositional ideas that really work – for anyone. Just look at some of the topics covered…

  • Manual
  • Optimize Your Exposures
  • Master the Triangle
  • Slower Shutter Speed
  • Learn to Pan
  • Use Intentional Camera Movement
  • Use Wide Lenses to Create a Sense of Inclusion
  • Learn to Isolate
  • Use Tighter Apertures to Deepen Focus
  • Use Bokeh to Abstract
  • Consider Your Colour Palette
  • Lines: Use Diagonals to Create Energy
  • Lines: Patterns, Lead my Eye, Horizons
  • See the Direction of Light
  • Light: Front Light, Side Light, and Back Light
  • Quality of Light: Further Consideration
  • White Balance for Mood
  • Light: Reflections, Shadow, Silhouettes, Lens Flare
  • People
  • Experiment with Balance and Tension
  • Use Your Negative Space
  • Juxtapositions: Find Conceptual Contrasts
  • Orientation of Frame
  • Choose Your Aspect Ratio
  • Use Scale
  • Simplify
  • Shoot from the Heart
  • Listen to Other Voices (Very Carefully)

And there is plenty more content to complement and extends these ideas. What’s not shown in a list is the excellent and sage advice throughout the book. I will let David duChemin have the last word…

Pace your-self. Anyone can master a camera; that just comes with time. It’s the other stuff — learning to think like a photographer — that takes so much work and allows this craft to become the means by which you create art.
The Visual Tool Box by David duChemin

And it is thinking like a photographer that you will quickly learn from reading this book.

How to buy this great book

This book was originally published as an ebook. However, it is no longer available in that form. The book has moved into the real world. It will be available on Amazon as a Paperback From 31 Mar 2015.
The Visual Toolbox: 60 Lessons for Stronger Photographs (Voices That Matter)You can per-order the book from Amazon.

Comments, additions, amendments or ideas on this article? Contact Us
or why not leave a comment at the bottom of the page…

Like this article? Don’t miss the next — sign up for tips by email.

Damon Guy - Netkonnexion

Damon Guy (Netkonnexion)

Damon is a writer-photographer and editor of this site. He has run some major websites, a computing department and a digital image library. He started out as a trained teacher and now runs training for digital photogs.
See also: Editors ‘Bio’.
By Damon Guy see his profile on Google+.
Six tips for reigniting your photographic passion

Reignite passion in your photography - try charity Work

• Charity Work •
Doing a bit of charity work can really uplift your photographic spirits while helping others. It is a great way to make contact with new people, get interested in new things and Reignite passion in your photography.

Discover your passion again…

Sometimes it can all go wrong! You just cannot get it right and you’re not bursting to take the next shot. When things look down don’t give up. This is the time to take new steps to invigorate your approach. Photography with a passion is one of the most exciting and interesting pursuits. When the passion fades it is not because photography is not engaging. There’s enough in photography to keep you captivated for a lifetime. More likely your vision has become distracted, stale or you’ve lost the creative spark. These are not long term problems. Lets get you fired up again! Here are six tips to reignite passion in your photography.

Reignite passion :: Take a photogs break

We are not talking holidays here. Although that would be nice, actually it would not solve the problem. Holidays make you want to take the camera out. When you are down in the dumps about your photography, more photography can be off-putting.

Take a real break from photography. Have a month off. Tell yourself to put all your equipment away and don’t be tempted to touch it. A rested mind is a freshened mind. Just forget your photography, your composition, your equipment. Rest.

Reignite passion :: Do something different

One of the most creativity stimulating activities is to learn something new. It helps you to cross fertilise your ideas and introduce new perspectives to your thinking. Adding a new dimension to your outlook can only be a good thing for your photography. So read something you would not normally read. See something you would normally not be interested in. Do something your partner wants to do without taking along a camera. If you had an interest in the past that you have neglected, spend a little time getting up to date on it. The wealth of our experience is the greatest gift we can give our creativity. Try this little trick. Pick out ten techniques from another interest. Think about ways to incorporate those skills into your photography. This new synergy will be sure to reignite passion in your photographic work later on.

Enjoy a few weeks of photographic respite, and immersion in an alternative area of insight. Bath in its luxury. Now you are ready to reignite your passion…

Personal contact will help you reignite passion

I have always found that meeting new people and having new discussions helps me get really fired up about photography. Every year I do two or three charity events. It is a really fun and cleansing experience. I come away from each of these events feeling refreshed and tingly – as if I had stood under a hillside waterfall. The sharpness of the water making my skin sting and turn ruddy.

One of my charity activities is to take the photographs at a local event held for senior citizens. Sobering too. As they sit eating their lunch I chat at each table for about ten minutes then take photos of each of the guests. During the course of about two hours I talk briefly with over 100 people and take a quick and candid portrait of them all. Wow. What stories I have heard – of war and love, action and sadness. It has not only helped my photography to be more passionate and expressive, but it has helped me grow as a person too. I have some great pictures as well.

Find something to get you involved in something new. Charity is great, but schools, drama groups, local clubs and even sports organisations all love photographers. Get involved. You might learn something new and you will certainly find a new way to express your photography and reignite passion in your hobby. The most important thing is getting involved with the people. That will spark off new contacts, opportunities and enthusiasms.

Reignite passion through commitment to a project.

Give yourself something to develop. It could be learning how to photograph your new interest in the club or group you have got involved with. Or, equally, it could be some aspect of photography that is new to you. I spent a lot of time two years ago developing my table-top work. It re-invested my interest in photographic art, as well as complementing the product photography I started to do for my work. Funny how things come together in your life when you start exploring new angles.

If you are working up a project for yourself enjoy it, but have some goals. A project with no plan or goals soon gets forgotten. Then the point will be lost and so will your passionate commitment. Sit down at the start of the project and have a good think about what you want to achieve. Then, set a deadline for completion. The key to a good project is to make it time-bound and challenging; cover new material and have specific targets. You will reignite your passion by just having those positive goals and thoughts in mind.

Reignite passion :: Learn a new technique

We would all like to learn more about photography. The simple away is in bite sized chunks. Pushing the boundaries to learn it all at once will simply lead to failure. That will make things worse for an already down time. So, find out about a particular technique. Practice in lots of different situations and with a variety of equipment. Put it to use in your project, your charity work or in your every day shots. Before long you will be a proficient and enthusiastic user of that technique. Sometimes you can help this process along by buying a new piece of equipment. It does not need to be expensive. Make it something you have never tried before – try to extend your experience and your approach with it.

Change your work flow

I have often noticed with developing photographers that when they learn to be more effective editors their success as photographers improves. Obviously a more effective editorial process relies on good knowledge of post production, and composition too. The more important point is that being more ruthless about what is an acceptable photograph also helps you when you are looking through the viewfinder too. Your eye develops, your acceptance of what should be in the frame is more discerning and your satisfaction with your shots goes up.

If you are in the photographic doldrums studying editing will sort out your problem. But, it can be a great way to sharpen your awareness of your good points and what needs improvement. Once you have a framework to improve your whole attitude will lift and be more positive. So think about this as a way to positively sharpen your photographic wit and reignite passion and feeling in your work.

The path to success

If you want to become a good or great photographer, or if you just want to make a better job of photographing your grand children… its possible to get stuck along the way. There are a variety of ways you can get out of the down times. Being positive, resting and then trying new things will set you off in ways you never suspected you would enjoy. Give it a try. Extend yourself, push the boundaries, try something new – have fun!

Comments, additions, amendments or ideas on this article? Contact Us
or why not leave a comment at the bottom of the page…

Like this article? Don’t miss the next — sign up for tips by email.

By Damon Guy (author and Photokonnexion editor)

Damon Guy - Netkonnexion

Damon Guy (Netkonnexion)

Damon is a writer-photog and editor of this site. He has run some major websites, a computing department and a digital image library. He started out as a trained teacher and now runs training for digital photographers.
See also: Editors ‘Bio’.