Tag Archives: Action shots

Using a neutral density filter

ND filters can be used to produce some great images

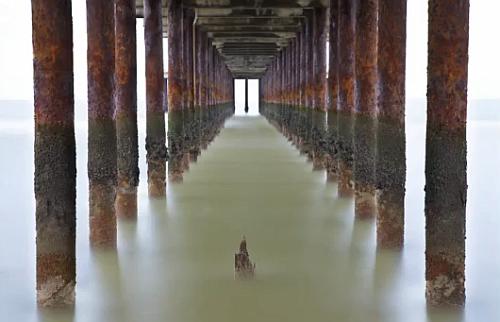
Lee Filters – Big stopper neutral density filter reduces the light by ten stops. You can produce great images like this one from the video.

Sometimes you need a long exposure…

However, to take a very long exposure in daylight will mean too much light will burn out your picture. So you need to turn down the incoming light. For that you use an ND Filter. Here is how they are used.

Remind me, why do I need this?

Remember, shutter speed controls movement blur. If you want to show a car looking blurred as it goes past you might set the shutter speed to about a fifteenth or thirtieth of a second. But what if you want to capture a much less obvious movement or a really slow movement? Say two minutes? Well, normally the amount of light coming in will burn out the shot. Of course you can use a really small aperture (eg: f22) and let less light into the camera. But on a bright day two minutes will still burn out the shot. This is where Neutral Density (ND) filters come in. They are specially darkened filters that cut the light down allowing you to extend your exposure. With one of these you can do some awesome effects.

10 stop Neutral Density Filter (video)

In the video we see the making of a picture (above) by using the Lee Big Stopper Neutral Density Filter. This ND filter is very dark, which takes down the light by 10 stops. It creates a great effect on of the water swirling under the pier. This is the darkest type of ND filter.

ND filter strengths

ND filters can reduce the light entering your camera for up to 10 stops. This allowed 2 minute exposures in the video. However, there is also ND2, then ND4 and ND8. Other strengths exist, but these are the most common. They allow you to have shorter exposures so you can adjust the exposure to the needs of your shot. You can also put them together so an ND8 + ND2 gives you an effective ND10 – the strength in the video.

ND Grad.

Another of these type of filter is the graduated Neutral Density, or ND grad. The use of an ND grad is quite specific. It is used to reduce the incoming light from the sky when you have a bright sky and dark ground. If you expose for the ground the sky burns out. If you expose for the sky the ground is too dark. The ND Grad. helps prevent the sky burning out.

The ND Grad. is dark at one end and clear at the other. The two zones meet in the middle where the clear graduates into grey. Put the filter over the lens so the line of clear/grey graduation lies on the horizon, darkening the sky. Now, you can expose for the scene and get even light distribution. The next video will show you how this type of ND is used.

Mike Browne  External link - opens new tab/page
Problems?

No, filters are simple and easy to use. There are some important things to remember…

Always use a tripod. It is impossible to hold a camera steady for more than about half a second. After that your image will start to get blurry.

You need to be quite precise about lining up ND Grads with the horizon. Take a little practice before going out to do the BIG shot.

The darker the ND Filter the more there is a tendency to impact on the white balance. Sometimes you get a blue colour cast, sometimes a red one. You can remove this in post production if you are using the RAW file format. Alternatively you can test the filter with your camera and adjust the white balance setting in-camera to correct for the aberration. Most of the stronger ND filters have this colour-shift tendency. it is exaggerated by the sensor type. CMOS sensors tend to magnify the effect.

Sometimes getting the exposure right is a matter of experimentation. Take a few test shots and make sure you do some “Chimping”.

If you are buying ND filters, especially ND Grads buy square ones. You can buy adaptors for these to fit any lens and it allows you get creative in more ways than round, screw-on filters that only fit one lens.

There are many different kinds of filters which produce a huge range of fun effects in-camera. Many of these effects cannot be processed into the shot later. The square filter system shown in these videos allows you to expand your collection and develop a new set of skills without buying an expensive filter for each lens.

ND Filter set…

3 full ND filters
3 graduated ND filters
Full fitting kit for a range of camera
and lens sizes.
10 Adapter Set + 6 Filter ND2 ND4 ND8 G.ND2 4 8 For Cokin P Canon Nikon Sony LF6

Please leave any questions or comments you have about these in the comments below.

find out more...Photokonnexion tips by email
If you enjoyed this article please sign up for our
Tips by email service.
                                                 Find out more
#11030#

By Damon Guy (author and Photokonnexion editor)

Damon Guy - Netkonnexion

Damon Guy (Netkonnexion)

Damon is a writer-photog and editor of this site. He has run some major websites, a computing department and a digital image library. He started out as a trained teacher and now runs training for digital photographers.
See also: Editors ‘Bio’.

The secret to world travel – but staying at home!

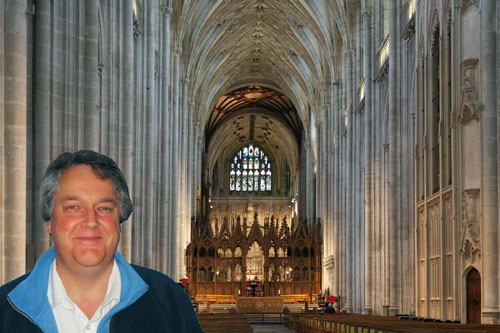
• Winchester Cathedral Chroma key image•

• Winchester Cathedral •
Chroma key work is quite easily done in Adobe PhotoShop and a range of other quality photo-editors.

When you want to be somewhere else…

There are places we would rather be than where we are now. I would like to be on an island paradise …not going to happen! But you can do it photographically. The secret is something called Chroma Key photography or green screening.

Chroma Key Substitution

In chroma key, often known as “green screen” photography, the subject is photographed against a uniformly lit green background. Then, in post production the subject is easily selected out from the green background. The selection can then be pasted into any other photographic background.

Any uniform colour can be used as a backdrop for the chroma key shot. The picture above is selected from a blue background and pasted into a picture of Winchester Cathedral in SE England. The two pictures were taken on different days.

To make the selection of the subject from the background it is important to light the background evenly. When the colour is even the selection is easy and can be completed in one operation. Colour variations from uneven light make it more technical to isolate the subject.

Green is the most frequently used colour in chroma key photography. The colour is very easily separated from human skin tones. Where the subject has green tones, blue is often used as the chroma key alternative. Blue is a common colour for clothing. It is therefore less suitable than a strong bright green which is not so popular as a fashion colour. However, green does have other advantages. The human eye is able to see more shades of green than any other colour. This makes it easy to see variations in the green when setting up the lighting. Green sensitivity is also built into software applications to match the abilities of the eye. This helps us to work with the background when doing awkward selections.

Fun and games

The substitution of a subject into any other photographic background provides great opportunities for doing fun things. Film stars can be placed in your garden. You can apparently travel the world without leaving your front room. Just find the right pictures and substitute yourself into the background of your choice.

Of course there are also opportunities for advertising, graphic art, product photography, still life, portraiture, action shots and many other false situations. Of course we should be careful not to be immoral about such things! Feel free to have fun though. You can really make it look like you have traveled the world.

How is it done?

Basically you need a chroma key background, lighting to illuminate it evenly, a camera and a subject. On a small scale this is easy to do. A lot of people doing chroma key work for the first time start with still life or table-top photography to get the technique right. Probably the most common use of the technique is for portraiture. Take a picture of yourself or your friends and then start playing. For this you need a larger screen…

The video is a complete introduction to the use of chroma key photography. You can take the same techniques and scale them to any size. The video introduces the ideas you need to grasp and shows how to set up the lights and the equipment. It also shows one of the software applications. After the video I will briefly look at that software for you.

How to Green Screen (Chroma Key) with Photography!

markapsolon  External link - opens new tab/page

Software

There is a whole range of software that is capable of doing chroma key. In essence chroma key software has two jobs. The first is to select the subject off the green background (or whichever colour you are using). The second is to successfully blend the abstracted subject with the new background.

The software from the video is called PhotoKey from FXHome  External link - opens new tab/page. It has been produced specifically for chroma key compositing. It is not alone in the market. However, there are not many applications specifically aimed at this work. Instead there are plenty of applications that do chroma key blending as part of a general suite of editing tools. There are also plugins for the same process to go into your favourite image editor.

The actual process for producing the final blended image is relatively quick and easy in most of these chroma key applications. The tools are usually quite self explanatory if you have some editing experience. As with any editor, you normally find the blending tools manage colours, contrasts, edging and so on. Ultimately you are creating a blend of the two images, but the best chroma key tools go further. At the end of working through the blending process you can make further changes in a good software suite or plugin. If you are satisfied with it you should be able to export your image to make a .png, .jpg or .tiff image.

The way to do it in Adobe PhotoShop

The general photographer is most likely to have use of a quality image editor like PhotoShop, Elements, GIMP, PaintShopPro and others. All these are able to do the type of work that PhotoKey can do. Admittedly it takes longer. But for beginners it is better to save your money for more general photography kit. For those who are interested, here is a short video explaining the Photoshop method of doing a chroma key composite. It is a simple technique using standard photoshop tools.

Isolating with a Chroma Key Background

This tutorial is aimed at Photoshop intermediate level users.

Overall…

Chroma key work is fun. There is quite a lot to learn, but it adds flexibility to your photographic work and post processing. The use of up to date quality image editors is probably better than splashing out on expensive specialist applications. Nevertheless specialist applications do a great job, saving time in post processing.

Can you write? Of course you can!
Write for Photokonnexion...

We would love to have your articles or tips posted on our site.
Find out more…
Write for Photokonnexion.

find out more...Photokonnexion tips by email
If you enjoyed this article please sign up for our
daily email service.
                                                 Find out more
#11030#

Three “laws” of street photography that will help you

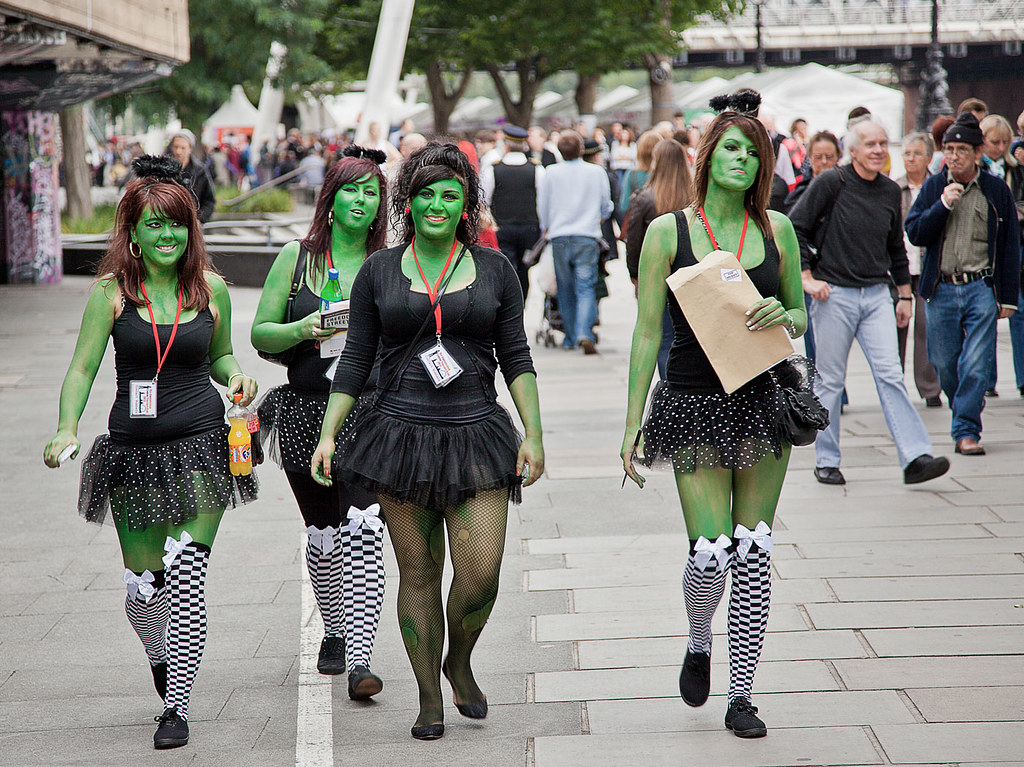
• Green Girls •

• Green Girls •
Click image to view large
• Green Girls • By Netkonnexion on Flickr External link - opens new tab/page

Street photography is not as chaotic as you imagine.

Most people behave in predictable ways in public. Understanding the general “laws” of street photography can really help you get the shots you want and capture the most interesting characters. Here are three ways that you can get ahead as a street photographer.

Outrageous people

When people are out and about enjoying themselves, especially in groups, they love to be photographed. The more outrageous they are presenting themselves, the more they love to be in the frame. They have made the effort to be “stand-outs” and so they are! More to the point they love to have photos taken because it shows they are the centre of attention. Groups like the green girls above just love to show off. And, don’t we love it too! So, for a bit of carnival fun, our first law is…

The photographers law of street stand-outs: The more outrageously dressed someone is, the easier it is to get a street photograph.

Hiding in plain sight

Be obvious, better still, be official looking. Nobody will question you taking photos. At lunchtimes I used to go out taking street shots. I wore a suit, had a tripod, and a Canon 5D. Sometimes I even wore a fluorescent jacket. I would put my tripod up in the middle of the pedestrian precinct and take photos of anything I wanted – nobody asked questions.

When hiding in plain sight, never look at someone directly. There are three little tricks to this:

  • When you are looking through the camera people cannot tell what you are looking at. If you use a wide angle lens you get a general view. Keep the camera pointing in the general direction of interest. You don’t even need to have the lens pointing directly at individuals. As people walk in and out of view you can snap them and they never know you are doing it.
  • Spend a long time looking through the lens – poised. People will walk in and out of the field of view and never guess you are watching them. All the while you are snapping away. Crop them into position later. With a wide angle shot you have plenty of scope to change the composition on-screen later.
  • If you are doing some spotting, not looking through the camera, make a big effort to “look past” people. Make it look like they are just in the way. People soon lose interest. Bingo – you have the shot and they are none the wiser.

So, for our every day photography in the high street our second law is:

The photographers law of sticking out like a sore thumb: If the photographer is obvious, the subject will be oblivious!

Candid or “can, but didn’t”?

The candid shot is a part of the business of being out on the street. However, not every shot has to be a candid. Interacting with people, getting in close and watching them pose, work or play is also a part of the scene. You probably think it’s difficult to stroll up to strangers and ask to invade their privacy with a camera. Its not as difficult as you imagine. Most people are pretty flexible. If you show an interest in them, generally they like to show cooperation. The problem is with the photographer. I have heard photographers say, “yeah, I could of spoken to them, but I couldn’t be bothered”. What they really mean is: “I would love to have chatted with them and got some shots, but I was worried about rejection”.

Here is some news. It is not as bad as you think. If you do get rejected just walk away. Try someone else. Actually, rejection does not happen very often. Most of the characters you want to photograph are quite pleased to be involved. Be polite, chatty, fun, complementary and respectful and most of the time you will get what you want. Pick your subjects for their character, presence and interest and you will probably find that they are pleased to share with you. Get in close and personal, be enthusiastic and involved. You will be a part of the behaviour, and a part of their lives. If they want copies, send them some. Then you have given them something in return for their posing. This is the third law:

The street photographers law of proactive interaction: If you don’t ask you won’t get!

If you want to be a street photog…

You have to develop and practice a number of strategies. Street photography is a fast and fun activity. Sometimes the direct action approach works best. Other times the candid approach works. However you choose to do it you will find it’s not that difficult. Actually the most difficult thing is starting… and only you can sort that out.

find out more...Photokonnexion tips by email
If you enjoyed this article please sign up for our
daily email service.
                                                 Find out more
#11030#

By Damon Guy (author and Photokonnexion editor)

Damon Guy - Netkonnexion

Damon Guy (Netkonnexion)

Damon is a writer-photog and editor of this site. He has run some major websites, a computing department and a digital image library. He started out as a trained teacher and now runs training for digital photographers.
See also: Editors ‘Bio’.

Events – what do you photograph?

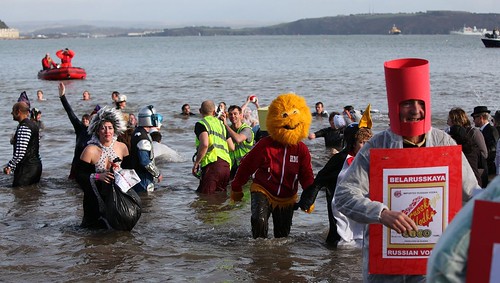
Run for the water

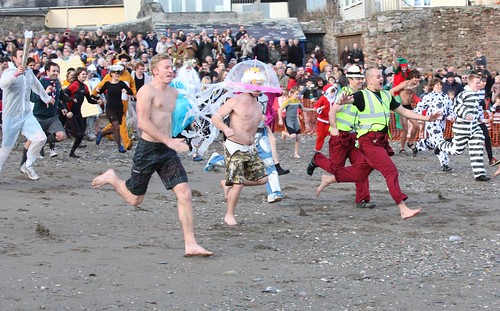
• Run for the water •
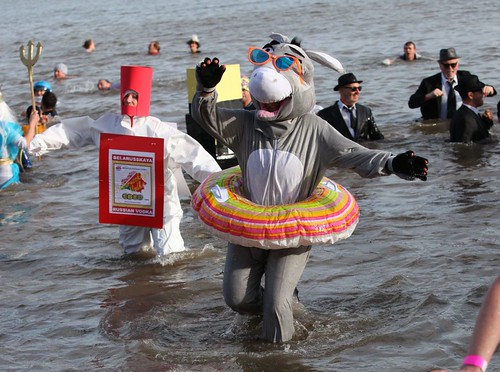
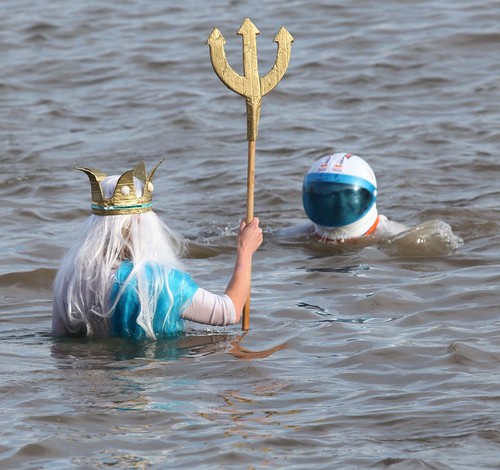
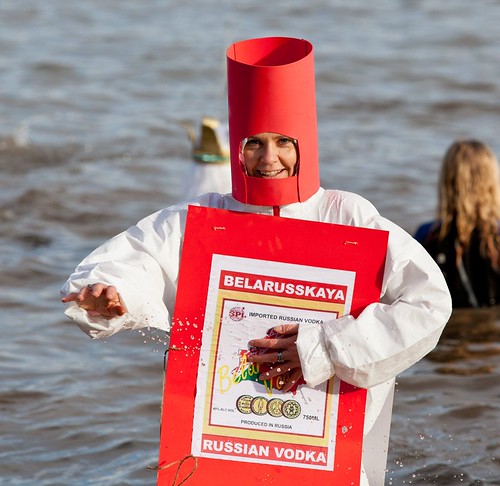
Participants in a charity New Year swim race to the sea
Click image to view large
Run for the water By Netkonnexion on Flickr External link - opens new tab/page

Every event has a theme.

Nevertheless there are lots of reasons for photographing an event. Don’t just snap away. A reason for taking photographs gives you a perspective for your shots. You can tell a story with a main idea.

Have a focus for your shots

If you have a specific reason to capture something it gives you a reason to look at it in a particular way. If your idea is to capture the fun, you are looking for smiles and enjoyment. If you are looking for love, say at a wedding, then your eye will pick out the looks, the coyness and the adoring glances. The way you look at an event is the way the capture the action.

If you have a lot of photos to take, with one reason to take them you have a storyline. The only way to create a clear story is to crystallise it around a single idea. If your pictures have a mixed or unclear idea overall then the story will be mixed and unclear too.


The moral is, despite the theme of the event, you are the person creating the story. It is the way you tell the story that is important. So make sure you know what you are trying to say about the event. Then pursue the pictures that depict the story you want to tell.

The picture story here…

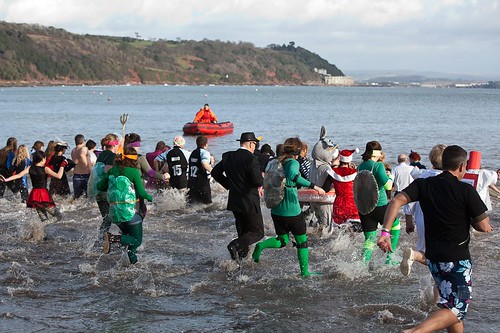
The pictures on this page were taken today at a fun-based charity event. Everyone gets dressed up in fancy dress and goes for a sponsored swim on New Years Day. While it is about raising money for charity, the event is about fun. I tried to show the fun and the smiles in the short photo-story.


By Damon Guy (author and Photokonnexion editor)

Damon Guy - Netkonnexion

Damon Guy (Netkonnexion)

Damon is a writer-photog and editor of this site. He has run some major websites, a computing department and a digital image library. He started out as a trained teacher and now runs training for digital photographers.
See also: Editors ‘Bio’.

Have fun, take great shots – photography at the zoo

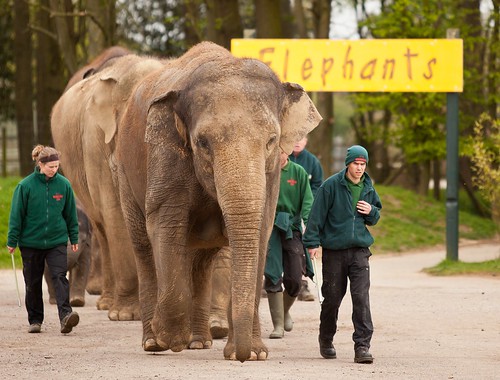
Elephants - at the zoo all sorts of images are there for you to capture.

• Elephants •
At the zoo all sorts of images are there for you to capture. Keep an eye open for the natural shots as well as the well timed ones.

Click image to view large.
• Elephants • By Netkonnexion on Flickr External link - opens new tab/page

The zoo is a rich playground for photographers.

All sorts of opportunities pop up for you. First off, concentrate on getting your pictures sharp and well composed. We will be looking at a few other ideas to help you on your zoo trip.

Sharpness and composition:

A zoo is a great place to practice your five S’s… check these out: Five S’s for super shots. We have also covered a lot of the subject matter in these pages on how to keep your shots sharp and well composed. So here are two links to look back on:

If you want to work through the issues of composition also check out the most important one to get started with: Rule of Thirds. However, composition is a wide study. So here’s the link to the composition articles on Photokonnexion: Composition resources. You can also find these listed under ‘Articles’ on the navigation bar above.

Any special tips?

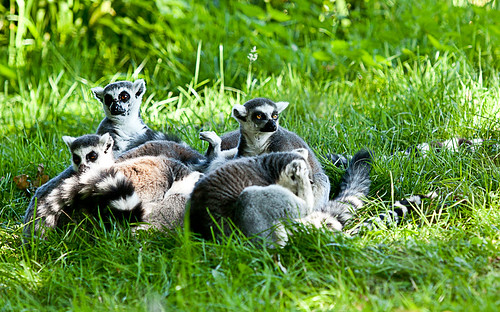
Yes, fences! They are a pain. But also not as much as a problem as you think. Ring-tail lemurs are hugely cute animals, but great climbers. They need to kept inside a high and secure chain-link fence – you know the diamond linked fencing…

Ring-tail lemur - inside a diamond-shaped link fence.

• Ring-tail lemur •
inside a diamond-shaped link fence. By focusing correctly you can focus the fence out.

Click image to view large.
• Ring-tail lemur • By Netkonnexion on Flickr External link - opens new tab/page

In this picture you cannot see the fence at all! I assure you it was taken through the fence. If you focus correctly you won’t see the fence. Just leave enough room between you and the fence and the fence and the animals. In this shot I was about 2 meters from the fence and the animals were about the same distance inside it. Equal distance either side of the fence and you will be OK. A sharp focus on the animal will put the fence in its most out of focus point. A great tip!

Unfortunately it does not work with thick bars. It is slightly less successful with some finer mesh fences too. It works reasonably well with glass. It does not work from a long way back from the fence because the individual strands in the fence appear to come together and look like a sheen over the shot. So this tip takes a little practice but you should be able to do it if you keep ‘chimping’. Yes, chimping! In a zoo that’s just the thing to do… keep looking at your screen on the camera to see how it came out.

Approach to your shots

Sometimes plain old photos of an animal in a cage are fine. Especially if you are doing a science project or something similar. You do not want to mislead people about where you get the shots. So, if you are doing any sort of a record shot then capture the animal in its enclosure. If you are reporting, taking a journalistic shot, then you must not mislead the public in any way. So, make sure that you take a fair picture of caging as well as the animal itself.

It is great fun, for your own interest, to take shots that make it look like you caught the animal in the wild. This does take a bit of creativity. You need to find ways that show the animal in an environment where it might be seen naturally. Avoid fences, people, artificial surfaces and toys/climbing equipment. Put in plants, other animals, trees, natural nests and so on. Most caged-off areas are quite well suited to this in modern zoos. In the UK, and most other aware countries, zoos must cater for the animal so it has five needs satisfied. They must have…

  1. somewhere suitable to live;
  2. a proper diet, including fresh water;
  3. the ability to express normal behaviour;
  4. any need satisfied relating to being housed with, or apart from, other animals;
  5. protection from, and treatment of, illness and injury.

These five needs also give you a clue as to what to look out for when photographing the animals. Look around their enclosures and find them doing things that fit these five essentials of their lives. That way you will catch them doing things they might be seen doing in the wild. Eating, playing, chasing, sleeping, running… all these things are good photographic material. Capture the animal in movement and stationary… whatever gets your artistic juices flowing! It’s all about enjoying yourself as well as extending your photography.

Portrait of a Rhino - capturing an animal in its noblest pose...

• Portrait of a Rhino •
Capturing an animal in its noblest pose is fun and shows the essential character.

Click image to view large.
• Portrait of a Rhino • By Netkonnexion on Flickr External link - opens new tab/page

Portraiture

It is not always easy to capture animals in action, doing exciting things. Another great pass-time is portraiture. Capture the animal looking at its best. There are lots of things you can do for this, and it helps to use a fresh perspective. So, try high shots, low shots, ground shots. Oblique angles and upside down shots are fun! Sometimes just get a beautiful picture. With your portraiture, as with humans, try to capture the animal looking at its best, and especially, when it is stationary. The idea is to make the essential character of the animal come out in your shot.

Where possible, and it is difficult sometimes, try to get catchlights in the eyes of the animal. The eyes of all animals, including humans are a strong focal point. Catchlights are great for helping to make the animal look alive and dynamic.

A day at the zoo

If you spend a whole day at the zoo you can also have fun people watching. Animals are great, but watch out for stupid humans. Grown ups are especially funny if you catch them with kids. They imitate the animals, and jump around in an attempt to get the kids into the mood. Boy does that make for some fun photography. So keep an eye out for good ol’ Homo sapiens External link - opens new tab/page doing what comes naturally when around kids and animals.

Afterwards

Finally, remember that you should take a lot of shots. Animals, especially on the move, make difficult targets sometimes. So, work hard to get each shot right. Also, concentrate on your experimentation, your sharpness and your composition.

Back at the ranch you have a chance to do some great post-processing. Some of the zoo shoots I have done over the years have seen over a thousand shots in a day. Wow! Weeks of post processing fun! Remember, while the shots may be worth developing in your favourite editor straight from the camera, animals make great subjects for morphing, general ‘PhotoShopping’ and cutting and pasting into other pictures. So don’t think your day is over when you get home. The fun is just beginning.

Have fun on your zoo trip!

By Damon Guy (author and Photokonnexion editor)

Damon Guy - Netkonnexion

Damon Guy (Netkonnexion)

Damon is a writer-photog and editor of this site. He has run some major websites, a computing department and a digital image library. He started out as a trained teacher and now runs training for digital photographers.
See also: Editors ‘Bio’.

Inspiration for sports photography

Sir Steve Redgrave - Winner of five Olympic Gold Medals

Sir Steve Redgrave – Winner of five Olympic Gold Medals

Great sportsmen inspire and so does great photography

The wonderful Olympic events in London this week has me reflecting on sports photography. I have learned some great lessons from watching television sports. I want to share some of these with you. They may not be what you expect.

Watch Television to improve your photography

Great technology and improvements in the quality of live video photography have produced some superb sports coverage. Today, there were some fantastic shots from the long jump competition. Watching these shots in high definition and slow motion was instructive. The best shots were taken from slightly below the level of the jumpers in the air and watching them come toward the camera. The camera was able to look up into the stadium and directly at the jumper coming toward them. It brilliantly captured the power of the jump and the power of the audience. A great upshot with a great backdrop. It shows that a near ground-level upshot can have strong visual power. Worth exploring further.

I have also enjoyed the high definition, slow motion photography in the Olympic Velodrome in London. Cycling is a great sport to photograph. Watching the champion-standard performances was amazing enough. But the composition of the video of the moving cyclists was phenomenal. The best shots were taken from just below and alongside the body-line of the cyclists. They had partially visible faces and we saw the entire action of each cyclic leg motion in full view. A great composition. The best shots were along a line of pursuit cyclists from this angle. The pursuit cyclists in a row demonstrated the discipline and strength of a team. The composition of the shot showed the visual power of a perspective down the line. Wonderful!

One of the enduring shots I saw yesterday was a high jump. The jumper was frozen with excellent clarity. Her body was contorted, straining every ligament to clear the bar. I was struck by this shot because there was absolutely no motion blur in the shot. The situation demanded fast and committed movement. Our eyes would only see a blur if we watched. Yet, this picture had a great impact because of its clarity. Sports images often convey power through the explosion of action. The lesson here is not to try for motion blur in every shot. There is sheer beauty in combining photographic clarity and sporting prowess.

Winners are loved by everyone. As a result it is sometimes difficult to get near to them. It is also difficult to get a great picture of a jubilant winner jumping up and down in a crowd. However, strong emotions abound at sports events. So be stealthy. Those who lose have very powerful emotions and reactions. Watch out for those. Strong emotions make for a great shot. You can communicate real power in a shot where someone is overcome with negative emotional energy or the grief of failure. These displays say as much about sports events as great sporting feats.

Although we may not be video photographers there are shared lessons in composition, positioning and perspective. While there are some great moving shots, there are also some brilliant frozen shots – stills just like the ones photographers take. These are often picked from the best of a video sequence. So some really excellently composed shots come out. Watch for those!

Watching sports television we can enjoy great sporting events and some great photographic lessons. So as you watch the Olympics look at some of the shots, analyze them, take a view on composition and content. There are some inspiring pictures. There are also some great images to keep in mind for our own future shots.

Television can inspire some great photography.

By Damon Guy (author and Photokonnexion editor)

Damon Guy - Netkonnexion

Damon Guy (Netkonnexion)

Damon is a writer-photog and editor of this site. He has run some major websites, a computing department and a digital image library. He started out as a trained teacher and now runs training for digital photographers.
See also: Editors ‘Bio’.

Throwing your precious camera in the air!

At the end – I could hardly watch!

Well, Wow! Here is a video about photography I just did not see coming. Funny? Yes! Expensive? YES!

The mad photographer from DigitalRev.com shows you how to throw your precious camera in the air to take a photo. Not content with that feat, he does it in typhoon conditions. Then, when he breaks a lens with his first efforts, he pulls out a top of the range camera and carries on in pouring rain…

From DigitalRev.com  External link - opens new tab/page on YouTube.com  External link - opens new tab/page

Can you write? Of course you can!
Write for Photokonnexion...

We would love to have your articles or tips posted on our site.
Find out more…
Write for Photokonnexion.