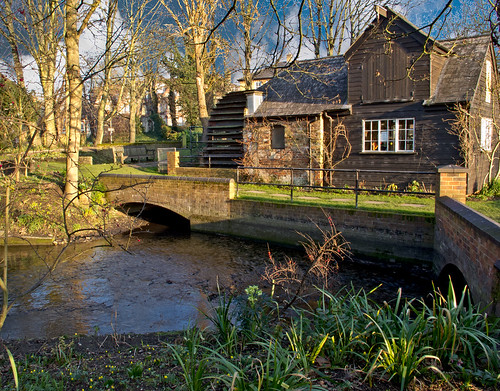
The mill on the Rye. Taken in a local park this mill presented a wonderful opportunity to capture the early morning sunlight. However, I think it might look good in black and white. Nice contrasty subject matter makes a good conversion.
Converting properly to black and white gives you greater control
I argued previously that you should not photograph your pictures in black and white. While you might get a credible picture it is not necessarily going to yield the best result. In my experience black and white, as processed by the camera, tends to be flat and lifeless. So how should you do it?
First look to your shot
Not every shot will work best in black and white (B&W). Some shots look flat and lifeless regardless of how you treat them. To get a good B&W shot try to look for pictures where the tones vary widely. Big contrasts in the colour and the texture of a subject will show big differences in the B&W ranges. Some colours convert better than others too.
The second point to look for is to shoot in RAW. If you are shooting with *.jpg files you will restrict the ability to post-process your shot effectively afterwards. The whole point of shooting in colour and converting to B&W is that you are able to fully manipulate the process to draw out the best that B&W can offer. RAW provides the depth of tones with which you can do that.
The conversion to Black and White
Converting to B&W is not difficult. However, you need to know the most effective process. In most editing applications there are two methods. These are…
Desaturation:
Photoshop: [ Click – Image menu | Adjustments | Desaturate ] Or [ Hold down Shift + Control + U ]
All colours resolve to a grey colour if mixed correctly with another colour. The tendency to create a grey from a specific colour is to desaturate it. However, all colours will resolve into the same grey if it were not for variations in brightness/lightness. The standard desaturation option in image editors is a program for reducing the colours to greys leaving the variations in brightness to create the grey tones. The ‘Desaturate’ option is limited. It does the same as a camera when shooting in black and white. Using this option you have no control over the conversion.
Adjustment:
Photoshop: [ Click – Image Layer | New Adjustment Layer | Black & White ]
This option allows you full control over the colour brightness before the conversion to grey. As the brightness determines the grey tones this gives you the opportunity to vary the intensity of the grey in the final conversion. In Adobe PhotoShop you are presented with a dialogue box that provides a slider for each available colour. As you slide them back and forth you will see the grey tones change. These changes are what allows you to adjust the strength and depth of the blacks and whites in your picture. The adjustment brings out subtle variations to emphasis the depth and three dimensionality of the picture. In addition, colours, tones and brightness/lightness varies for every picture. Using the sliders you will be able to adjust these variables to suite your scene. This is something your camera or your ‘Desaturate’ option cannot do. As a result you will be able to create a subtle variation that brings out the best in your picture.
Although I have used Adobe PhotoShop as the example here most applications have two options for the creation of B&W pictures. You can access your help files to see which you want. The most effective is the adjustment option – so look for a term that describes that sort of control.
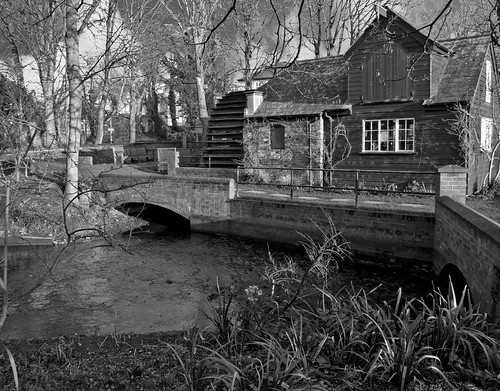
To see what the difference is between the methods I include two B&W conversions of the picture above. The first uses the ‘Desaturate’ version…

The Mill on the Rye – Desaturated version. Not bad, but a little flat
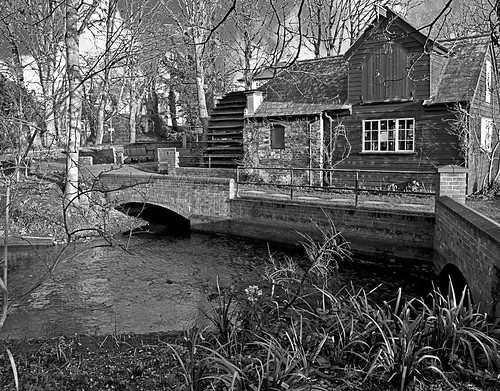
The second picture uses the ‘Adjustment’ method. The colours have been adjusted to create a greater contrast in the black and white range of the picture. This gives a better grey tonality and creates a greater sense of depth in the picture…

The Mill on the Rye – created using the ‘Adjustment’ process for converting to black and white. There is a greater range of tones.
