Category Archives: Guest Contribution

Ten simple ideas to help your portraiture improve

Video

Video

Straight forward portraiture advice is difficult to come by…

In the video we have some great ideas that help you to map out a great Portraiture session. This is straight advice aimed at getting you to a good quality completed portrait as directly as possible.

I have to add that the book advertised in the video is also a great book. It is packed with some excellent ideas and written in a simple and easy-to-read way. If you are interested in following up on the book I can highly recommend it. My copy is pretty dog-eared these days!


Portrait and Candid Photography: Photo Workshop This is a great book packed with lots of hints, tips and ideas like the ones below. A really worthwhile read.


Ten points at the core of good portraiture

In the video Erin Manning highlights the importance of the following ten points…

  1. Don’t fix your subject in the middle of the frame. Instead, think about the rule of thirds – a more dynamic outcome.
  2. Poses and “cheesy” words to force a smile are false and make the photo look strained.
  3. Make your clothes simple and un-distracting. Forget patterns and fussy details. Simple solid colours help the subject to stand out, not the clothes.
  4. Avoid straight on shots with a big flash. The open pupil in the eye will cause light to reflect back to the camera and show bright red eyes… You don’t want your subject to look like red-eyed monsters. Use red-eye reduction settings if your camera has them.
  5. Vary your poses, angles and heights. The more angles you get the more you are telling a story about your subject. Get them in many different ways.
  6. Use flash to help reduce harsh shadows. The sharp sunlight of the middle of the day is very unflattering. The use of fill-in flash softens the shadows bringing out the subjects character.
  7. Look for great quality of light. Remember that hard light (harsh edges and strong contrasts) is very unflattering. Shoot in the later afternoon or early morning to get soft light with better colours. Use shade to reduce hard light if you are forced to work in bright mid-day light.
  8. Don’t stand too close and use a wide angle lens. This exaggerates the nose. Stand away and zoom in. This reduces nose size and is much more flattering. (Great advice).
  9. Pay attention to the background. If it is too busy make sure there is nothing distracting. Check to make sure the background has not created odd effects like poles sticking out of heads and flowers in ears!
  10. Make sure you have enough battery capacity and memory card space to cover the whole session. You don’t want to lose any shots when you are in full swing.
Erin Manning’s Top 10 Dos and Don’ts for Great Portraits


Erin Manning

By Damon Guy (author and Photokonnexion editor)

Damon Guy - Netkonnexion

Damon Guy (Netkonnexion)

Damon is a writer-photog and editor of this site. He has run some major websites, a computing department and a digital image library. He started out as a trained teacher and now runs training for digital photographers.
See also: Editors ‘Bio’.

find out more...Photokonnexion tips by email
If you enjoyed this article please sign up for our
daily email service.
                                                 Find out more
#11030#

Inexpensive Close-Up Photography – Tips and Tricks

• Oil and water •

• Oil and water •
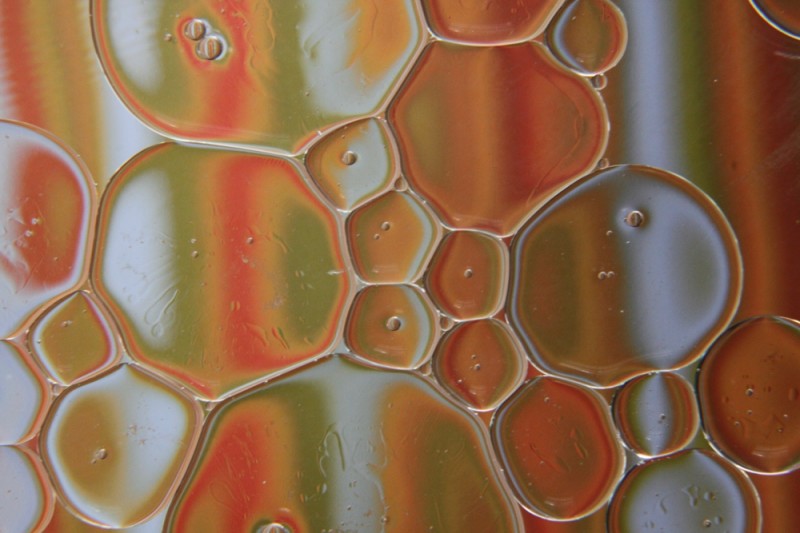
These bubbles of oil in water were shot with a
Canon 50 mm f/1.8 and a +10 close-up filter
Click image to view large
Oil and water • by ArchaeoFrog

Easy, budget macro.

Macro or close-up photography is accessible without investing in a pricey macro lens. The first three articles in this series covered techniques for inexpensive macro-level results: close-up lenses, reverse rings, and extension tubes. In this article, I offer suggestions for achieving great-looking results using any of these three techniques.

Choose Your Depth of Field

Depth of field is a term that refers to the area of the image that is acceptably sharp and in focus. Depth of field is a function of many things. Our interest is in three factors. These are aperture, the distance between the camera and the subject, and the orientation of the subject relative to the camera.

Aperture has a direct influence on the depth of field. A wide aperture (smaller f number, such as f/1.8) creates a shallow depth of field. Areas of the image outside of the zone of sharpness fall out of focus quickly. Wide apertures can be used to create bokeh – unsharp sections of the image.

A narrow aperture (larger f number, such as f/22) creates a deep depth of field. The majority of the image is in focus. Narrow apertures are often used by landscape photographers to capture front-to-back sharpness throughout an image.

The distance between the camera and the subject also influences the depth of field. Generally, the closer that you are to your subject, the narrower the depth of the field becomes. This is particularly important when using macro and close-up photography techniques where you need to be physically close to the photographic subject.

• Bokeh penny •

• Bokeh penny •
By ArchaeoFrog
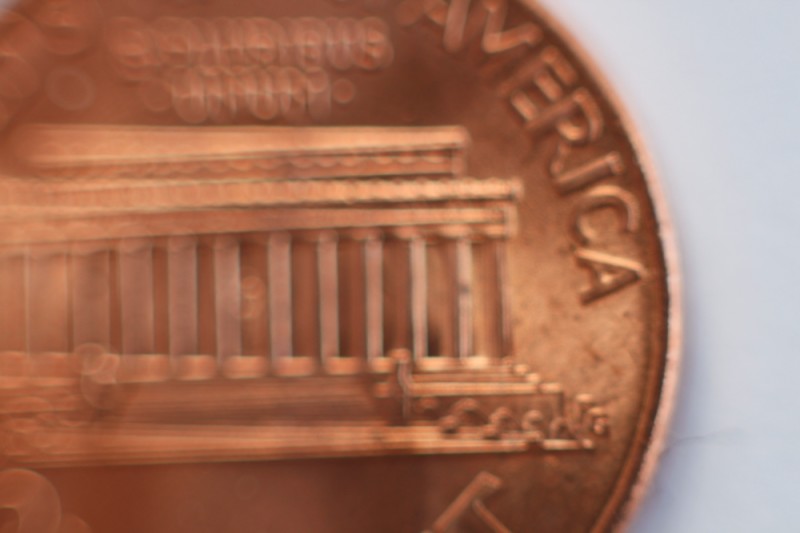
Penny shot with a Canon 50 mm f/1.8 lens and a full set of three, generic extension tubes (7, 14, and 28 mm). The plane of sharpness lies parallel to the flat of the lens. If the plane is not parallel the focus is quickly lost.
Click image to view large

It is also important to consider the orientation of the subject relative to the camera. The depth of field can be thought of as a plane that is parallel to the camera lens. If you can orient yourself so that the subject is parallel to the flat of camera lens, more of your subject will be in focus than if it is at an angle to the camera. In the penny shot above, I tilted the camera lens slightly away from the parallel position. The loss of focus from right to left is obvious.

• Flowers and Depth of Focus •

• Flowers and Depth of Focus •
Click image to view large

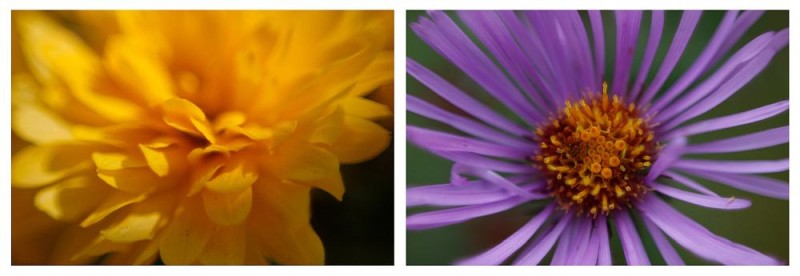
The flower photographs show how depth of field influences an image. Both were taken with the same lens (Canon 50 mm f/1.8), the same aperture (f/1.8), and the same technique (reverse ring). Both images have a shallow depth of field (wide aperture) and are close to the subject. The appearance of the depth of field is very different. The yellow flower (left) is sideways to the camera. Only the closest edges of the petals are within the depth of field and are in focus. The purple flowers center is shot parallel to the camera. The entire center of the flower is within the depth of field and appears in focus.

If you want more of your subject in focus use a narrower aperture. Increase the distance between yourself and the subject, and set the camera (and thus the depth of field) parallel to the subject. If you want less of your subject in focus, you can use a shallow aperture, get in closer to your subject, and orient the camera and depth of field perpendicular to the subject. Try it many different ways and see what works best for what you envision!

The Tripod: With and Without

It is possible to achieve acceptably sharp macro results hand-holding the camera. The majority of images in these articles were shot hand-held. If you have a stationary subject using a tripod will greatly improve the sharpness of your image. A tripod allows you to use longer shutter speeds. This helps you get crisper images in lower light. It also allows a narrower aperture to gain a deeper depth of field. The steadiness of the tripod will significantly reduce hand movement.

If available, also use the Live-View function on your camera to fine-tune your focus. Live-View lets you use your display screen rather than the viewfinder. Many cameras allow you to zoom in on a portion of the image to check the focus.

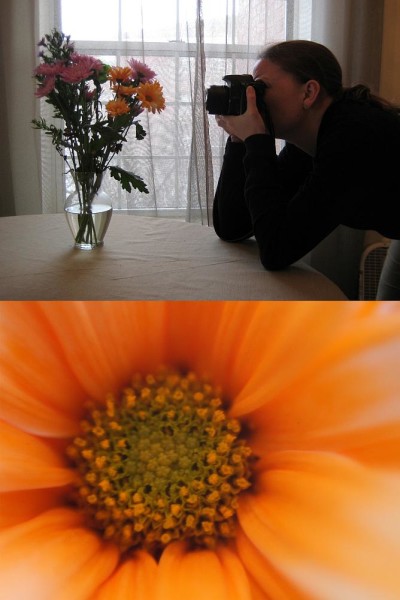
Without a tripod a good stance improves stability while hand-holding. Create your own tripod with your body by bracing yourself or your camera. In the diptych image below, I am using my elbows for support. The elbows in combination with my feet create a similar a three-point stability like a tripod. In the extension tube article, I demonstrated a similar human-tripod by bracing my elbows on my knees while shooting.

• Simultaneous diptych •

• Simultaneous diptych •
These two images were taken at the same time and show my hand-holding position as well as the image captured. The flower was shot with a reverse-mounted Canon 50 mm f/1.8 lens.
Click image to view large

This three-point position allows me to lean in and out very slightly with the camera. I can manually find the exact focus that I want in the photograph. Focusing with body movement allows me to place the depth of focus exactly where I want it relative to the subject.

More after this…

find out more...Photokonnexion tips by email
Enjoying this article? Please sign up for our
daily email service.
                                                Find out more
#11030#

When you are hand-holding practice breathing slowly and pushing the camera shutter button gently, without imparting additional motion to the camera. (More tips on stance)

Play, Combine, and Find What Works for You

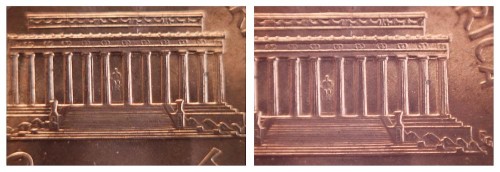
You can use extension tubes in combination with either a reverse ring or close-up lens for even more detailed images. However, the working distance between the lens and the subject is narrow and the depth of field is incredibly shallow. With the pennies below, I found it impossible to keep both Mr. Lincoln and the columns of his memorial in focus together, as the columns are slightly raised relative to the surface of the penny.

• Penny diptych •

• Penny diptych •
These pennies were both taken with a Canon 50 mm f/.18 lens and a set of three, generic extension tubes (7, 14, and 28mm). In the left-hand image a +10 close-up lens was added, and in the right-hand image the lens was instead reverse mounted.
Click image to view large

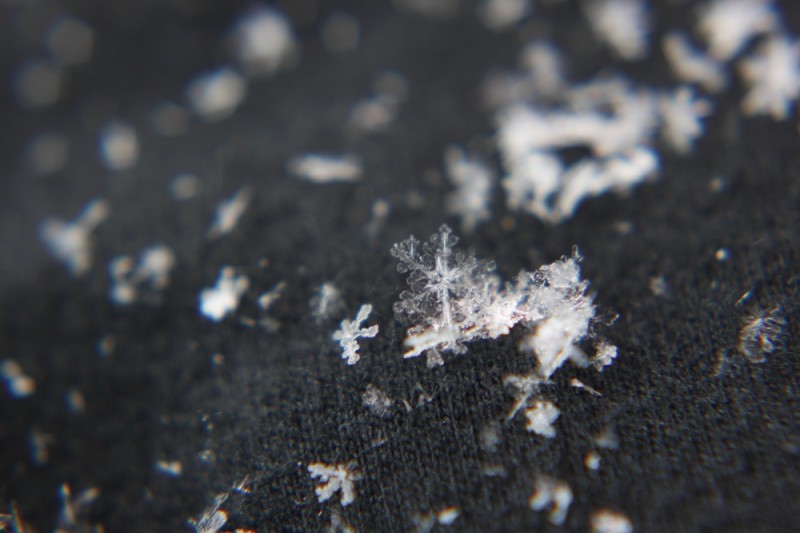
Close-up lenses can also be screwed in to each other for greater magnification. I used both a +4 and +10 close-up lens for the snowflake image below. There is some distortion visible in the image particularly around the edges. I also found it more difficult to focus when looking through both lenses.

• Macro snowflake •

• Macro snowflake • By ArchaeoFrog •
This snowflake was shot with a Canon 50 mm f/1.8 lens
and a +4 and +10 close-up lens.
Click image to view large

The final curtain

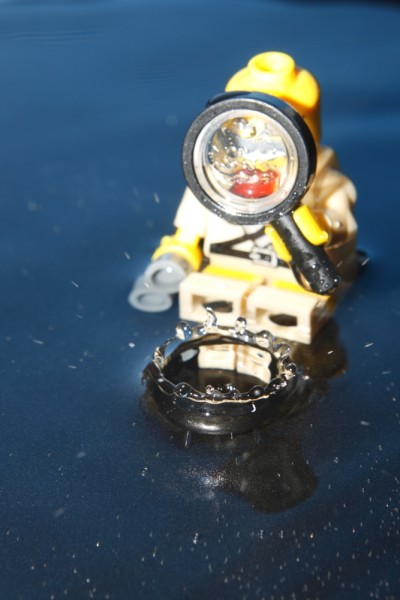
The varieties of subjects for macro and close-up photography are endless. I have tried to highlight a variety of them during this series. Flowers, insects, and falling water are perennial favourites, as are coins, Lego figures, and other small objects. Your imagination and creativity are your only limitations. Enjoy!

• Macro snowflake •

• Lego water crown •
This Lego mini-figure and falling water crown were shot using a
Canon 50 mm f/1.8 lens and a +4 close-up lens.
Click image to view large

Articles on Close-Up and Macro Photography
by Katie McEnaney

Part 1 of this series focused on using close-up lens, Part 2 covered reverse rings, and Part 3 explained extension tubes.

Inexpensive Close-Up Photography – close-up rings
Inexpensive Close-Up Photography – Reverse Rings
Inexpensive Close-Up Photography – Extension Tubes
Inexpensive Close-Up Photography – Tips and Tricks (this article)

By Katie McEnaney (contributing author)

Katie is an elementary school teacher in Wisconsin, USA. She is an avid photographer with wide interests. She is always interested in learning more and growing in her photography.
By Katie McEnaney (Archaeofrog)

Can you write? Of course you can!
Write for Photokonnexion...

We would love to have your articles or tips posted on our site.
Find out more…
Write for Photokonnexion.

Inexpensive Close-Up Photography – Extension Tubes

• Water Icicle •

• Water Icicle •
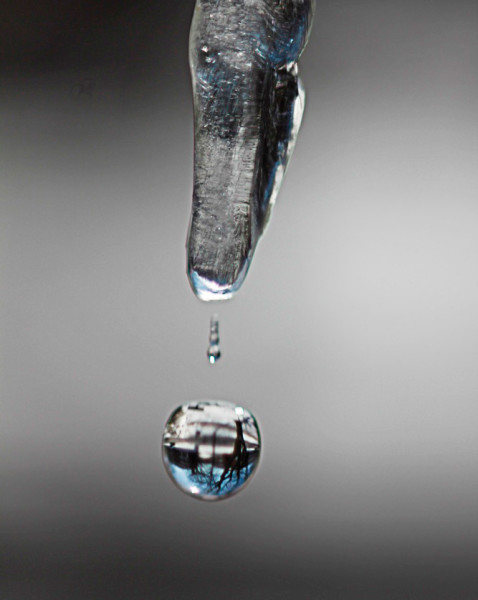
Fig 1: Water dripping from an icicle. The drip was shot with
a 7 mm extension tube on an old manual lens.
Click image to view large

Simple tubes bring remarkable results.

Macro photography allows you to capture images of small subjects, detail and pattern. Unfortunately, macro lenses are expensive. In the last two articles I looked at inexpensive ways to do close-up photography. These showed how to avoid buying a new macro lens. We looked at close-up rings and rReverse Rings.

Another way to do macro photography without special lenses is to use extension tubes.

• Extension Tubes •

• Extension Tubes •
by ArchaeoFrog
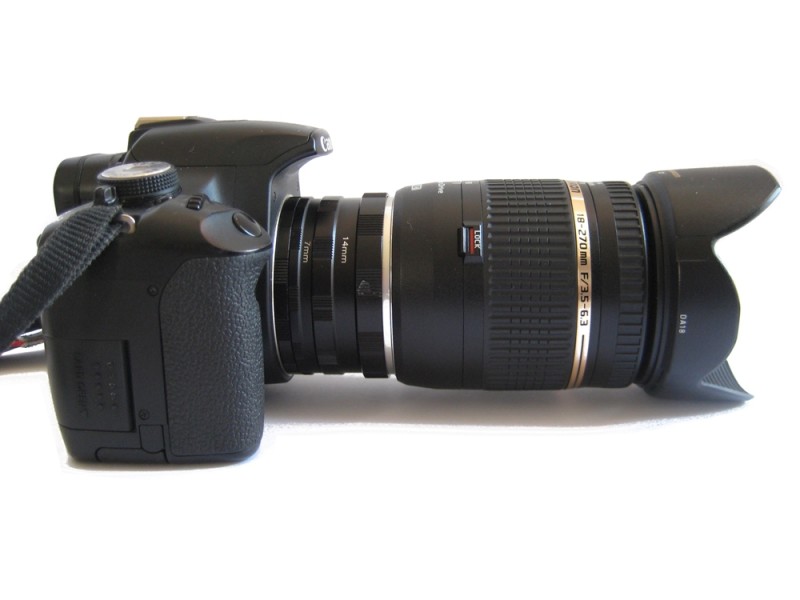
7mm and 14mm extension tubes between a Canon T1i body
and Tamron 18-270mm lens.
Click image to view large


Extension tubes are hollow metal rings. They attach between your DSLR camera body and an ordinary lens. An example is shown in the image above. The further your lens is moved away from the digital image sensor by extension tubes, the closer you can get to your photographic subject. At the same time the subject is enlarged.

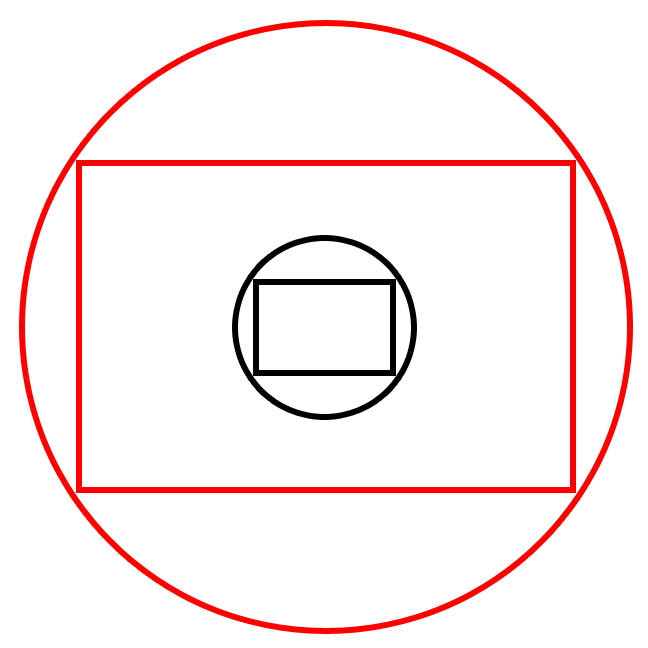
Visualization of the effect of an extension tube at the image sensor.

Visualization of the effect of an extension tube.
The diagram shows in black the actual size of the image circle and the rectangular sensor size inside it. The red lines show how a 7 mm extension tube casts a larger image circle (red). The image sensor (black rectangle) records the enlarged section in the middle and ignores the rest of the circle outside the rectangle. •

The camera’s sensor is a rectangle, but your lens is round. When your camera records an image, it is only recording the rectangular portion of the light that falls on the sensor. This is indicated by the black rectangle (the sensor) and black circle (the image circle) in the diagram. An extension tube moves the lens further away from the sensor, which makes the image circle (red) larger. Now the sensor is recording an area less than a ninth of the original image (compare the black and red rectangles). The longer the extension tube, the further your lens is from the sensor. And, the more detail you are able to capture.

Using extension tubes

There are two types of extension tubes. One type is a set of generic metal tubes, usually packaged as a set of three allowing you various enlargements. This type is made from bare metal tubes. They do not carry the signals that the camera uses to tell the lens to change aperture and focus. This means your lens has to be adjusted manually. This can be an advantage. Macro lenses have a very shallow depth of field. Manual focus is often more accurate in that situation.

The second type is also a tube but maintains the electrical connections between the camera and the lens. This allows you to use all the functions of your lens, including autofocus and aperture adjustment. These expensive versions are sold as one piece. You do not have the option to vary the enlargement factor. There is a big difference in price between the two. You will pay around ten times as much to maintain those lens functions.

The directions below apply to the cheaper version of extension tubes.

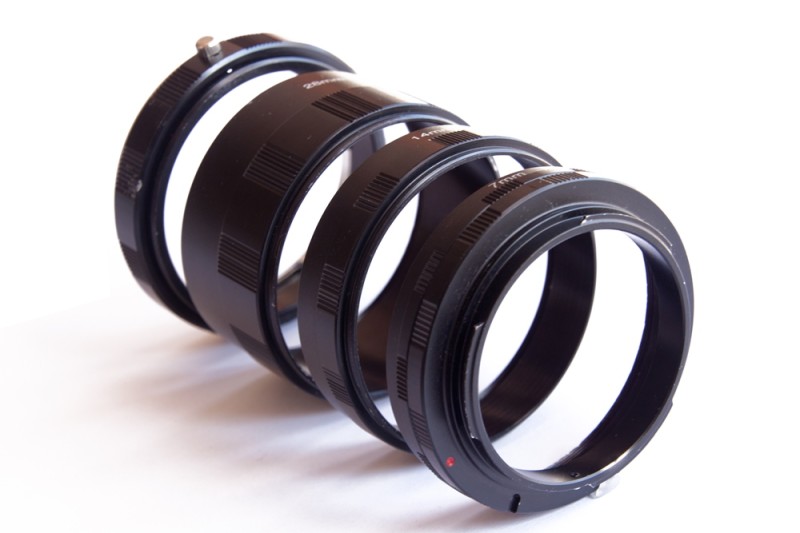
The generic metal ring extension tubes are often sold in sets of three lengths with 7 mm, 14 mm, and 28 mm being common. In addition to the three rings, you will receive two additional pieces: a piece that mounts the extension tube to the camera body and a piece that mounts the lens to the extension tubes. You will need to buy a lens mount that fits your camera brand.

• Extension tube set •

• Extension tube set •
A set of three extension tubes and mounting pieces. The camera mount piece (near end) and the 7 mm extension tube are already screwed together. The lens mounting piece is visible in the back.
Click image to view large


Decide which extension tube (or tubes) you want to use. Each length can be used independently or combined to create a longer extension (eg. closer images). Screw the extension tube(s) onto the camera mount and onto the lens mount. Then, you can screw the extension tubes onto the camera and screw the lens onto the extension tubes. There are red and white circles as indicators on the mounts to help you align them when attaching. To detach the lens, push down on the silver knob on the lens mounting piece and unscrew the lens. To detach the extension tubes, push the lens release button on your camera body. If you have trouble unscrewing the extension tubes from each other or from the mounts, wrap a rubber band around one section for increased grip.

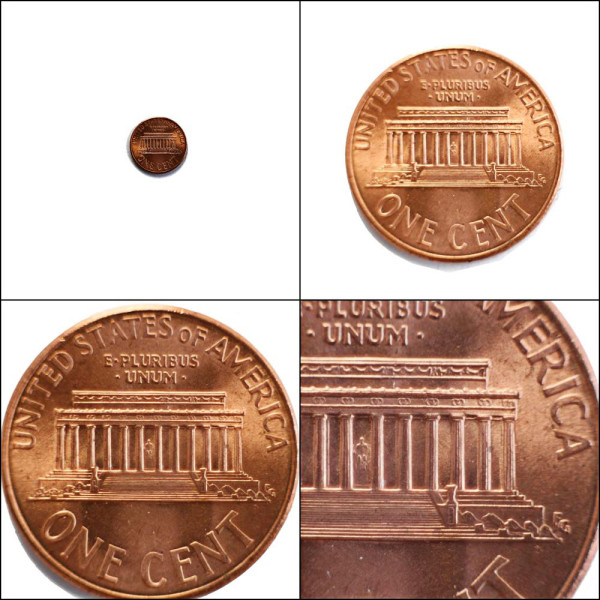
• Views of the back of a penny (Cent). • Click image to view large • Views of the back of a penny (Cent). • By ArchaeoFrog

• Views of the back of a penny (Cent). •
These four images were shot with a Canon 50 mm f/1.8 lens alone (top left), with a 7 mm extension tube (top right), with 7 mm and 14 mm extension tubes (bottom left) and with 7 mm, 14 mm, and 28 mm extension tubes (bottom right). Each image was cropped to a square but not resized
Click image to view large

Adjusting the aperture

The full connection extension tubes connect directly to your camera body. Aperture settings are carried out as with any other ordinary photograph. The generic metal ring style requires a work-around to adjust the aperture. A detailed explanation of the process is available in the previous article: Inexpensive Close-Up Photography – Reverse Rings.

If you want to use an aperture other than the widest default of your lens, first dial in that aperture in aperture priority or manual mode. Then, depress and hold the depth of the field button while pressing the lens release button and removing the lens. (Please note: not all DSLR cameras have a depth of field preview button.) Next mount the extension tubes to the camera and the lens to the extension tubes. Then the lens will maintain the chosen aperture until reconnected directly with the camera body. I suggest you only do this where you can avoid getting dust or debris entering the camera body.

• Detailed rose •

• Detailed rose •
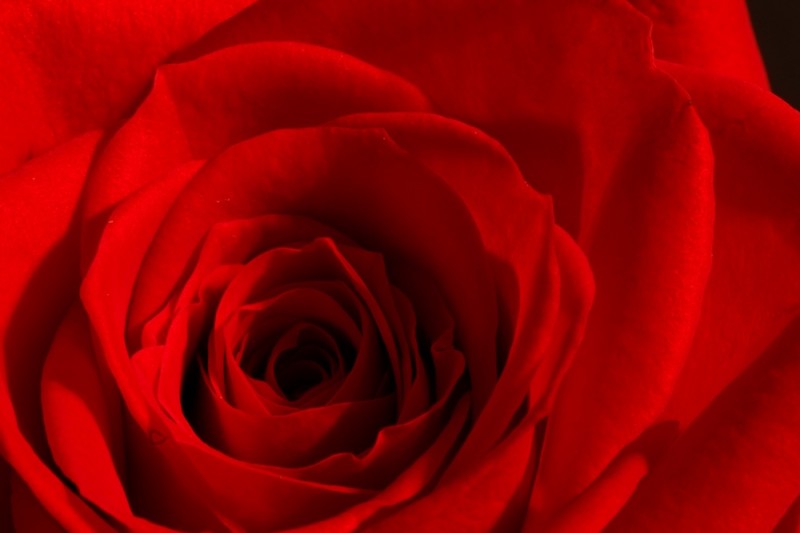
This rose was shot with a Canon 50 mm f/1.8 lens and a 7 mm extension tube. The aperture was set at f/22, resulting in a shutter speed of 30 seconds at ISO 100. A tripod was used.
Click image to view large
• Detailed rose • By ArchaeoFrog

Advantages and limitations of extension tubes

Extension tubes are a versatile and simple way to achieve macro or close-up results. The generic metal ring style is very inexpensive. The pricier full-function tubes gives you full control over your camera for less than a dedicated macro lens. Both styles are small and portable. However, the generic tube-sets give you three tube lengths to achieve a variety of enlargement factors which is more flexible. They are also much cheaper.

If you choose the cheaper extension tubes, you will lose autofocus. Manual focusing often results in better images in close-up photography. Manual focus need not be intimidating. A little practice will make you quite accurate especially with a tripod.

Using an extension tube does change the minimum focusing distance of your lens and requires you to be physically close to the objects you are photographing. If you put too many extension tubes together on a long zoom lens, you may find than an object would have to actually be located somewhere inside your lens to be in focus. I cannot put all three tubes together on my Tamron 18-270 mm at 270 mm for this reason. All three tubes can be used on my 50 mm lens, however, to give a reasonable working distance of a few inches The image below is taken like that. This makes extension tubes ideal for flowers, indoor shots and other static subjects.

• Extension tubes in action •

• Extension tubes in action •
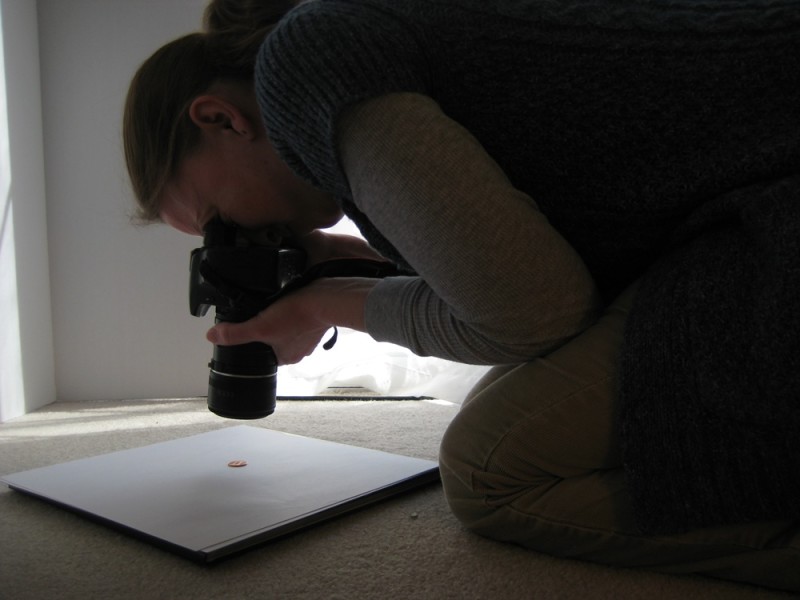
In this image, I am using a Canon 50 mm f/1.8 lens with the 7 mm, 14 mm, and 28 mm extension tubes to photograph the penny (one Cent piece) seen previously.


Strong lighting is a benefit to all close-up photography. As the lens moves further from the camera, the area being captured becomes smaller, and the amount of light reaching the sensor becomes less. Strong indoor lighting or bright, natural daylight can provide enough light for you to maintain a good shutter speed, even when hand-held. Better results come from using a tripod. Then you can use longer shutter speeds to brighten the image.

Flexibility and price win the day

Extension tubes are an excellent way to try close-up or macro photography. You use your existing lenses. The inexpensive generic tubes give great results. You also receive a variety of widths to broaden the scope of how close or how far you can get to your subject and what level of detail you can achieve. On balance the generic metal tubes will provide you with a full macro experience. They are flexible and at a reasonable price. Everyone will find them affordable and they will get you started. Try them for yourself. Then decide later if you want to upgrade to the fully-functional tube version or a full macro lens.

Buying options

The generic extension tubes can purchased from Amazon. This extension tube search provides most of the options…
Extension tube list for various camera brands  External link - opens new tab/page


Articles on close up and macro photography
By Katie McEnaney

Part 1 of this series focused on using close-up lenses, and Part 2 covered reversing lenses using reversing rings. Part 4 will bring all these techniques together with a range of close-up ideas and tips.

Inexpensive Close-Up Photography – close-up rings
Inexpensive Close-Up Photography – Reverse Rings
Inexpensive Close-Up Photography – Tips and Tricks

By Katie McEnaney (contributing author)

Katie is an elementary school teacher in Wisconsin, USA. She is an avid photographer with wide interests. She is always interested in learning more and growing in her photography.
By Katie McEnaney (Archaeofrog)

Can you write? Of course you can!
Write for Photokonnexion...

We would love to have your articles or tips posted on our site.
Find out more…
Write for Photokonnexion.

Inexpensive Close-Up Photography – Reverse Rings

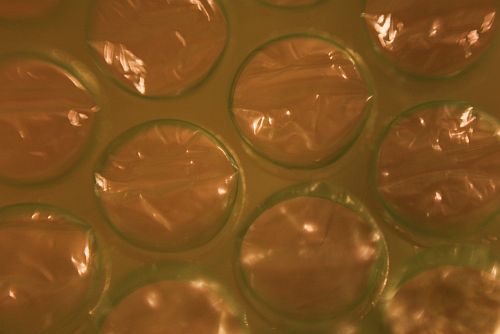
Bubble Wrap

Green bubble wrap shot with Canon 50 mm f/1.8 lens reversed.
Hand-held to the camera body.
• Bubble Wrap •
By Archaeofrog

Anyone can use reverse rings.

Close-up or macro photography is something every photographer should try. However, a macro lens can be an expensive investment. This series covers inexpensive ways to get great close-up results. The first article “Inexpensive Close-Up Photography – close-up rings” discussed using close-up lenses that attach to your existing photographic lens. A second way to achieve close-up results, surprising as it may sound, is to reverse your DSLR camera’s lens by mounting it on backward.

It is possible (but awkward) to simply handhold your lens backwards against your camera body, as in the top photograph. I don’t recommend it, as it can allow dust or other debris into your camera that may affect the sensor. The inexpensive alternative is to purchase a reverse ring camera mount adapter that fits your lens (based on its diameter) and the make and model of your camera body.
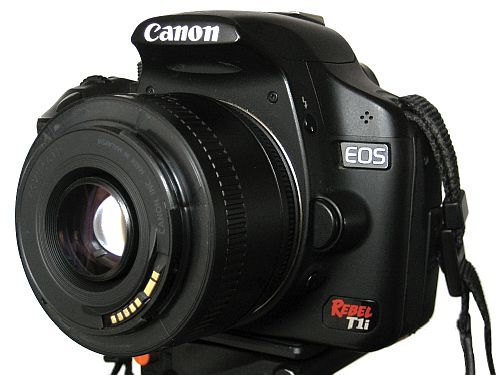
Canon Reversed Lens

Canon 50 mm f/1.8 lens attached backwards to a Canon T1i body using a reverse ring. The depth of field preview button is visible underneath the lens release button.
Click image to view large

How to use the reverse ring

First, remove any filters you have on your lens. To use a reverse ring, screw the ring securely on to the front of your camera lens filter thread. Hint, it is easiest to screw the ring on while the lens is in the camera body. After attaching the reverse ring to the lens, remove the lens from the camera body. Now reverse it and fit the lens-mount side of the ring into the camera body and lock it in place. You will no longer be able to use the autofocus function of your camera or adjust the aperture of the lens once it is reversed, but you will be able to adjust the shutter speed and ISO. Your camera may display an aperture value of F00 or other default. I recommend that you change the shooting mode on your camera to aperture priority or manual. In aperture priority mode, the camera will calculate and set the shutter speed for you, while in manual, you will set it yourself. Now you are ready to use the lens.
Origami Crane

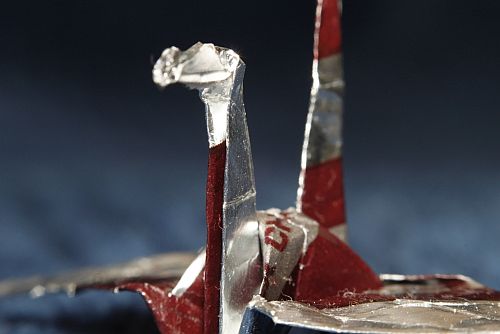
• Origami Crane •
Click image to view large
Origami paper crane folded from a bite-sized Hershey wrapper.
Captured with a reverse-mounted Canon 50 mm f/1.8 lens

A reverse ring gives better results when used with a prime lens rather than a zoom lens. Prime lens are often faster, which means that they have a wider maximum aperture and can use a faster shutter speed, even in lower light.

You can use any type of lens, although light lenses are recommended. Very heavy lenses may damage the reverse ring mount adaptor or the lens filter thread.

Using a zoom lens, particularly when fully zoomed out, can be awkward to support. Because the lens is reversed, zooming the lens requires you to be further from the object you are photographing and does not give such a close-up view of the subject. The working distance (distance from the lens to the object in focus) is about five inches with the Canon 50 mm f/1.8 lens reversed. Using my Tamron 18-270 mm zoom lens at 18 mm, I have to be within about two inches to get an object in focus, while it is greater than six inches at 270 mm.

Adjusting the aperture

When your camera lens is not attached to a camera, its default position is to be open to its widest aperture. So, for the Canon 50 mm f/1.8 that would be f/1.8, which results in a very shallow depth of focus. In the crane picture above, the neck of the crane is in focus, while the beak and tail are not. When I reverse this lens on my camera, the aperture will still be f/1.8, and I will be unable to adjust the aperture value after the lens is reversed on the camera. But there is a work-around.

Most DSLR cameras have a ‘depth of field preview’ button. The purpose of this button is to allow you to look through the viewfinder and see exactly what your camera will see at the aperture that is set. When you press that button, the blades inside the camera lens close down to the selected aperture. This will allow you to set the aperture for your lens. (Please note: not all DSLRs have a depth of field preview button).
Carnation at F22

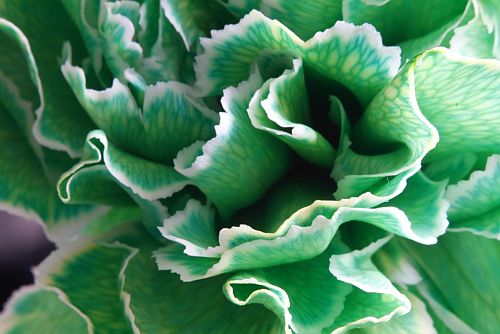
• Carnation at F22 •
By Archaeofrog

Here is the procedure. Using aperture priority or manual mode on your camera, dial in the aperture that you want to use for the shot. Next, depress and hold the depth of field preview button. While still holding down the button, press the lens release button and remove the camera lens. Then you can mount it on your camera body using the reverse ring. The camera lens will maintain whatever aperture you had selected. If you want to return to the default position or change the aperture again, simply put the lens back on the camera the regular way and repeat the process. Tip: if working outside, you may want to set your aperture first and reverse the lens indoors, to avoid dust getting into the camera body and on the sensor.

Advantages and limitations of reverse rings

The reverse ring is a fun and easy way to experiment with close-up photography. The ring itself is very inexpensive, usually less than $10 USD (around £7-£8 UK), and is small enough to fit in a purse or pocket. Depending on the lens that you reverse, you can get very close to macro-level results.
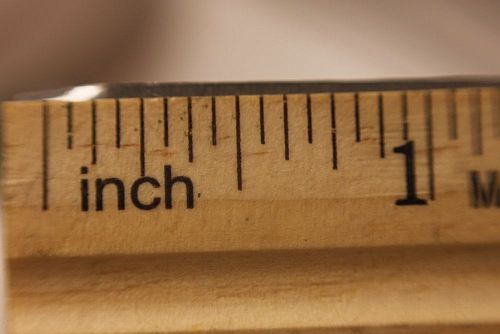
Ruler

• Ruler •
Click image to view large
This photograph of a ruler demonstrates the scale of a reverse-mounted Canon 50 mm f/1.8 lens, which gets down to an image of about an inch and a quarter wide and has a working distance of about five inches.

Like other close-up techniques, using a reverse ring does require you to be physically close to the objects you are photographing. Depending on your lens and your comfort level, however, you may still be able to capture detailed shots of slower moving insects, such as the bee below. A reverse ring is also ideal for indoor shots or other stationary details.
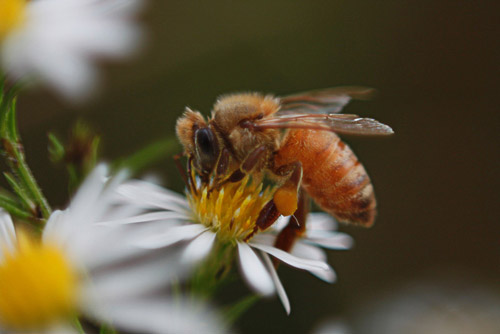
Bee

• Bee •
Click image to view large
Bee photographed using a reverse-mounted Canon 50 mm f/1.8 lens.

You will lose some of the automatic functions of your camera, including autofocus, with a reverse ring. The electrical contacts that normally carry signals to the lens are not in contact with a reversed lens. This is not that much of a disadvantage. Generally, with close-up shots, you get better results when using manual focusing.

While you can adjust the aperture (on some cameras), there is an additional step of setting the aperture using the ‘depth of field preview button’ before reversing the lens.

As with any close-up or macro technique, the depth of field (area in focus) will be very shallow. You can maximize sharpness by keeping the camera lens parallel to the object being photographed. In the photograph of the bee, above, the body of the bee is parallel to the camera lens and stays in focus. The flower is perpendicular to the lens and falls out of focus quickly.

Another technique to maximize sharpness is to use a smaller aperture like f/22, but this may require a longer shutter speed than you can easily hand-hold. You can solve this problem by using a tripod for stationary objects, which allows you to use a longer shutter speed to achieve the desired sharpness.

All close-up techniques benefit from the additional stability of a tripod. Although, as you can see from the shots above, you can get effective results from hand-held techniques.

A flexible option

Overall, a reverse ring is an inexpensive and portable way to use your existing lens for close-up photography. Depending on the lens you reverse, there is enough working distance to photograph insects, flowers, or any other small subjects that interest you. There is flexibility to adjust the aperture value before reversing the lens, which gives you a little control over the depth of focus. It is an inexpensive option to get you started in the tiny world of close-up photography.

Buyers guide

The inexpensive nature of these rings makes a quick purchase worthwhile. Remember that you will need to buy the ring that suits your specific camera mount (eg. Canon, Nikon etc). The size of the filter thread on your lens is important too. On the following link you can find a range camera mount types as well as thread sizes…
Reverse ring camera mount adapter products  External link - opens new tab/page

A great lens for doing close-up work is a 50mm prime lens. More information on buying 50mm prime lenses including product links can be found in…
Are your pictures distorted? Considered a 50mm?

For general reference: 50mm Prime lens product listing  External link - opens new tab/page

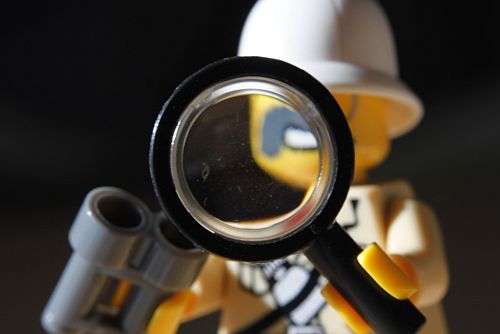
Lego

• Lego •
Click image to view large
Lego explorer mini-figure.
Using a reverse-mounted Canon 50 mm f/1.8 lens at f/1.8.
• Lego • By Archaeofrog

Articles on Close-Up and Macro Photography
by Katie McEnaney

Part 1 of this series focused on using close-up lenses. Part 3 will cover extension tubes, and Part 4 will bring all these techniques together with a range of close-up ideas and tips.

Inexpensive Close-Up Photography – close-up rings
Inexpensive Close-Up Photography – Reverse Rings (this article)
Inexpensive Close-Up Photography – Extension Tubes
Inexpensive Close-Up Photography – Tips and Tricks

By Katie McEnaney (contributing author)

Katie is an elementary school teacher in Wisconsin, USA. She is an avid photographer with wide interests. She is always interested in learning more and growing in her photography.
By Katie McEnaney (Archaeofrog)

Can you write? Of course you can!
Write for Photokonnexion...

We would love to have your articles or tips posted on our site.
Find out more…
Write for Photokonnexion.

Five great ways to improve your photography

I heart Photokonnexion

The top five posts from 2012

In our first year as a website we learned a lot about our readers and worked hard to provide great content for you. We did some research and identified the most read posts of the year.

Number five

Light is the most important component of our work as photographers…
Six things to know about light.
[Also check out other Light and Lighting resources].

Number four

Composition was an important theme through the year. Simple ideas are the best. This post captured a consistent readership…
The Rule of Odds – Uneven Composition

Number three

This is a great post from my friend Steve Maidwell (imageinnation.com). As a contributing author he made a hit with our readers. He’s promised another post soon…
Creating a Fake Smoke Effect

Number two

I made a personal recommendation for two ideal Christmas presents. They really went down well. These would make great gifts to yourself too…
Two great Christmas gift ideas for photographers

And the top post of the year:

Number one

Street photography has been a consistent success on Photokonnexion. The most viewed post in 2012…
Forty six quick street photography tips

By Damon Guy (author and Photokonnexion editor)

Damon Guy - Netkonnexion

Damon Guy (Netkonnexion)

Damon is a writer-photog and editor of this site. He has run some major websites, a computing department and a digital image library. He started out as a trained teacher and now runs training for digital photographers.
See also: Editors ‘Bio’.

Night photography – let the sparks fly!

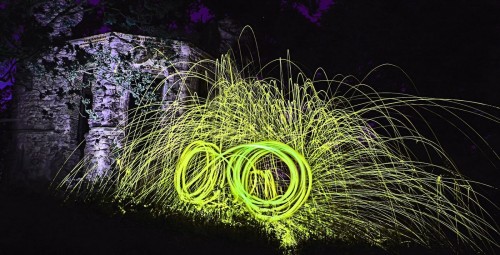
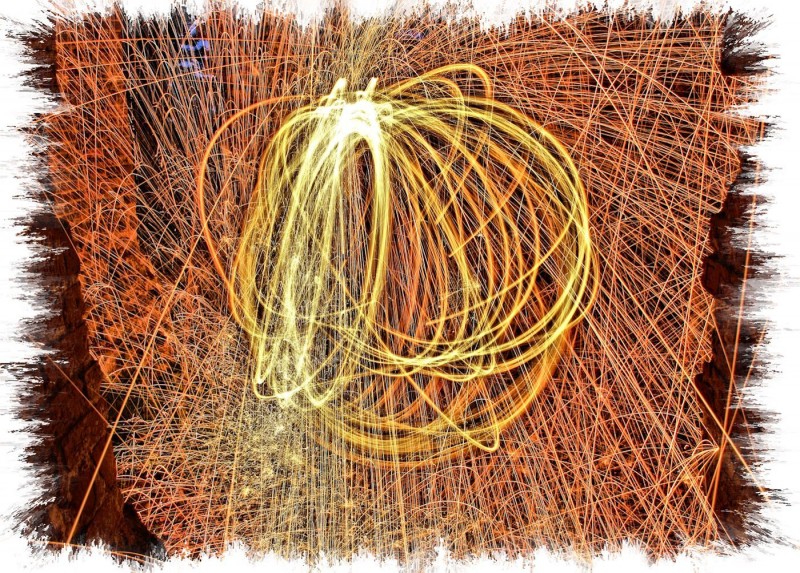
• Steel wool spinning •  by Steve Maidwell

• Steel wool spinning • In the tutorial you will see how to create images like this.
Click image to view large.
[Steel wool spinning • by Steve Maidwell]

Photography at night is an intense experience.

Not only is darkness powerful but the shock of light is even more invigorating. Put the two together and you have a formula for great impact. In this article Steve Maidwell gives us the tools to create incredible light shows.

What you will need
  • Steel wool – Get this get from any DIY store. I bought six bags, you will use a lot. Get Grade 0, 00, 000, or 0000. Don’t get anything at or above Grade 1, it won’t burn properly
  • Steel cable, rope or metal chain – Approx 1.5 M long, DIY store again. You could also use a metal dog lead with a clip at the end of the cable. I used the clip as a handle, but you can do whatever you wish. If you use a chain you won’t need the whisk or rope. Just poke the steel wool around the loops in the chain; it just takes longer to do that.
  • Whisk – I bought mine at a DIY store for £1. Make sure it is all metal, no plastic parts for obvious reasons.
  • Any D-SLR Camera and Tripod
  • A Lighter or 9 Volt battery – Use this to light the wool.
  • LED light or torch
  • Remote release for your camera (desirable, not essential).
  • All your clothes should be black if possible and you will need a hat or hoodie.

Next you need to build your cage to hold the steel wool. I attached the whisk to a steel cable. I looped the cable through the hole at the top of the whisk handle and then securely taped it on with duct tape. This cloth type tape is very strong so will not pull off when whisk is swung. Cut the cable/rope to about 1.5M long. I stripped the plastic covering leaving only the metal cable, again for obvious reasons. Then put two balls of steel wool into the balloon part of the whisk. Tease the steel wool apart to fill the whisk. This creates air pockets that allow more sparks to be generated. Put this to one side then set up the location in which you will take your images.

Out on location – ready to go

Set up the camera with the tripod, then…

  • Set camera dial to Manual (M)
  • Take the LED light or torch (flash light) and place it in the middle of the location you will be spinning your steel wool. Turn it on and point it so your camera will be able to focus on it.
  • Walk back to your camera, focus on the LED, then turn off auto-focus. This prevents the focus from changing when you start to expose the image.
  • Set a medium aperture F8-F11 and ISO at 100.
  • Set shutter at around 15secs. This may vary due to how dark it is when you take these. A good time is when you can just see light still in the sky but dark on the ground.
  • If you do not have a remote release button set the camera timer to give you a few seconds to move to the point of focus. You may need to practice this a few times before you light the wool.
  • Go to the torch (flash light) where you focussed your camera. Turn off the torch.
  • Push the remote shutter button (or wait for the camera to click on with the timer) and quickly ignite the wire wool with a lighter or battery terminals.
  • Spin the whisk. The faster you spin, the more sparks are generated.

If you have a partner helping out they can set off the camera or spin the whisk.

WhizThatWireWool - by Steve Maidwell

• Whiz That Wire Wool • by Steve Maidwell •
Shutter Speed: 16 Seconds
Aperture: F9.5
ISO: 100
White Balance: Auto
Click image to view large

In order to create the orb shape, spin the cable around in a circle. Then, while spinning, start rotating your body around the pivot point.

Spinning the wool in a circle without rotating around the pivot point will make a two dimensional Circle. It does tend to also light up the person doing the spinning. This creates a ghost image of the spinner. These are just as effective as the three dimensional orbs. Trying out different things is what it is all about!

You will need to test, and change, the settings on the camera to get the exposure right. It may take a few shots to get it the way you want it, but it is worth the effort. Don’t expect to get a correct exposure or final shot with the first try. After the first three or four shots you will get the hang of it.

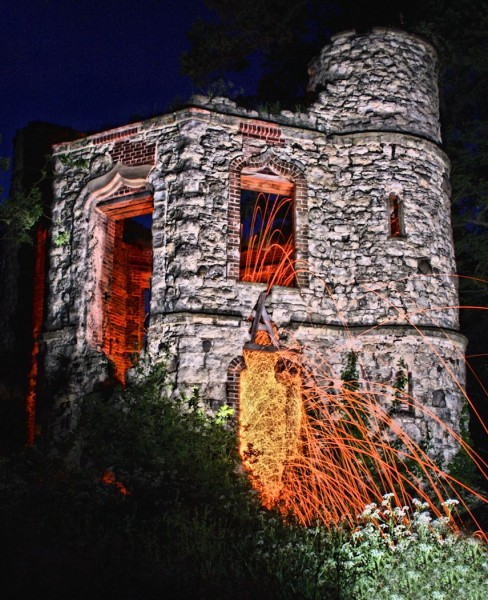
Sparking Tower by Steve Maidwell

• Sparking Tower • by Steve Maidwell •

Camera settings for this image…
Shutter Speed: 30 Seconds
Aperture: F8
ISO: 100
White Balance: Auto
Click image to view large

Safety

Your safety is very important! For safety, wear a hat or hoodie, long sleeves, long trousers, shoes, gloves and goggles. This prevents your hair or clothes catching alight.

Allow the whisk to cool down before touching it, it will be very hot.

Have a fire extinguisher and a jerry can of water near-by, just in case a spark accidentally lands on a patch of dry grass. It can and WILL catch fire, especially if you are doing this in dry conditions. Very wet conditions are much safer.

Spinning wool in remote places helps because it draws less attention to yourself. You could attract unwanted attention from the authorities in public places.

Happy Spinning!

By Steve Maidwell (contributing author)

Steve Maidwell is a keen amateur photographer and active member of Marlow Camera Club. He has some superb images to his name and enjoys working with special effects. His website is imageinnation.com  External link - opens new tab/page. You can also see his images on his 365Project  External link - opens new tab/page

Shedding Light on Family History

When you take a photograph or video do you think about the use future generations will make of your work?

Photography was one of the first ‘new media’ that enabled people to see a place they had never physically visited. Together with sound recording it enabled barriers of place and time to be broken down.

It also does rather more than that. One of my particular hobby horses is that family history needs to be viewed as more than a list of names, places and occupations. We should also consider the times in which they lived. The photograph, and latterly the video, provide a method to give us this extra information. As camera equipment became cheaper, and more people were able to take photographs, it enabled us to see how all levels of society lived. Before photography, and in its early years, it was the wealthier members of society who were depicted.

By opening a window to the masses the photograph can also show “true” history rather than the popular view of history we tend to take for granted.

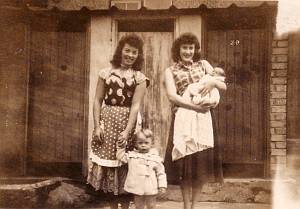
Two proud mothers...

Two proud mothers…

Take the picture to the left. At first sight it is nothing special. It shows two women, we assume the proud mothers of the children in the picture. It was obviously taken, like many such photographs are, to show off their children to friends and family. It is little different to the many millions of snaps taken over the years.

To the family historian photographs like this add a little colour to the family. They also show a little of how people lived. I asked a member of the family being researched about this photo. I found out the picture was taken around 1959-60 in Dartford, Kent and that the doors behind the women are actually outside toilets. From the picture we also see the type of everyday fashion worn in the early 1960s. We can also see that despite much work to remove slums and modernise our towns even by the 1960s people still lived in houses without the basic facilities we take for granted today.
 

The popular view that everyone in the 1960s was a hippy and spent all their time lazing about and listening to Grateful Dead albums in a haze of naughty smoke is a little off the mark. That will certainly shock my eldest niece. She is convinced I must have known The Beatles and met President Kennedy!

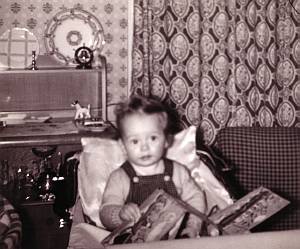
Baby and book

Baby and book

The photograph on the right demonstrates how a picture can show information on interior decoration. Not to the standard you would see in a Design Magazine, it sheds light on decoration in ordinary homes of the period. If you look a little deeper into the picture you might infer that conditions in this house were a little cramped.

It goes without saying that this process works in reverse. I remember spending a happy hour or two indexing photographs of the building of Basingstoke town centre. They were donated to the library some years ago. Most were helpfully catalogued. A few were not and a rough date could be worked out from looking at surrounding buildings, fashions and other objects like cars. In some cases this took some time and I’m sure my mutterings and wanderings round the reference section in Basingstoke library were a subject of some speculation for staff!

Suburban House in Basingstoke

Suburban House in Basingstoke

The picture on the left illustrates this. It is not one of the photographs I referred to above but shows a house in the suburb of Basingstoke. This picture may be roughly dated by the car in the foreground. This may be done by looking at the date identifier on the registration plate. Alternatively, you can check when this model of car was in production. This would give the date range during which the picture might have been taken.

One final area in which pictures can help is in jogging the memory. When the occasion demands a picture can act as an aide memoir and open up the memory. This is something the family historian finds invaluable when trying to find additional information for a family member.

Remember, your photographs are a record of the people and places that are in them. They are much more than a simple picture.

Have fun with your photographs and researching your family history.

By Terry Firth (contributing author)

Terry lives in Hampshire UK. An experienced reference librarian, he did research for the public, business and the and local authorities. Later Terry managed the Hampshire County reference and local studies services. He was a Board member on the Sense of Place South East External link - opens new tab/page which managed a digitisation/website project for five local authorities including ‘Hantsphere’ External link - opens new tab/page. Terry now runs ‘Terry Firth Research Services’ External link - opens new tab/page using his experience doing family history research for clients worldwide.

Can you write? Of course you can!
Write for Photokonnexion...

We would love to have your articles or tips posted on our site.
Find out more…
Write for Photokonnexion.