Category Archives: Equipment

equipment, supplies, gear, accessories, accompaniments, accouterments, apparatus, appliances, appurtenances, articles, attachments, baggage, belongings, contraptions, contrivances, devices, equipage, facilities, fittings, fixtures, gadgets, impedimenta, implements, kit, machinery, material, paraphernalia, rig, tools, utensils

Umbrellas and softboxes

umbrellas and softboxes

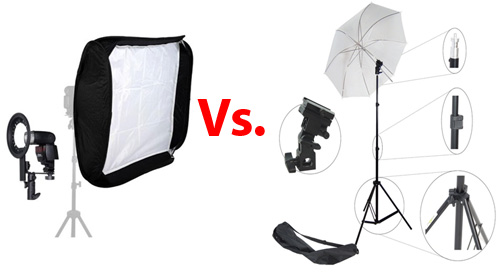
• Softbox Vs. Umbrella •
Umbrellas and softboxes seem to have similar characteristics… or do they?

What IS the difference?

Photographers learning to use lights find it difficult to understand the difference between a softbox and umbrella set-up. It is important to understand if you want to have control of light.

The nature of soft and hard light

Hard light is not some mutated form of ordinary light. It is a type of light that is focussed and which shows a hard transition from bright to dark. The shadow line is a sharp contrast. On the other hand, soft light wraps itself around curves and has a soft transition from light to dark.

The definitions of hard and soft light tell us much about the characteristics of the light but not how the light is formed. Well, it turns out that the light source, its shape, size and focus or diffusion as well as distance from the subject all have an impact on the characteristics of light.

Photographic umbrellas and softboxes

In the video Mark Cleghorn examines the characteristics of photographic umbrellas and softboxes. He does some great shots with both. Pay attention to the way he uses the lights and what characteristics he points out. Distance and size of the sources play an essential role in the formation of the softness and hardness of the light. His experiments are interesting and show you how the nearness of a large light source can create softness. It seems counter intuitive, but it is correct.

The first half of this video is very useful and you will learn a lot about Umbrellas and softboxes as light sources. The second half showcases advanced features of Photoshop. This is a less useful section if you are only interested in the practical issues for umbrellas and softboxes. You can safely skip it.

Lastolite Umbrella Versus Softbox from Lastolite on Vimeo  External link - opens new tab/page.

Types of lights

There are many types of light source that can generate light for umbrellas and softboxes. For most situations it is best to use off-camera flash units. The more expensive studio flash units are more for professional use. If you are just starting out they will be more powerful than required for most general purpose needs. Off camera flash helps give you flexible use. It is also easily controlled. You can work with both umbrellas and softboxes with an off camera flash.

Fortunately, most umbrellas and softboxes units designed for off-camera flash will mount most types of flash units. When looking to purchase lights think about what you want to achieve. Then buy the flash unit needed to meet your need.

Below is an example of a photographic umbrella set…

DynaSun W968S Professional Kit with Holder, Umbrella, Stand and Bag for Cold Shoe Mount Flash Gun Flashgun  External link - opens new tab/page
This is a high quality but affordable photographic umbrella unit. The complete package includes everything you need except the off-camera flash unit. The inclusion of the small carrying bag makes the whole thing neat and well presented.

When it comes to the purchase of a soft box these too have the universal fittings for off camera flash units (although studio units are also available). Here is an example softbox…

24″ 60cm x 60cm EZ-Fold Studio Softbox Kit with 2 x Diffusers and Ballhead Bracket for Portable Flash and Speedlite  External link - opens new tab/page
This is a high quality, well produced softbox with easily adjustable fittings and a variety of ways to set up light diffusion within the unit.

Of course both these units are among many others in the field. You can see the various types of each on these search pages…
Photographic umbrella – Search page on Amazon  External link - opens new tab/page

Softboxes – search page on Amazon

These various examples include studio light units, always on bulb mountings and fittings for off-camera flash. Check for what you want before you buy. The most flexible is for off-camera flash when you are starting out.

No removable flash? Read this: Off-camera flash. It’s a great introduction and recommends an affordable flash unit.

Comments, additions, amendments or ideas on this article? Contact Us
or why not leave a comment at the bottom of the page…

Like this article? Don’t miss the next — sign up for tips by email.

Damon Guy - Netkonnexion

Damon Guy (Netkonnexion)

Damon is a writer-photographer and editor of this site. He has run some major websites, a computing department and a digital image library. He started out as a trained teacher and now runs training for digital photogs.
See also: Editors ‘Bio’.
By Damon Guy see his profile on Google+.

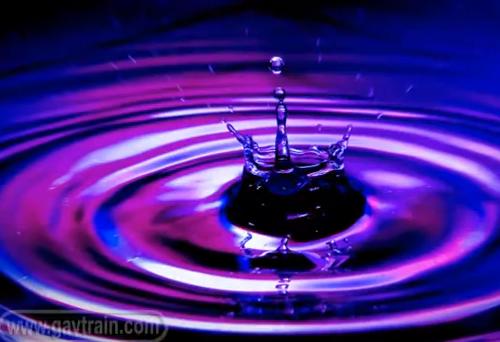
A quick and simple method to make brilliant water droplet images

water droplet

• Water Splashes •
The most beautiful scenes in the world include water. Here you can make your own water droplet.
(Image taken from the video)

The close-up world of the water droplet – endlessly fascinating

The captivating thing about water is that it is ever changing and creates a sense of magic in every scene. When you get in close some simple techniques make wonderful images.

How to photograph water droplet impacts

Ever enthusiastic Gavin Hoey takes us through the simple process of creating wonderful water droplet photos. Colour, light/shade and magic water droplet sculptures are the result.

The best bit about this is that you can make these wonderful photos yourself. It is very easy and great fun. When I first did this I spent hours of time on it and got lost in a world of wonderful colours and effects. There are three things to remember that will help you make this a personal and effective shoot…

  • The more shots you take the more great effects you will see.
  • Background colour should be varied. I’ve used wrapping paper to brighten colours.
  • The angle of the camera can affect your shot (not mentioned in the video).
  • Try different camera heights with respect to the water.

After yesterdays blog, the way you see it is about your style. Don’t look for “new”, look for you!

This is a short video (six minutes 50secs), but one that will give you hours of fun and excellent images.
Gavin Hoey  External link - opens new tab/page

No removable flash? Read this: Off-camera flash. It’s a great introduction and recommends an affordable flash unit.

Comments, additions, amendments or ideas on this article? Contact Us
or why not leave a comment at the bottom of the page…

Like this article? Don’t miss the next — sign up for tips by email.

By Damon Guy (author and Photokonnexion editor)

Damon Guy - Netkonnexion

Damon Guy (Netkonnexion)

Damon is a writer-photog and editor of this site. He has run some major websites, a computing department and a digital image library. He started out as a trained teacher and now runs training for digital photographers.
See also: Editors ‘Bio’.

Why do new? Just do you!

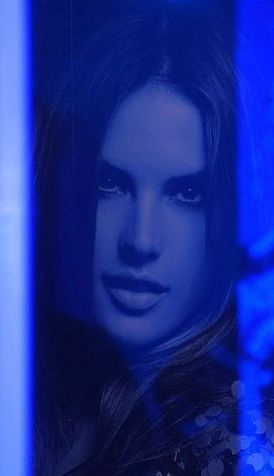
Reflection of a girl in a shop window. Don't do new, do you

• Monochrome girl in blue •
When starting out try out lots of things. As you develop your interests will start to find a focus.

Style is you.

Photography is your interest. Do it your way. When learning you’ll find joy in just trying out many new things. As you develop you will find your way of doing things becomes a form of self expression.

Self expression

Letting out the inner you in your photography is one of the highest forms of success. Every photograph is a unique form of communication. So when you focus on something that you are interested in, passionate about, you express your inner self in a powerful way. Self expression is how top photographers make a success of their business. Clients come to them because they like the way the photographer does it.

Doing new is not you

Less experienced photographers think that they will only “make the grade” by dreaming up something new. It is a seductive idea – our modern culture is built on “new”. Trust me on one thing. There are very few ways of doing something “new”. New techniques, new ideas, never-seen-before views… totally new stuff – these things are far and few between. Photographs are published online in their millions every day – literally. A photographer cannot hope to do “new” all the time or even frequently.

“New” is something that will happen – but normally as a result of a very individual form of expression. When you really express you, really do it your way, you are doing “new”. Truly individual expression comes from doing it your way. The picture may be of an oft-seen subject. The way you do it is what will make it a lasting image in the mind of the viewer.

If you concentrate on developing your pictures around your special way of seeing you will be developing your style. That is what will give you the edge, the new way of doing it. Look for the light the way you like it. Take the point of view you like to see things from. Express the colours in the scene in the unique pallet you love to have around you. These things will all contribute to your style and your expression.

Ironic isn’t it? So many photographers look for the new, the different, the next new idea. If they spent a little time looking at what they were really interested in they would find the “new” within themselves.

Remember to enjoy your photography

If photography becomes an stressful search for something that is not in you, then the fun will go out of it. Investing your shoot-time in a personal interest will bring out your passion in a unique way. In so doing you will increase your enjoyment. You will also find the “new” you were looking for. You will also find a new way to express your inner feelings about the world around you.

Comments, additions, amendments or ideas on this article? Contact Us
or why not leave a comment at the bottom of the page…

Like this article? Don’t miss the next — sign up for tips by email.

By Damon Guy (author and Photokonnexion editor)

Damon Guy - Netkonnexion

Damon Guy (Netkonnexion)

Damon is a writer-photog and editor of this site. He has run some major websites, a computing department and a digital image library. He started out as a trained teacher and now runs training for digital photographers.
See also: Editors ‘Bio’.

Can you write? Of course you can!
Write for Photokonnexion...

We would love to have your articles or tips posted on our site.
Find out more…
Write for Photokonnexion.

Reflecting on ways to work with the best light

Reflectors

• Reflectors •
A session with reflectors is a way to control the sun
and get the lighting you want on your subject.
[Image taken from the video]

The control of light is not always obvious.

Reflectors and other shapers of light make a big difference to the scene. Often photographers go to great lengths to work with reflectors. Here are a few simple tips to bear in mind when you want to shape light – particularly outside.

When you need a reflector

You can use reflectors in any type of environment. They are best used where you need to even out the light on your subject. Remember that if you are using a reflector the source light is the main or key light. The reflection from your reflective surface is in proportion to the power of the key light. This proportionality is important. Often, more than one light is difficult to balance. Using only one light source you can create a natural balance with the reflectors. It is difficult to get reflected light out of proportion. There is always some loss in the reflection. This ensures that the light on your subject will be less intense than the key light but related to it by its proportion. The result looks more natural.

Shade is as important as light

When you are working in the fullness of light it is common to be confronted with strong reflections from the subject itself. Specular highlights, reflections off of curved surfaces and shiny areas are the most difficult to control. However, bright reflections on larger areas like flat areas of glass or even areas of flesh like bare arms can also be really difficult to control.

If you have these sorts of reflections you can reduce the worst of them using a polarising filter. Of course the only sure way is to reduce the intensity of light overall. This means creating shade. Again, the most important issue here is to reduce the light in proportion to the ambient light around you. This helps the light to remain looking natural because it is derived from the main light once again.

Don’t spend a fortune

For most of us expensive reflectors and shade creators are out of reach. As with most things however, the amateur can create the same effects as the professional without the expenditure.

Reflectors can be created from white sheets, curtains, even large pieces of card. These things can be purchased inexpensively and propped up easily to create the effect you want. What is more important than the material that creates the reflection is the way you use the reflections themselves. It is important in very bright light that the reflections are used to infill darker areas of shadow to even out the contrasts. Then your camera can cope and you will see a more controlled light on your subject.

Shade too can be created easily. Use solid card sheets or even blankets on poles. I do quite a lot of car photography. Often specular highlights can be eliminated by hanging a thin white sheet on two poles in the line of the light. The main light – normally the sun – will penetrate a thin sheet so that a proportion of the light will continue to illuminate the subject. Again, the proportionality is important. Things always look more natural if the light is proportional to the surrounding ambient light.

Using Reflectors – Photography & Video Tutorial

In the video J.P. Morgan, a successful photographer, uses lots of resources and equipment to manipulate light in all sorts of ways. First, he looks at how the light is best exposed to the subject. He uses the light to create a rim light. This helps to reduce large, strong areas of reflection and helps to define the body shape.

When he has the light direction right and well controlled he uses a gold reflector to give the light a pleasant colour – an evening sunlight yellow. This lifts the colour of the faces in the shot.

The other thing that J.P. Morgan does is use the shade and reflectors to create fill. The sun provides the main light but the levels of light off the reflectors allows a lower level light intensity creating a natural light. This does not look like it has been deliberately projected at the subjects. It is a soft light that beautifully wraps around the children. It evens out the contrast between the brighter light and the darker areas.

Look at the way the equipment is used in the video. But spend your time afterwards thinking about how you can substitute affordable reflector materials and ways to create shade. Making your own kit can be fun and just as effective brand equipment.

The video is just over six minutes.

The Slanted Lens DSLR Lighting Tutorials  External link - opens new tab/page

If you want to buy an affordable reflector set, here is the one I use. These reflectors work very well and are flexible in the way they can be used. The whole set also folds away into a great compact bag. The pack contains five effects (silver, gold, white reflector/diffuser, grey and black)…

42″ Photographic light reflector set (5 in 1)
Ex-Pro 5 -in- 1 Photographic Light Reflector – 42″ (110cm) Silver, Gold, Black, White & Translucent, Collapsible.
This is an excellent reflector set, robust and effective as well as easy to store. I highly recommend this as a standard piece of equipment.


Comments, additions, amendments or ideas on this article? Contact Us
or why not leave a comment at the bottom of the page…

Like this article? Don’t miss the next — sign up for tips by email.

By Damon Guy (author and Photokonnexion editor)

Damon Guy - Netkonnexion

Damon Guy (Netkonnexion)

Damon is a writer-photog and editor of this site. He has run some major websites, a computing department and a digital image library. He started out as a trained teacher and now runs training for digital photographers.
See also: Editors ‘Bio’.

What good is a lens hood?

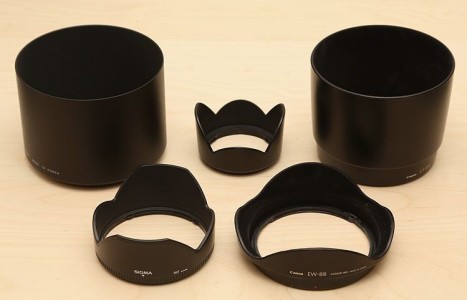
Five Types Of Lens Hood

• Five Types Of Lens Hood •
Attribution: Photo of five lens hoods for a mix of lenses; March 2013; Author: Geni; Permission: GFDL CC-BY-SA

Using a lens hood is important.

It is not always clear why we need a lens hood. Why do we need them and what are they for? Actually they are pretty important and can help prevent some nasty visual artefacts.

What is going on in the lens

Normally photographic lenses perform really well. They receive light reflected from your subject as parallel beams. These are focused by the lens into an image formed on the digital image sensor.

When light hits the lens from the side the situation is slightly different. Some of the light is refracted through the lens correctly. Some of the light however, is reflected off the surface and lost. But there is a percentage of light that goes astray in the lens. It can be bounced around in the lens – reflecting around from the surfaces of different lens elements internally. If it does so, on each reflection some of the light will get through to the sensor. Each time that happens there will be a slightly side-shifted ghost image. All sorts of light aberrations can be created by this internal reflection in the lens. It is these that cause the artefacts you see in the image.

Light is also scattered by inconsistencies in the lens glass. Chemical, and structural variations in the glass can impact on the way the light travels through the lens. This scatter contributes to the problem. These artefacts, and often an associated haze, are called lens flare and can be worse the further to the side that the light enters the lens. Flare and haze will not only form a distraction but also act to wash out the colours in your shot and reduce contrasts. These will make your picture look flat and lifeless. Unintended flare can simply kill the effectiveness of the shot.

A sharp angle of side-light can therefore cause all sorts of visual image ghosts which are not there in the scene. You can see a range of different types of flare in this Google image search…
Google images: Example lens flare images  External link - opens new tab/page

In general, poor quality glass and multiple elements in the photographic lens will tend to create more flare. Of course better lenses (read: “more expensive”) can help to reduce the problem. Higher quality lenses will incorporate a range of ways to reduce the problem. These include optimised lens-element design, surface coatings and non-reflective surfaces/parts internally as well as high quality glass. Despite that no lens is immune to flare.

What does a lens hood do?

The most common reason we use a lens hood is to reduce the incidence of a bright light source hitting the lens from the side. This will act to reduce the chance that the lens will suffer from the flare problem. In other words, the hood will help to keep the light coming in from the front of the lens in parallel rays.

It is simple really. Put up a wall at the side and the side light is cut out. However, it is not so simple to design a lens hood that will do that without obstructing the lens. The field of view of the lens cannot be allowed to catch the hood sides. If it does it will leave its mark on the image. So all sorts of hood shapes and sizes are required to match the visual characteristics of the lens. Lens hoods are quirky shapes because they have been designed to optimally reduce the side incidence of light and not interfere with the field of view.

Common design elements include “petal” shaped edges. These allow the corners of the sensor a wide field of view without interference in the corners from the hood. The long petal shape must be along the long side of the sensor (landscape view). If you put it on the other way the side of the picture will show the edge of the hood and light will also get in from the top (or bottom) because the cover is insufficient there.

There are conical shapes and cylindrical shapes too. When these don’t have petals they are designed to accommodate the full field of view of the lens from any angle. You may find that these types of hoods are common on lenses where the front of the lens extends when changing focal length. As the extension of the lens will change the field of view the hood shape must be wide enough for the widest angle of view. But it cannot have petals because they would rotate with the lens and at some focal lengths would interfere in the picture.

Lens hoods do more…

As you can see you should buy a hood for your lens that has specially been designed for it. If you don’t, you risk the hood intruding in your shot, or not providing sufficient protection against flare.

Hoods can help in other ways too. When you have a lens hood on the lens it acts as a primary protection for your vulnerable front element. Once, when I was panning to follow a bird with a heavy/expensive pro-zoom lens I whacked the lens hood off the glass of my car window. I am convinced I would have broken the window and damaged the front lens element if I had not had a lens hood on. It harmlessly bounced. Phew! I use hoods whenever I can these days.

Lens hoods also help to reduce over exposure generally from incident reflected light on bright days. There may be no direct bright light source shining into your lens. But it helps to reduce the high levels of brightness from the side regardless. That helps to reduce the overall high light levels and especially the contrast.

Lens hoods are worth the effort

Lots of learner photographers forget the lens hood. Yet it can have quite a significant impact. Even if it is not significant, when you are trying to get a sharp image and reduce the colour wash-out in bright light every little detail counts. Great images come from the attention to detail.

Comments, additions, amendments or ideas on this article? Contact Us
or why not leave a comment at the bottom of the page…

Like this article? Don’t miss the next — sign up for tips by email.

By Damon Guy (author and Photokonnexion editor)

Damon Guy - Netkonnexion

Damon Guy (Netkonnexion)

Damon is a writer-photog and editor of this site. He has run some major websites, a computing department and a digital image library. He started out as a trained teacher and now runs training for digital photographers.
See also: Editors ‘Bio’.

How safe is your lens from breaking or failing?

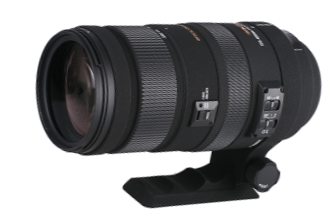
Sigma 120-400mm Lens

Some of your lenses will not get as much use as others…
but they can still get broken.

If you look after your lenses…

Generally lenses last for years. The well built and robust lenses last well and give great service. But despite looking solid and unbreakable they are vulnerable. Lets look at the situation.

What makes a lens vulnerable?

Lenses are often metal cased and quite heavy. While they are pretty resilient they still break or fail.

There are various vulnerabilities for modern lenses. Here are the sort of issues you should look out for…

  • Lens scratches – every lens has a front element that is open to the air. That element is highly vulnerable to impacts and scratches.
  • Lens glass breakage – the front element can be impacted by another object or bashed against something. It is breakable and may shatter.
  • Internal impact damage – everyone drops lenses! Modern ones are breakable. Internal components can break or go out of alignment. Jambing is common after an impact.
  • Electrical component failure – modern lenses are sophisticated electronic systems with motors and computers on-board. All these components are potentially liable to failure.
  • Dirt entering the lens body – happens surprisingly often. Sand and fine dust particles can enter in a number of places in the lens. The dirt gradually builds up in the lens.
  • Water and damp in the lens – these build up over time and cause the potential for rot, growth of fungus and corrosion of electronic contacts.
  • Mechanical failure – lenses wear out or deteriorate from wear and tear.
Lens damage – how does it affect me?

Lenses are expensive. The better lenses are an investment but are very expensive. For a good return from your purchase look after the camera and its lenses. A recent blog from Lens Rentals  External link - opens new tab/page exposes how they are vulnerable as a business to heavy wear and tear on lenses. They base their whole business on renting lenses. The renters are sometimes (frequently?) less careful with a rented lens (surprised?). Lens rentals get involved in lens repair a lot. As a result they have a range of things to say about different manufacturers, the different lens models and the various vulnerabilities.

Lens Rentals analyses the data related to the repair and maintenance of their lenses. They only keep lenses two years. They have data for lens returns from repairs, types of repair; failure rates and so much more. It is a worthwhile (but somewhat heavy article) to read. For the majority of us it is worth noting some rather more important impacts of lens damage…

Lens damage – the effects!

  • Repairs are very expensive – typically exceeding $100
  • Repairs take a long time (many weeks with shipping / factory queueing).
  • You may not get your lens back – if you decide you don’t want to pay.
  • You may be charged if you do not get your lens back.
  • You may be charged worldwide shipping costs in addition.
  • Repair costs may exceed the lens value if an old model.
  • Repair and shipping costs may exceed replacement cost.
  • You may have to pay a fee for a repair estimate.
  • Estimates may turn out to be inaccurate (rare).
  • You are going to be weeks without that lens even if repaired.

Lens repair is expensive and you will be without the lens a long time. It is therefore worth considering just buying another – especially for cheaper lenses. Or, if the damage is not too bad, just living with it.

A tiny scratch on the front element may irritate. They consider it important to have perfection, so they ship the lens for repair. A lens costing, say £600 may have a total cost of estimate, parts and repairs of around £150 for repairing the tiny scratch. You may be without the lens for, say three months. Is it really worth it? An alternative for many of us is to remove the tiny scratch in post processing, and save the money for an up to date replacement later.

About lens protection after this…

find out more...Photokonnexion tips by email
Enjoying this article? Please sign up for our
Tips by email service.
                                                Find out more


How do I protect my lenses?

Here are some ways to protect your lens against more common vulnerabilities…

  • Don’t drop your lenses! Always work on or over a surface so lenses cannot drop far. To reduce slipperiness: Do not change lenses while wearing gloves; have clean hands; always change lenses when dry and out of the rain; do not allow chemicals or grease onto the lens body. Place lenses on surfaces in the middle or away from the edge. Watch out for the lens rolling off tables etc. Don’t give your £1500 lens to a child!
  • Keep your lenses dry and chemical free! Water/chemicals in your lenses cause all sorts of problems. Going out into damp cold air or hot air from air conditioned rooms causes problems. Let the lens cool down/warm up slowly in your bag before use in the new conditions. Condensation can form in a lens if they suddenly change conditions. This will not suddenly have an impact but over time could cost you a lot of money. This precaution lengthens the life of your lens.
  • Keep your lens out of dust or take protective measures Wrap a plastic bag around it if you must use it in a dusty environment. Always wipe the lens down before putting it in the lens case or it will build up dirt in the case and pollute the lens more and more over time.
  • Keep your lens in proper, padded lens cases. Impacts are the most damaging events for a lens. Padded cases provide protection  External link - opens new tab/page when the lens is off the camera (a surprisingly damaging time for a lens).
  • Be careful where you put your lens/camera down. Lenses/cameras get kicked while on the ground! They also get knocked off things. So make sure they are secure against that. You can use a camera strap to secure it to something while is it put down.
  • Use a lens hood! The lens hood will protect against side swipes, frontal crunches and rain on the lens as well as prevent stray light from creating flare.
  • Use a skylight filter! While they are optically useless in most situations they are one way of stopping scratches and coating damage on the lens. They are cheap and relatively disposable. More on skylight filters here: Skylight and UV filters

Maybe it is not a damage issue, but you should be vigilant against theft. Be careful where you use or leave your lens. A recent video shows a lens theft while on-camera around the photogs neck. See this short video (24 seconds):
Thieves in Saint-Petersburg (Russia)  External link - opens new tab/page

Simply being careful…

In the end being careful and sensible with your lens will ensure that it remains an investment and not a disaster. Think about what you do with lenses, where you put them and the environments you use them in. But more than all of that, think carefully about insurance. Many of us walk around with huge amounts of money around our necks! Be acutely aware of your investment.

Comments, additions, amendments or ideas on this article? Contact Us
or why not leave a comment at the bottom of the page…

Like this article? Don’t miss the next — sign up for tips by email.

By Damon Guy (author and Photokonnexion editor)

Damon Guy - Netkonnexion

Damon Guy (Netkonnexion)

Damon is a writer-photog and editor of this site. He has run some major websites, a computing department and a digital image library. He started out as a trained teacher and now runs training for digital photographers.
See also: Editors ‘Bio’.

Can you write? Of course you can!
Write for Photokonnexion...

We would love to have your articles or tips posted on our site.
Find out more…
Write for Photokonnexion.

A quick shoot making water splashes? Tips to get started…

Water splashes :: Have a go at water from a bottle

• Have a go at water from a bottle •
Water splashes :: Great fun, easy to do at home.
Picture taken from the video.

Photographing water splashes is great fun!

Every photographer has to have a go at water splashes some time. It is fun, can be done at home, and produces some creative. exciting and visually interesting shots. To get started you need very little kit. Here’s how you can have a go…

Water splashes :: Fine art water droplets

Everyone wants to do water droplets splashing up. Typical fine-art water droplets shots produce brilliant shapes and forms that we don’t see every day. I am sure you have seen them… if not here is a page of examples ::
Fine art water droplet images on Google  External link - opens new tab/page

Water splashes :: Working with water to get started

Fine art water splash shots need quite a bit of practice and precise measurements. It is better to get some practice working with water first. Then you will learn about the equipment and working with water. You will also get some great shots.

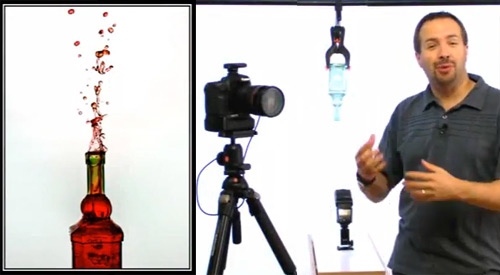
Start off with an easy exercise. The video is going to show you how you can do photos of water tumbling out of a bottle. You get some great results and there is a twist to add a little pizazz. You can show the bottle with the water splashes going upwards!

The video will show you how to set up the water splashes shot with a bottle. Here are a few things you need to do for this exercise. In the video Gavin Hoey has some expensive equipment. We can do it using only household items.

What you need…
  • A water tray – to collect the water splashes coming out. Use a baking tray or large bowl.
  • Use a broom stick or pole to hang the bottle. Put two chairs on a table with the the pole between them Use the backs to hang the bottle. This gives you enough height for the shot at a comfortable level.
  • Use a smallish, thin-necked bottle. Large bottle necks let the water out too quickly. Start looking for the right bottle now. You will have found what you want by the weekend!
  • To suspend a bottle without a studio clamp, tie the bottle around with a length of string long enough to hang it from your pole. Then use some packing tape, or electrical tape to stick down the string tied around the bottle. This stops the bottle from slipping out of the string. This method actually does a better job than shown in the video because the bottle hangs slightly to one side – a pleasing composition. Tape the string onto the bottle near the end of the bottle so your shot captures the top part of the bottle without seeing the tape.
  • If your bottle swings too much while the water is coming out, tie it up using two strings affixed to the bottle. Tie them to the pole wider apart than the width of the bottle and this will stop the swing.
  • In the video Gavin suggests using an off-camera flash. OK, lots of you do not have these. Use the pop-up flash flash on your camera. The problem is that the on-board flash may create a bottle shadow on your background. This is because the flash is in-line with the shot. Notice how the flash is below the bottle in the video. Pull your working table away from the background. Then, well away from the water, point one or two bright domestic lamps at the wall. These will stop shadows and make sure that you have a perfect white background. I usually stand them on the floor behind the table and point them at the wall from there.

Apart from these tips the rest of the equipment is much as shown in the video.

One trick not in the video…

Cleaning! Don’t we all hate it? Yes, but it can really make a difference to your shots. Make sure you clean your bottle really carefully. Did I mention carefully? One thumb mark, dirty trace or blotch and the beautiful clarity of your shot will be ruined. Wash it in detergent and make sure it is dry (free of drips) before you start. It really makes a difference.

Please remember safety…

This is a safe exercise if you remember a few tips…

  • Make sure any electrical appliances are well away from any water splashes.
  • Ensure there are no trailing electrical wires near any water or equipment.
  • Have a towel on hand. Mop and dry wet patches on the table and floor as soon as they spill to prevent slipping.
  • Keep your camera and especially any flash equipment away from the water splashes. You don’t want to break your camera or get it wet.
  • Flash guns, even ones with batteries, release very high power jolts of electricity and can be dangerous if wet.
  • With chairs on the table make sure they are safe from falling.
  • This may seem a fun environment for kids… it’s not. Keep them clear. Have fun with the pictures later.
  • Remember, food dye can mark certain clothes, table tops and carpet materials. Keep it clear from these things, wear old clothes.
How to create amazing photos with water and a bottle


PhotoGavin  External link - opens new tab/page

A fun extension activity…

I have found that this bottle exercise can be huge fun. However, it’s also fun to experiment. I have on occasion placed various items under the falling water. Place them within the range of your shot frame. It takes a little lining up. Fun things like brightly coloured objects work well. Try grapefruit, lemon, bright colour balloons a bath duck and so on… Make sure you have something large enough to catch the water splashes. This makes way-more mess over a larger area!

If you want to make it really fun you can do the water splashes falling on someone’s head. Yeeha!

Have fun with your water splashes. With only a few tries you can get some great results and have some excellent shots to show your friends.

Comments, additions, amendments or ideas on this article? Contact Us
or why not leave a comment at the bottom of the page…

Like this article? Don’t miss the next — sign up for tips by email.

find out more...Photokonnexion tips by email
If you enjoyed this article please sign up for our
Tips by email service.
                                                 Find out more