• Family day out •
The memories are preserved better if you have relaxed shots. Don’t ruin the day obsessing about your photography – make a story. Forget the world class aesthetics and concentrate on the stuff of memories.
Capture the spirit of the day out.
The “Family day out” is one of the important bonding moments for a family. When you get to your destination the family relax and spend time doing what they enjoy. Memories are made of great days out. And, your pictures of the day make for wonderful memory-moments when you look back.
Often photogs out for the day tend to line people up in stiffly-posed formal positions. The informal clothing and location put these poses at odds with the scene. And it is not all about great aesthetics either. The family day out is more about people enjoying themselves than it is about achieving a world class image.
Here are three tips to help you get the most out of your family day out memory-shots.
Family day out – the candid moment
It’ll be fun, especially if you have the children there. So the most important thing is to get them doing what they enjoy. There is a problem though. You’ll never get a memorable family day out image if you spend the day fretting about getting it all just right.
Sometimes as photographers we get rather precious about poses, backgrounds, set up, simplifying scenes… It all has to be right. But does it really? Capturing a family scene is about your memory. Great aesthetics are one thing. Seeing your loved ones in a memory popping moment is another. So, relax your high principles – for the sake of a family memory moment.

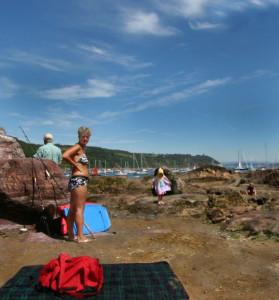
• A quiet moment at lunch •
Catch your loved ones in a candid moment. Tell a compelling story of your family day out.
There are lots of different aspects to photography. Instead of being an over-bearing photographer consider a different way. Just do something for you. You could make a great family day out miserable by regimenting them just so you can record it.
Alternatively, you could make the whole experience a vital and unique series of captures. Spend your time documenting what your family are doing. Catch them really enjoying themselves. Leave them be, spend your time getting the candid moments when they are most absorbed. That way you will see the deeper aspects of their character as well as making your shots tell a compelling story.
Capturing people doing what they enjoy
Doing what you enjoy on a day out is very character revealing. If you capture your subject in a moment that reveals their inner self then the shot is more memorable for you. It’s still in the spirit of the candid moment. Don’t interrupt them – capture them in action. It helps tell the story of the day. It also will help you remember the context of the shot and what you were doing at the time.
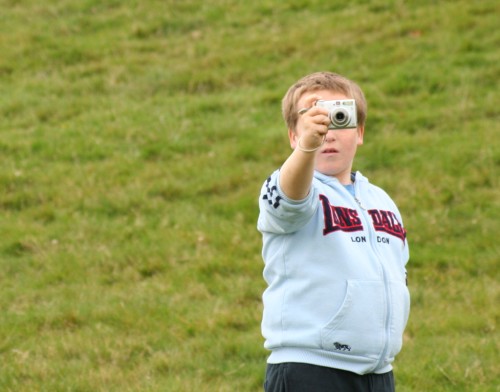
• Making pictures •
Capture your loved ones doing what they enjoy. It helps make the story of your family day out more compelling.
Family day out – vista shots – story continuity
As the family photog you can be happily engaged in your interest while the rest of the family pursue theirs. So don’t forget to have a good look around. There are plenty of things you can be photographing as well as your family. This is your chance to make your photographic skills come out. You can obsess all you like over the detail of things you photograph while you leave the rest of the family to have their fun.
Take in the vista too. Make sure you look at the surrounding area. Capture the things that interest you and others in your family. Think about how to put your “family day out” story in context. So make sure you take some shots of the scene and the surrounding areas or activities taking place. If you take the time to do this through the day you can build a story line with your pictures. It will make a great album for you all to remember your family day out for years to come.
Comments, additions, amendments or ideas on this article? Contact Us
or why not leave a comment at the bottom of the page…
Like this article? Don’t miss the next — sign up for tips by email.
Photokonnexion Photographic Glossary – Definitions and articles.
Day out by Netkonnexion on 365Project.org

Damon Guy (Netkonnexion)
See also: Editors ‘Bio’.
By Damon Guy see his profile on Google+.